RobNZ
TPF Noob!
- Joined
- Jan 17, 2010
- Messages
- 543
- Reaction score
- 2
- Location
- New Zealand
- Can others edit my Photos
- Photos OK to edit
I have been shooting 3D for just over a year now, I postponed 3D to concentrate on the fundamentals of photography, technique, compostion etc.
Technology has moved so fast (much faster than I expected (3D TV's as hardware will become a standard in the future, just like stereo sound has become), its time to pick up my old 3D shooting skills and combine them with what I know now.
I do have some reservations about posting 3D images on a photography forum, but as far as I am concerned (and hopefully you?), they are photographs, I am posting them for C&C and the original 2D compostion should be able to standalone (in some cases it will be the 3D effect only), so C&C can be for 2D or 3D.
I would also like to know, who was able to view the images in 3D, and how long did it take you to be able to.
So I went through some old images, gave them a tweak and crop (bear in mind I knew nothing about compostion) and I have a few oldies to share along with a couple I did today.
I am willing to "mentor" anyone who would like to learn more about shooting in 3D.
The method I use to free view and edit my 3D shots is ther crossview method.
Stare at the paired images (hopefully on a clutter free screen, makes it much easier) and try to focus an imaginary object about one foot in front of your nose. When you see a third picture in the middle of the 2 on screen, relax your eyes slowly and focus on the middle one and hold.
This technique, once learnt is like riding a bike! Easy peasy, from now on.
1. Oldest first, I used 2 cameras to get this, manually synched with some fabricated RC servos. Doesnt look all that good in 2D sadly, 3D it works quite well.

2. 2nd oldest, gutted now I missed the bottom of the frame, you will find yourself trying to peer in to see more, cropped since previous version, too much blue sky. Reshoot is in order.

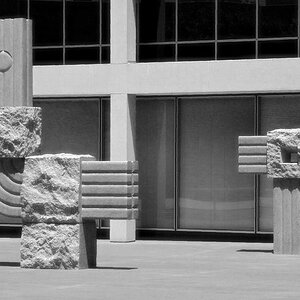
3. Major flaw in this image, no perspective distorion is gonna correct it, 3D photography is very unforgiving post, global adjustments to both images are ok, but dare not fix anything else, because it will show up big time.

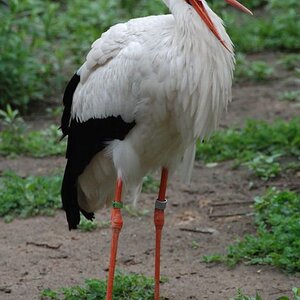
4. All of these were before I knew pretty much anything about photography formally, they were shot for the purpose of 3D, wrong way to think in general.

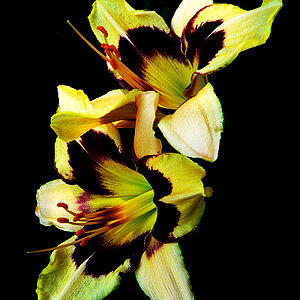
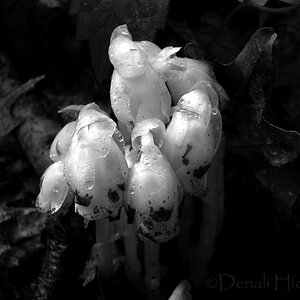
5. Obviously you cant tell from this size image and the fact its in negative, but this was a 6 shot HDR (3 each side), incredible shadow detail in the flower bed, played with it in negative and preferred it for the 3D version, nothing great, just like the effect.

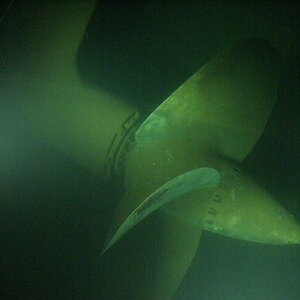
6. Shot yesterday, stereo baseline was about 1.5 feet, tree is about 300 feet away, I can see depth all the way, thius shot has some flaws due to the wind blowing things around between shots.

7. This was a practice shot that kinda worked, shot this afteroon while I was experimenting.

Yay or nay?
Technology has moved so fast (much faster than I expected (3D TV's as hardware will become a standard in the future, just like stereo sound has become), its time to pick up my old 3D shooting skills and combine them with what I know now.
I do have some reservations about posting 3D images on a photography forum, but as far as I am concerned (and hopefully you?), they are photographs, I am posting them for C&C and the original 2D compostion should be able to standalone (in some cases it will be the 3D effect only), so C&C can be for 2D or 3D.
I would also like to know, who was able to view the images in 3D, and how long did it take you to be able to.
So I went through some old images, gave them a tweak and crop (bear in mind I knew nothing about compostion) and I have a few oldies to share along with a couple I did today.
I am willing to "mentor" anyone who would like to learn more about shooting in 3D.
The method I use to free view and edit my 3D shots is ther crossview method.
Stare at the paired images (hopefully on a clutter free screen, makes it much easier) and try to focus an imaginary object about one foot in front of your nose. When you see a third picture in the middle of the 2 on screen, relax your eyes slowly and focus on the middle one and hold.
This technique, once learnt is like riding a bike! Easy peasy, from now on.
1. Oldest first, I used 2 cameras to get this, manually synched with some fabricated RC servos. Doesnt look all that good in 2D sadly, 3D it works quite well.
2. 2nd oldest, gutted now I missed the bottom of the frame, you will find yourself trying to peer in to see more, cropped since previous version, too much blue sky. Reshoot is in order.
3. Major flaw in this image, no perspective distorion is gonna correct it, 3D photography is very unforgiving post, global adjustments to both images are ok, but dare not fix anything else, because it will show up big time.
4. All of these were before I knew pretty much anything about photography formally, they were shot for the purpose of 3D, wrong way to think in general.
5. Obviously you cant tell from this size image and the fact its in negative, but this was a 6 shot HDR (3 each side), incredible shadow detail in the flower bed, played with it in negative and preferred it for the 3D version, nothing great, just like the effect.
6. Shot yesterday, stereo baseline was about 1.5 feet, tree is about 300 feet away, I can see depth all the way, thius shot has some flaws due to the wind blowing things around between shots.
7. This was a practice shot that kinda worked, shot this afteroon while I was experimenting.
Yay or nay?