An Excersice On the Effect Of Distance

smoke665

TPF Supporters
Staff member
Supporting Member
Joined
Mar 29, 2016
Messages
14,718
Reaction score
8,181
Can others edit my Photos
Photos NOT OK to edit
@Derrel made a comment on another post about the ideal distance to place your light, "The actual look and "feel" of lighting changes, based on the distance from the light, to the subject". Had some time to kill so I thought I'd try a few experimental shots. There is equal though minimal processing on all three. WB, and a slight tone curve contrast.
Lighting example.jpg


After doing this I think I would add to Derrel's comment "and the addition of multiple lights".

A few things I noted in the example, was of course how quickly the light falls off when you bring the light in close, the darkened background. Something that could be useful to remember if you need to de-emphasis a cluttered background. The shadows could be filled with the addition of a reflector or second light on the fill side, but there seems to be a lot of texture created on the face by the shadows.

When I moved out to the 6' mark and powered up to to adjust for the exposure, I got a lot of light everywhere. Face, hair even the background with very few shadows, a flat image, but, there was even illumination across the face, hair, even the background. I tried to maintain the same angle when I moved it back.

The last example, while it looks like the exposure is different it isn't. The light ratio is still the same, but the combination of the two lights required that both lights be powered down, to maintain the same f/5.6 exposure under the chin. When I did that it introduced shadow details missing in the 2nd shot.

While each has their place, I like the last example because of the more even lighting on the head and hair. It also seems to have less texture on the cheeks and nose that could be helpful when lighting skin.

Anyhow, interesting couple of hours of experimenting when it's to cold to be outside.

Clarification on image: I metered the fill light to f/5.6, and the combined exposure (under the chin) to f/5.6
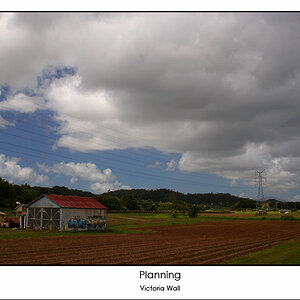
 
I think the first two photos, with just the 40-inch octabox, make for the best comparison of how distance from the light to the subject changes the "look and feel" of the lighting effect. At three feet from the modifier to the face, there is quite a bit of shadowing and fall-off from the light side of the face to the shadow side of the face; but moving the same exact light back, to six feet, creates lighting that is very even.

The takeaway from the first two photos, I think, is to take with a huge grain of salt the common, internet-era saying that, "the closer a light is to a subject, the 'softer' the light is." That is really NOT accurate! Look at how much shadowing, and light fall-off, and how much contrast there is when the octabox is a measured three feet from the subject's nose! Is that "soft" lighting in the first photo on the left? I think not.

...proving once again...don't take everything that's said in a YouTube video to be the gospel truth. No matter how many times one hears the idea that the closer a light is placed to the subject, the 'softer' the light is...because...that's not really an accurate statement.

Thanks for posting these test photos!
 
I think, is to take with a huge grain of salt the common, internet-era saying that, "the closer a light is to a subject, the 'softer' the light is." That is really NOT accurate

Despite thinking I had an understanding of hard light vs soft light, until I did this I apparently needed a heaping dose of that salt! While the first two are better examples of the how falloff is affected by distance, the last was an eye opener to me on the addition of a light and how it can create shadow in an evenly lit image, by reducing light intensity. While the addition of a reflector to the first image might bring fill to the shadow, it doesn't "add" light to the exposure. It only moves light.
 
I think the third photo is a good demonstration of why Main Light + Fill Light became such a common studio portraiture lighting method so,so many decades ago.

Just as an aside, when comparing the first two photos against one another: notice in the first shot, how dark the background is, and in the second shot, notice how much brighter the background is. And the same goes for the tabletop on which the mannequin head is resting; in shot #1, the shadow side of the tabletop is dark, but in shot #2, the light is much more-even on both sides of the mannequin head's base.

True but just as important, I think, is how the combined output of two lights required a decrease in the light output of both main and fill to keep the exposure the same. The result was to minimize the flat shadow free look of the 2nd image without underexposing the image.
 
Light has 4 characteristics, direction, diffusion, intensity and color. Softness or hardness of light refers to how rapid the shadow edge transition is, a function of diffusion, light relative size/ distance. The ratio between highlight and shadow addresses relative darkness of shadows referring to relative intensity. Your photos are taken with the light so close to the nose axis that there is virtually no nose shadow from which to easily judge the shadow edge transition. I suggest you move the light more to the side and higher. The first photo there is barely a nose shadow and it appears the light is at about the same height as the nose. Move the light higher and to the side to produce a half inch nose shadow extending from the nose down the nasolabial fold to the mouth. Examine the shadow edge transition, it should be fairly broad, ie soft. Move the light back on the same line and adjust to get the same loop lighting as well as exposure and take a shot. Examine the nose shadow edge transition and it will be faster. This is called "hard light." The darkness of the shadow relative to the highlight is primarily a function of the brightness of the main, against ambient/and or fill. Light reaching the background can be reduced by bringing the lights closer to the subject, speeding up the fall off. This is also handy when trying to control the tone of the bg separately from the subject or adjusting the bg tone. In studio I prefer to have no spill on the bg and control the tone of the bg with one or two lights. I can then add a light for accent...but not the cliched halo, please shoot me if I do. Also, when gelling, it is helpful to eliminate any spill on the bg, and that enables getting saturated gel colors. You indicate there is less texture in the last shot. I am guessing because you have filled shadows. It is shadows that reveal wrinkles or pores. I prefer to light in a pattern complimentary to the subjects face then deal with and skin issues in post or have it addressed by my make up artist.
 
... take with a huge grain of salt the common, internet-era saying that, "the closer a light is to a subject, the 'softer' the light is." That is really NOT accurate! Look at how much shadowing, and light fall-off, and how much contrast there is when the octabox is a measured three feet from the subject's nose! Is that "soft" lighting in the first photo on the left? I think not.
Going to disagree with you here Derrel - if you bisect the face vertically through the nose, and ONLY look at the left (image right) side of the face, the lighter is softer. Yes, there's a hard fall-off, but that's due to the placement of the light. If you brought the key around to say, 15-20 degrees off-axis, it would be MUCH more pleasing (IMO). Agree on the third image and the 'two light standard'.
 
The hard fall-off creates...hard light. Not sure how one can disagree with that. Soft, even light is what the second image shows. There's no sense in bisecting a face in a portrait breakdown, since we look at the entire face in the final shot. We are lighting the _entire face_...not just one-half of it. Light that is six stops darker on one side of the face is not soft light...it's high-contrast and hard lighting.

So you want to disagree with this??? I put the most-salient points in bold.

"I think the first two photos, with just the 40-inch octabox, make for the best comparison of how distance from the light to the subject changes the "look and feel" of the lighting effect. At three feet from the modifier to the face, there is quite a bit of shadowing and fall-off from the light side of the face to the shadow side of the face; but moving the same exact light back, to six feet, creates lighting that is very even.

The takeaway from the first two photos, I think, is to take with a huge grain of salt the common, internet-era saying that, "the closer a light is to a subject, the 'softer' the light is." That is really NOT accurate! Look at how much shadowing, and light fall-off, and how much contrast there is when the octabox is a measured three feet from the subject's nose! Is that "soft" lighting in the first photo on the left? I think not."

Again...look at photo 1 and photo 2...
 
Last edited:
@mrca

Softness or hardness of light refers to how rapid the shadow edge transition is, a function of diffusion, light relative size/ distance. The purpose of the exercise was to explore the size/distance aspect. Might have to try one with diffusion. The ability of the light to wrap around features when the light is up close eases the transition of the light to shadow edge, but the depth of light (the ability to illuminate a larger surface at a greater depth) increase as you move away from the subject, thereby eliminating the shadow. Assuming you keep the intensity the same as metered at the subject.

As to your other comments I couldn't disagree with most other then to say this was an excersise to test one thing only, and not necessarily on placement for a portrait. There was a reason for placement at 3 feet and 6 feet as it was an arbitrarily easy way to double the distance, based on the room I had available in my great room.:allteeth:


@tirediron In my unscientific exercise I didn't measure the angle off center, but best guess was > 20 as my lens was next to the octabox, and space was tight. As to falloff see above, distance increases depth, which decreases shadow. (Granted it also causes other negative things but that's another exercise) Supposedly the surface area you are illuminating increases by 4 times when you double the distance between subject and light. I didn't record the outer edges but I suspect that the shadow edges at the outer reaches would be devoid of much transition. Hmmm, another excersise for a cold day.

@Derrel I think Mrca hit on it, as it's not so much the appearance of shadow, as the transition when referring to the softness.

I'm finding the comments on my exercise extremely helpful in understanding the results.
 
Last edited:
Whoops - I mis-read your parameters; I thought you were saying that the light was 40 degrees off-axis. My error..

@Derrel... would you accept "more pleasing" vice "softer" in my previous post?
 
Whoops - I mis-read your parameters; I thought you were saying that the light was 40 degrees off-axis. My error..

@Derrel... would you accept "more pleasing" vice "softer" in my previous post?

I would expect you of all people to not confuse inch with degree. Did they let you navigate much :bouncingsmileys:
 
Smoke, I suggested the creation of loop lighting to give a shadow easy to compare. The spread of light does occur over distance but properly positioned, you can move the light away and still create loop lighting. It will just be harder, since it is relatively smaller in comparison to the subject. Think of a moving truck next to your subject, much larger than subject but move it a block away and now relatively smaller. The relative size of the same source determines the shadow edge transition. You are experimenting and that is the best way to learn. Hands on. Remember a great quote on learning, it's called trial and success, it's called trial and error. Keep experimenting with your lighting, store the results in the back of your mind, label the photos of what you were doing in the shots so you can go back and compare as you progress. If you are looking to see how light spreads, you might shoot against a wall from 3' then move the light back several times as your room permits. Try that with each of your modifiers. Note the fall off at the edges of the light. For example, grids in a 7" reflector exhibit a lighter ring around a hotter center. Armed with that, I was able to solve a problem where I had to place the bg light in the main light side but wanted the bg darker. Skimming the edge of gridded light across the hill side and placing the hotspot behind subject head, was able to make that side darker against the highlight side and brighter further away on the shadow side even though it was further away to increase separation, creating chiaroscuro, dark against light.
 
@mrca I always appreciate the advice and guidance you've offered. It's helped me immensely in learning lighting. While basic one light sets aren't that difficult I'm finding moving to 2,3,4.... light setups becomes exponentially more so. Might be partly in my nature as I have to break things down to the simplist point to fully understand, like this exercise. Trying to visualize multiple scernarios at the same time makes for a muddled mess in my brain.
 
Smoke, many of us are on this site, not only to learn, but to share knowledge as others had done for us. It is encouraging to see you testing, standing back and examining the results, considering modifications. You are on your way to master lighting, not an end in itself, but part of what goes in to supporting the reason for the shot. Trying to analyze a complex lit shot can be difficult. When building a shot, always start with one light. usually main or fill. Turn it off and then add another and you will be able to see what that one light does, adjust power and position. eg, a kicker. Turn on the main and see what you have, adjust. Continue that way adding one light at a time and evaluation position, power then examine it with all the previous lights on. Note the ratios and amount of coverage you like. Your willingness to test will give you things that you have somewhat worked out on your test dummy before trying it on a subject. Another of my favorite quotes from one of my mentors, was you don't own a technique til you use it 3 times. I have had my lighting influenced by some of the novices here. Taking a portrait course, a famous teacher emphasized using a hair/shoulder light that you guys were exploring. My boom arm had collected dust for 10 years. Now it is up permanently with a 6"x3' gridded strip box that I can turn on and adjust power from my stool. We all can learn from each other. I really enjoy watching you guys grow in the craft. I predict you will become a master of light and that will take you images to a new level.
 
Whoops - I mis-read your parameters; I thought you were saying that the light was 40 degrees off-axis. My error..

@Derrel... would you accept "more pleasing" vice "softer" in my previous post?

I would expect you of all people to not confuse inch with degree. Did they let you navigate much :bouncingsmileys:
Only on Sundays!
 

Most reactions

Back
Top