DIY Ringlight.

K_Pugh

No longer a newbie, moving up!
Joined
Sep 26, 2005
Messages
1,343
Reaction score
75
Location
Scotland
Well i finally got round to building one. I had been meaning to for a while but always put it off.. after reading the DIY thread and icassell's (i think) enthusiasm towards his recent build i decided to build one.

I wanted mine to work with the flash on the camera shoe and be light weight, and fairly big. It all fell into place. I used an old CD spindal for the inside hole and there was a plastic mixing bowl in the kitchen which was perfect for the job (so i scavanged that).. just waiting for the paint to dry now but it seems to be working ok.

DSC_4265-r.jpg


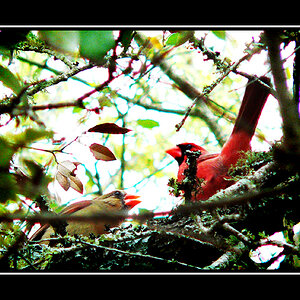
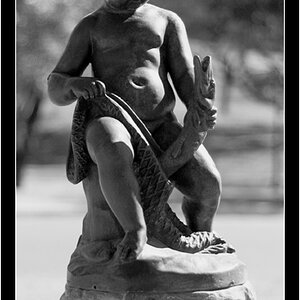
quick snap, i'm too ill for anything better at the moment.

I'll get pics of it up tomorrow once it's all done. glad i built one though, pretty nice.
 
Kewl! Put up some shots of the ring flash you made. I wanna see. :D
 
Yea. I am thinking of making one myself
When you feel better put up some of the pics of it sounds like it should be easier to make then the first one
 
Sorry about the silver duct tape, i just added it to take away any rough edges. I don't really need the bracket on the bottom but added it for a little extra support, it's pretty rigid though, which is good.

rl-1.jpg


rl-2.jpg


rl-3.jpg


Doesn't look professional but it's good enough for me - solidly built so it'll last a good while.

I'll try get one on-camera if i can... 2 secs.

rl-4.jpg


poor quality, dust on filter etc.. meh, what can you do (clean it?).
 
Last edited:
Apologizing for duct tape? Isn't that like breaking a mirror or something? :D

Awesome shots! Cool ring flash! Good job :thumbup:


BTW: to get a profile shot of a camera you need one small mirror in font of the lens (very close to the lens) at about a 46˚ angle all in front of that large mirror you just used.
 
^ i'll try that mirror thing later, will need to find another smaller one first.. hmm, i'm thinking screwdriver and bathroom cabinet lol.
 
not got round to doing the profile shot yet.. here's a few for fun.

rl-5.jpg


rl-6.jpg


was about a foot from the wall, camera about 2 foot from me (roughly).
 
Can you list the supplies used
What I am lost on is what did you sue to make the bracket and where did you find the screw to attach it to the mount
 
CD spindle cover for the inner diameter.
Mixing Bowl for the parabolic dish/outside diameter.
Flexi Chopping Board for the diffused front panel.
Sticky Back Silver Reflective Tape for all the inside reflective surfaces.
misc: paint, duct tape, glue, screws, cardboard (for the flash mount), oh and some brass plate i had in my toolbox for some reason was used to make the bracket.

The screw i used from an old camera case for a FED.. i only use that screw as it's less obtrusive when holding in vertical position with the battery grip. If i'm sticking it on a tripod i just use the tripod shoe (if that's what you call them).
 
Pretty much any photography shop worth it's rent will have all kinds of tripod socket screw accessories. Step up, step down, male/female on either/both ends, male with thumb turn ring, etc. If they don't have it you can officially scoff at them and call them opportunistic bubblegummers! :D The bracket material is found at any and all hardware stores. Thick in prebent shapes, thin, straight, T shaped, L shaped, etc.
 
well go on this thread and look through it for other DIY threads
This DIY thread is the original (or the first one I've see on this website) for the ringlight/ ring-flash
click
 
yup that was one of the threads.. there is a few but they're more or less the same thing. A google search brings up loads of different pages.

was just trying a few shots with my other lens to make sure i could use it without vignetting etc.. plus i thought i'd try adding another light as well (gelled sb-22s towards wall.)

1. excuse the pose, was purely taking the p**s.
rl-9.jpg


i like this one though.
rl-11.jpg


Anyway i must go get a shower and change this shirt lol :lol:
 
Hey, great job! You've already done more with yours than I have with mine and the images look great. Hope you feel better soon so you can do more.


bdv1973 -- Here is the link I posted: http://www.flickr.com/photos/8472611@N04/sets/72157603816045949/

tkaat -- I used a piece of 1.5" aluminum that I got at home depot in the hardware section (they have a display with various threaded steel and aluminum rods and tubes as well as solid stock. The steel stock is cheaper, but much harder to work with. I think a 3' piece of the aluminum stock was about $9.00) to make the bracket (sawed it to length and then folded it in a vice). I got a 1/4" wing nut in the hardware section to hold it to the camera body.
 
Last edited:

Most reactions

New Topics

Back
Top