Gavjenks
TPF Noob!
- Joined
- May 9, 2013
- Messages
- 2,976
- Reaction score
- 588
- Location
- Iowa City, IA
- Can others edit my Photos
- Photos OK to edit
Lens is a kiev old cheap 45mm, f/3.5 medium format lens off ebay. Medium format because A) the flange focal distance is 80 something millimeters, giving me space to move it around without losing infinity focus, and B) it more than covers the full format sensor on my 6D here, allowing wiggle room for movements and hopefully making up for the lower quality of the lens just a little bit by primarily utilizing the middle of the glass.
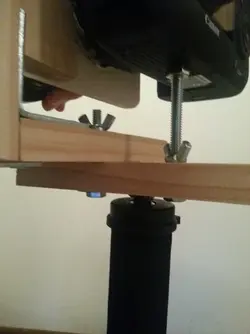
Construction is basically a wooden set of gimbals with thumb screws.
Attachment to the camera is a bit... slapped together at the moment. That should have a dowel or something to be more sturdy, without torquing the threaded rod.
The camera and the lens are both attached routinely to a monopod, so that the entire weight of the lens is not bouncing around in a big U curve, which would almost certainly torque the mount. This way, the camera weight and the lens weights are both transferred almost straight down, making it more stable.


Movements are 2-3x more flexible than Canon's in every direction! About 30 degrees tilt, up down left right (can do right and up etc. at the same time to do diagonal tilts). Shift is about 1 inch in any direction (can do 2 at once for diagonal shifts). Movement pics:


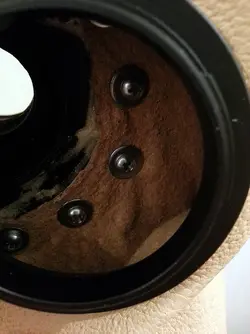
Images from the camera work as expected from looking through the viewfinder. I am not posting any just yet though, because the light leaks are horrendous, obviously, as I haven't actually put anything on it to stop the light. This is going to be a loose collar of felt with plenty of slack for play, attached to the camera with an $8 macro reverse ring and some plywood / screws, etc.
When I'm done with that I will take a goodly number of demo shots and post them.
Total cost = about $150 ($75 lens, $75 random hardware and such, including some tools that I didn't have, which shouldn't really count)
Please excuse terrible quality images. I lent my other body to a friend and only have a cell phone to take these with.
Construction is basically a wooden set of gimbals with thumb screws.
Attachment to the camera is a bit... slapped together at the moment. That should have a dowel or something to be more sturdy, without torquing the threaded rod.
The camera and the lens are both attached routinely to a monopod, so that the entire weight of the lens is not bouncing around in a big U curve, which would almost certainly torque the mount. This way, the camera weight and the lens weights are both transferred almost straight down, making it more stable.


Movements are 2-3x more flexible than Canon's in every direction! About 30 degrees tilt, up down left right (can do right and up etc. at the same time to do diagonal tilts). Shift is about 1 inch in any direction (can do 2 at once for diagonal shifts). Movement pics:


Images from the camera work as expected from looking through the viewfinder. I am not posting any just yet though, because the light leaks are horrendous, obviously, as I haven't actually put anything on it to stop the light. This is going to be a loose collar of felt with plenty of slack for play, attached to the camera with an $8 macro reverse ring and some plywood / screws, etc.
When I'm done with that I will take a goodly number of demo shots and post them.
Total cost = about $150 ($75 lens, $75 random hardware and such, including some tools that I didn't have, which shouldn't really count)
Please excuse terrible quality images. I lent my other body to a friend and only have a cell phone to take these with.
Last edited:


![[No title]](/data/xfmg/thumbnail/42/42467-e93a2a1ecfbab434ac7d27c9d0dd0a02.jpg?1734176999)


![[No title]](/data/xfmg/thumbnail/42/42466-109a1021e2f0f132abfd74e1a6e39444.jpg?1734176999)
