My First...or, umm... Third Product Shot.

I actually like the first one better.
 
For artistic reasons i prefer the first. It's not just a picture of a ring. The second I think looks more like an ad for a ring. It shows the ring in detail, and that's it. Both would work, just depends on application.

On that note, both shots have some strange bounce effects on the inside.
 
While I really like the first one, the colors are great and everything is spot on technical-wise, I just think the white background shows the beauty of the ring a bit more. That's just a personal preference though.
 
Don, I do this in my shop, which is small. The flourescent lights are typical 4 tube recessed ceiling.
I don't have the room, the storage, or the time to have a complex set up for "real" product photography.

You don't need a lot of room. But you do need to work out a system that is quick, easy and repeatable.

Should they all just be done on white backgrounds?

Depends :)

You can shoot from a low angle onto a draped backdrop with three lights or from a high angle with two lights onto a flat backdrop.

With a draped gray paper backdrop and three lights you can get a white background. One main light, one fill light and one light on the backdrop.

By lights I mean CF bulbs in clip on work light reflectors, doesn't need to be fancy on this scale.

With the 5500k CF bulbs there is no color balance issue.

Long story, short. A $45 light tent will help A Lot with reflections but the image won't be quite so dynamic :)

Better is reflect the light onto the object. And you can control the color of the reflections with the color of reflectors you use, ie., black or white, etc.

Your last white paper image is the best except for the reflections inside the band.

Some examples of what I'm talking about...

Light tent...

MackpensidewhiteBG.jpg


Black reflectors..

MackBlacktwo.jpg


The set up, keep in mind I sized my reflectors to shoot larger stuff but the concept is the same for work on your scale.

The light is bounced off a colored reflector onto the work. The only "reflection" that will be visible on the work is the surface of the reflector.

Notice I had to cover my tripod also to eliminate those reflections...

Penshotsetup.jpg


Cheers, Don
 
From a photography standpoint, I like the background in the first shot best - but I like the angle of the ring in the 2nd shot. From a "consumer" standpoint..I think I would be more attracted to buy the ring based on the 2nd shot.... I don't know why exactly, but it makes the ring itself look more appealing to me. The mixed colors of the first shot are pretty, but they kind of make me think "physcadelic" or "stomac churning..."

I don't mean to sound harsh, both shots are absolutely stunning! Just adding my own opinion.
 
I think that the angle of the ring in the second shot makes the ring look great and for product photography number two works better. It seems like the face? of the ring in number one is too cluttered.
 
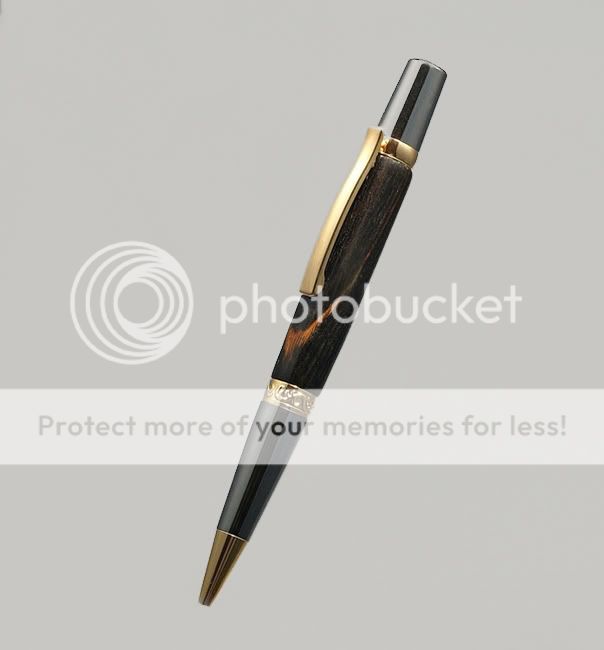
Is it better just on white?

Again, on glass block with white paper under it, overhead (ceiling) flourescent tubes.

Domeagain.jpg

I was going through this book on photoshop, and I came across something that covers your problem; about the background looking grey-ish when put againt a bright subject. I'm sure you must've considered this, but in any case, here it is-

1) The above image required special attention to ensure the
background went to pure white. Yet I did not want to blow out the
highlights on the white shirt or on the model’s blonde hair.

2) A Levels adjustment was applied to make the highlights go as
light as possible on the shirt, but without losing any detail. But
the background still needed to go whiter. I made a quick selection
of the background area, feathered the selection by 2–4 pixels and
fi lled this with white.

3) There needs to be a gentle tonal transition between the white
cut-out and the edges of the subject. If not, the edge detail will
become lost in print. I deselected the selection and set the history
source against the original history state (see the circled history state
icon in the History palette) and carefully painted around the subject
edges, especially around the fi ne strands of hair, to restore detail.

4) If we check the fi nal histogram you can see a slight gap
between where the highlight tones of the subject tail off and the
white background cuts in.

Hopefully this helps.
 

Most reactions

New Topics

Back
Top