What's new

Overexpose? How can you tell?

practice, practice practice.

He is right.
There are no shortcuts.
In order to take good pictures, operating the camera must be second nature.

I can't tell you how many photos I took of just sitting in the living room just practicing and seeing the results of the
Aperture (depth of field and low light),
or shutter speed (light and movement),
or ISO (seeing when grain starts entering in various pictures and seeing how AUTO takes a picture in various situations to adjust shutter speed to what I want to capture a moving image),
WhiteBalance (sitting in the bathroom trying to get the white tub "white" when there are 2 different colors of light bulbs in there plus outside ambient light),
Exposure button (using for minute adjustments), etc.
After seeing the results of each individual change of each setting it all started making sense.

Now when I look at something I can actually dial in the settings fairly close BEFORE I even take a photo. And usually within a few photos I have the settings I want on everything. The practice has helped me immensely.

I don't know how many of the 11,000+ photos I've taken are all basically "testing" stuff but easily 3,000 of them. Not much anymore because I understand alot of things now. But I'm not an advanced ability by far.

just practice, practice practice :)
 
Over exposed and blown out (clipped - pure white) are not the same thing.
Parts of an image can be over exposed, yet be no where close to being clipped.

A standard many professional portrait photographers use is that highlights in the facial mask of a person that are between a value of 235 and 240 in the red channel are properly exposed.
Less than 235 in the red channel indicates under exposure and over 240 indicates over exposure.

A histogram shows exposure in the horizontal axis, and in the vertical axis a histogram shows a graphical representation of how many pixel in the photo have the same luminosity value.
So clipping is indicated at the sides of the histogram, not at the top of the histogram. That's also why the clipping indicators on the ACR (LR and Camera Raw) histogram are where they are.
If clipping was a function of the vertical axis one clipping indicator toggle icon would be at the bottom of the histogram.

It is also worth noting that LR uses a wide gamut color space similar to ProPhoto RGB to do all the image calculations.
The LR histogram and RGB % readouts are based on that native LR RGB color space.
If you are editing a JPEG, TIFF, or PSD image, LR's histogram represents the tone range of the file's native color space.
If you edit a Raw file, there are no gamut restraints until you export the image as a JPEG, TIFF, or PSD file. The choice of output RGB color space will determine the limits of the gamut and if a gamut smaller than LR's native color space is used, many of the colors in the output gamut will be clipped.
 
Last edited:
Thanks for the clarification. I'm still learning!! But if I understand it, being blown-out would also be over exposed - in that region. I guess I was looking at individual regions, as opposed to the entire image. Exposure is all about how the sensor records the light - so it is directly related to light and dark regions, the amount of contrast detail, etc. But I understand (and agree) that an overexposed image (or region) might not be blown out, just too bright and out of balance. (likewise on the underexposed side of the argument).

Having a histogram which is clipped horizontally is more of a side-effect of "poor" exposure, is it not?

If the camera (in auto) meters with center-weighted for the average over the whole scene, it might easily be skewed (if high contrast) compared to the desired exposure. Likewise can be true with spot metering, if it is only looking at one spot for exposure calculations, the photo might easily have areas which are over and under exposed.

This is where the art of photography comes in. At first, we just take what we get on auto. As we learn, we can tell the camera which areas we want in the exposure we like.

And lastly, this is why some people do HDR/bracketing to capture multiple exposures, and blend them to get a better balance comparable to what the eye sees. (not an overprocessed tonemapped look, which are sometimes cool).
 
Hamlet, Lew has given you some excellent pointers in terms of what you need to know to get the "right" exposures. From a technical point of view, the goal of a "good" exposure is to have as much of the image having pixel values that are away from 0,0,0 (solid black) or 255,255,255 (solid white). Then, with post processing software, you can manipulate their relative values, contributions, etc. The complication is that we tend to see about 14 stops of dynamic range with our eyes, whereas most camera JPG's cover a dynamic range of about 6-8 stops. That means, that if you expose so that the highlights have "some" detail in them (ie, values below 255,255,255), then the pixels at the low end will end up with no information (0,0,0), giving you potentially large areas that are essentially just black with no detail. If you expose for the detail in the dark side, your midrange to hight brightness areas will probably be rendered white (or close to total white). So the trick is to figure out what exposure gives you enough detail in the highlights you care about, and still show some detail in the lower end (the almost black).

Negative film generally has greater dynamic range than do digital sensors (between 10-14 stops of latitude depending on the film and processing), so film could give deliciously well-gradated tones ranging from deep darks (but with detail) to bright whites (again, with detail). Digital cameras can approximate via processing (HDR, tone-mapping, enfusing, blending), what was possible to do with film in a few steps. Still, good exposure is a fundamental property that allows us to extract the maximum amount of information from each image.

Keith has pointed out that the histogram is generated from the JPG image (not the RAW), so the way the JPG is generated by the camera will affect how the histogram appears. If you want to verify this for yourself, set your camera on a tripod and photograph a static scene. Set up your WB to daylight. Set up your exposure so that the right side is NOT clipped, but has some values very close to the right side. Lock that exposure in. Now change the WB to another setting (say, tungsten), and shoot the exact same scene with the exact same exposure. When you compare the resulting histogram to the histogram of the first image, you'll see that they are not the same. Now, the RAW files from the two images will be identical, but the JPG's generated from them will not be.
 
But if I understand it, being blown-out would also be over exposed - in that region. I guess I was looking at individual regions, as opposed to the entire image. Exposure is all about how the sensor records the light - so it is directly related to light and dark regions, the amount of contrast detail, etc. But I understand (and agree) that an overexposed image (or region) might not be blown out, just too bright and out of balance. (likewise on the underexposed side of the argument).

Having a histogram which is clipped horizontally is more of a side-effect of "poor" exposure, is it not?
A camera image sensor does not have as much dynamic range as our eyes do.
The clipping of an image at the sides of a histogram may be because the scene in the photo has more dynamic range than the image sensor can record, even when the overall exposure is appropriate for the photo.

Most photographs have areas of under and over exposure. In some images, like a landscape photo, we manage the exposure to suit the time of day the photo is made.

Blown out is the maximum amount of over exposure and means one or more of the 3 color channels are maxed out at 255. At 255 there is no detail remaining in the channel.
In ACR (LR Develop module/Camera Raw) if a Raw file has a single color channel clipped up to 2 stops worth of detail can be recovered in that portion of the photo.
If 2 channels are blown out, 1 stop worth of detail can be recovered.
If all 3 color channels are blown out - 255, 255, 255, or pure white - no detail can be recovered.

Because JPEGs are limited to an 8-bit color depth, and are compressed image files that have had the image pixels locked into Minimum Coded Units (MCU's) blown color channels cannot be recovered.

If the camera (in auto) meters with center-weighted for the average over the whole scene, it might easily be skewed (if high contrast) compared to the desired exposure. Likewise can be true with spot metering, if it is only looking at one spot for exposure calculations, the photo might easily have areas which are over and under exposed.
A camera in auto is likely to use matrix/evaluative metering rather than center-weighted metering.

While center-weighted metering looks at the luminosity in the entire scene, it gives more 'weight' to the middle 70% or so of the light it detects, matrix/evaluative does average the entire scene.

Spot metering provides the most accurate exposure information because it averages a spot that is only about 2% of the scene.

And lastly, this is why some people do HDR/bracketing to capture multiple exposures, and blend them to get a better balance comparable to what the eye sees. (not an overprocessed tonemapped look, which are sometimes cool).
It goes back to the fact the image sensor has a limited dynamic range.
When a scene has more dynamic range than the image sensor can record, multiple exposures are needed to record the high dynamic range the scene has.
An HDR is typically made from 3 or more exposures.

Often 2 exposures is sufficient for recording the entire dynamic range of a scene. Two combined exposures is generally called a composite rather than an HDR.
 
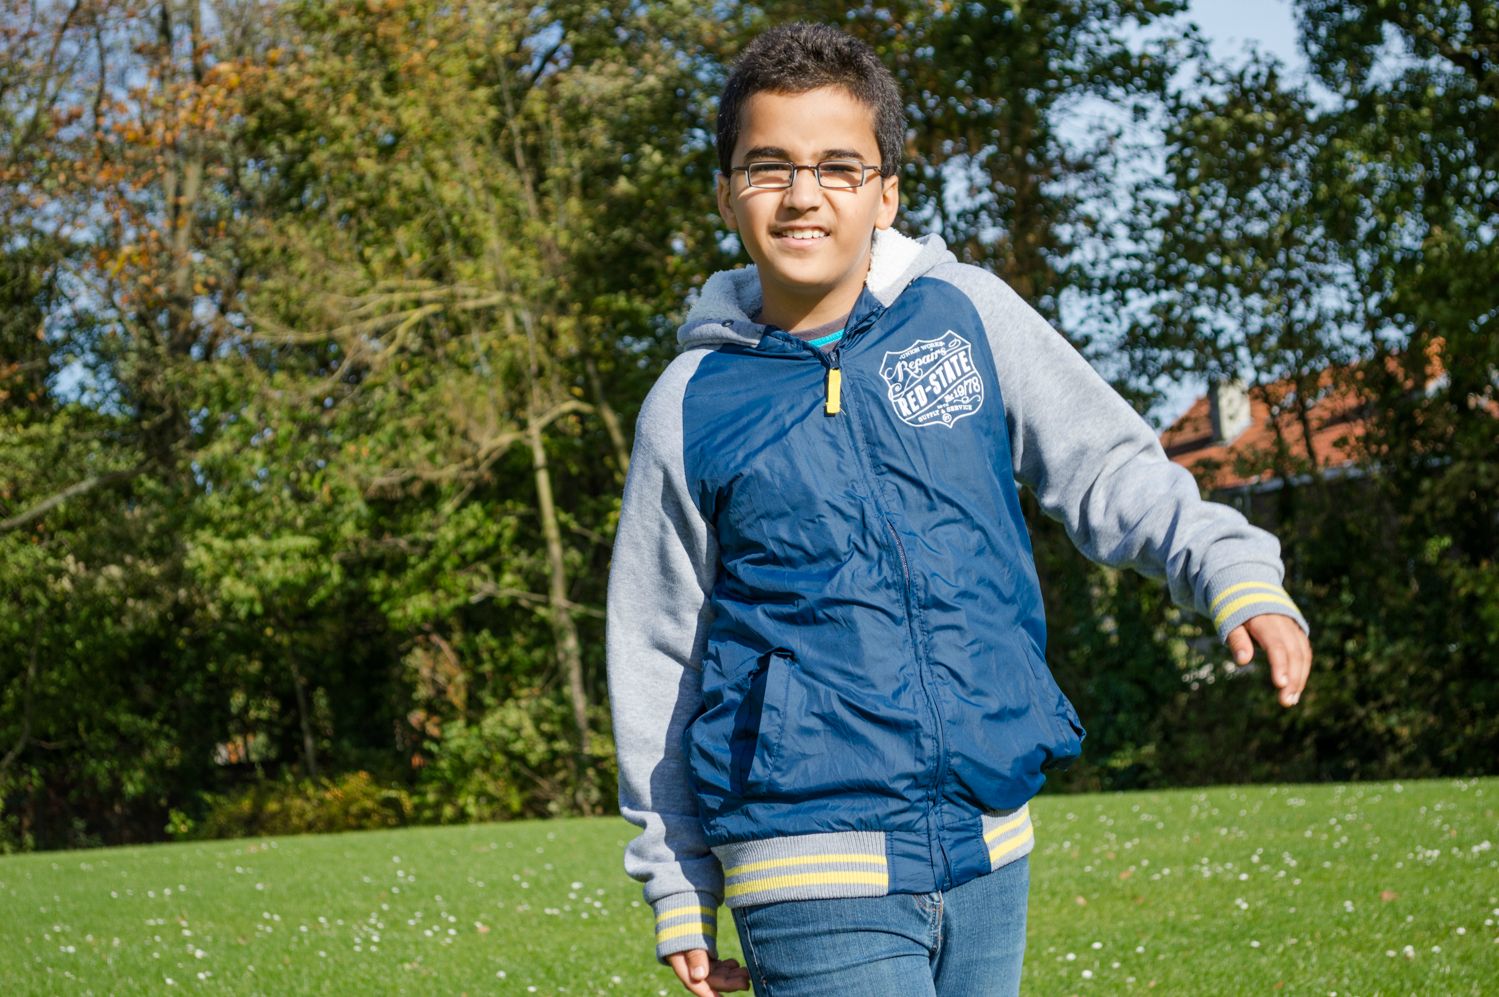
I edited the shadows ever so slightly:

edited
ihGJyYQ.jpg


original
Q00Ye9U.jpg


Here i experimented a little more with bringing down the yellow on the jacket and adding detail. Some other things too.

IusfDX1.jpg

(i actually don't know if i brought the yellow up or down. :lmao:)

I like the richer colours, but its fall, the grass doesn't look that green. I'm starting to figure out things bit by bit.
 
Last edited:
Look up Picture Control
Standard, Neutral, Vivid, Monochrome, Portrait, Landscape

and then play with those

First thing tomorrow i will on my tripod.
 
I think you need to lay down the camera for a day or so and do some reading on:

dynamic range
exposure triangle
exposure compensation
raw versus jpeg

so you have these facts in hand and you will know more what you are doing.


Lew
Thank you. I have no need for jpeg any more.
 
I can see you have the same problem I had about exposure.

What you need to test is precisely this, exposure.

Take pictures of the same thing and use the exposure button or simply increase shutter speed. You know if the shutter is open too long that the entire photo is bright white. That is clearly over exposed, every detail is gone.

As you bring the exposure down you see more and more details.
as you get closer to the "correct exposure" the details are more detailed.

Your question is about improving your expertise on exposure, and you just have to practice and experiment to improve your ability of seeing the details.
Thus, you need to practice making multiple exposures of the same object and then looking very closely at the details of that object. Then seeing which ones are better. By repeating this you will gain experience in understanding when some details get blown out a bit. once the details are blown out and NOT THERE then post processing IS NOT going to make them magically reappear. practice, practice practice. that is why digital is so much more fun. Don't think about film anymore as that was my crutch too.

Conversely, you can think of this in a dark room. You INCREASE shutter speed times to gain exposure to an object in the dark. Until you can see the details.
I am beggining to notice that my pictures are over exposed in some areas and they've completely lost the ability to retain any information. I need to process all this information before i can understand it. I'm so confused right now and physically applying it on the field is the only way i will make any sense of this.
 
Back to the question in the OP - "how can you tell if something is over exposed" - it will be pure white (especially if JPG). In LR, in the View menu, there is an option to "Show Clipping" - shortcut J. This will make any overexposed areas red, and lost detail in the shadows as blue (if you drag the exposure slider down). This will help you to visually see what's going on.

Clipping is referred to when the curve in the histogram goes flat (like at the top, higher than the maximum value, and it clips the top of the peak off).
As stated, read up on RAW formats, Dynamic Range, and how the eye differs from the camera sensor.

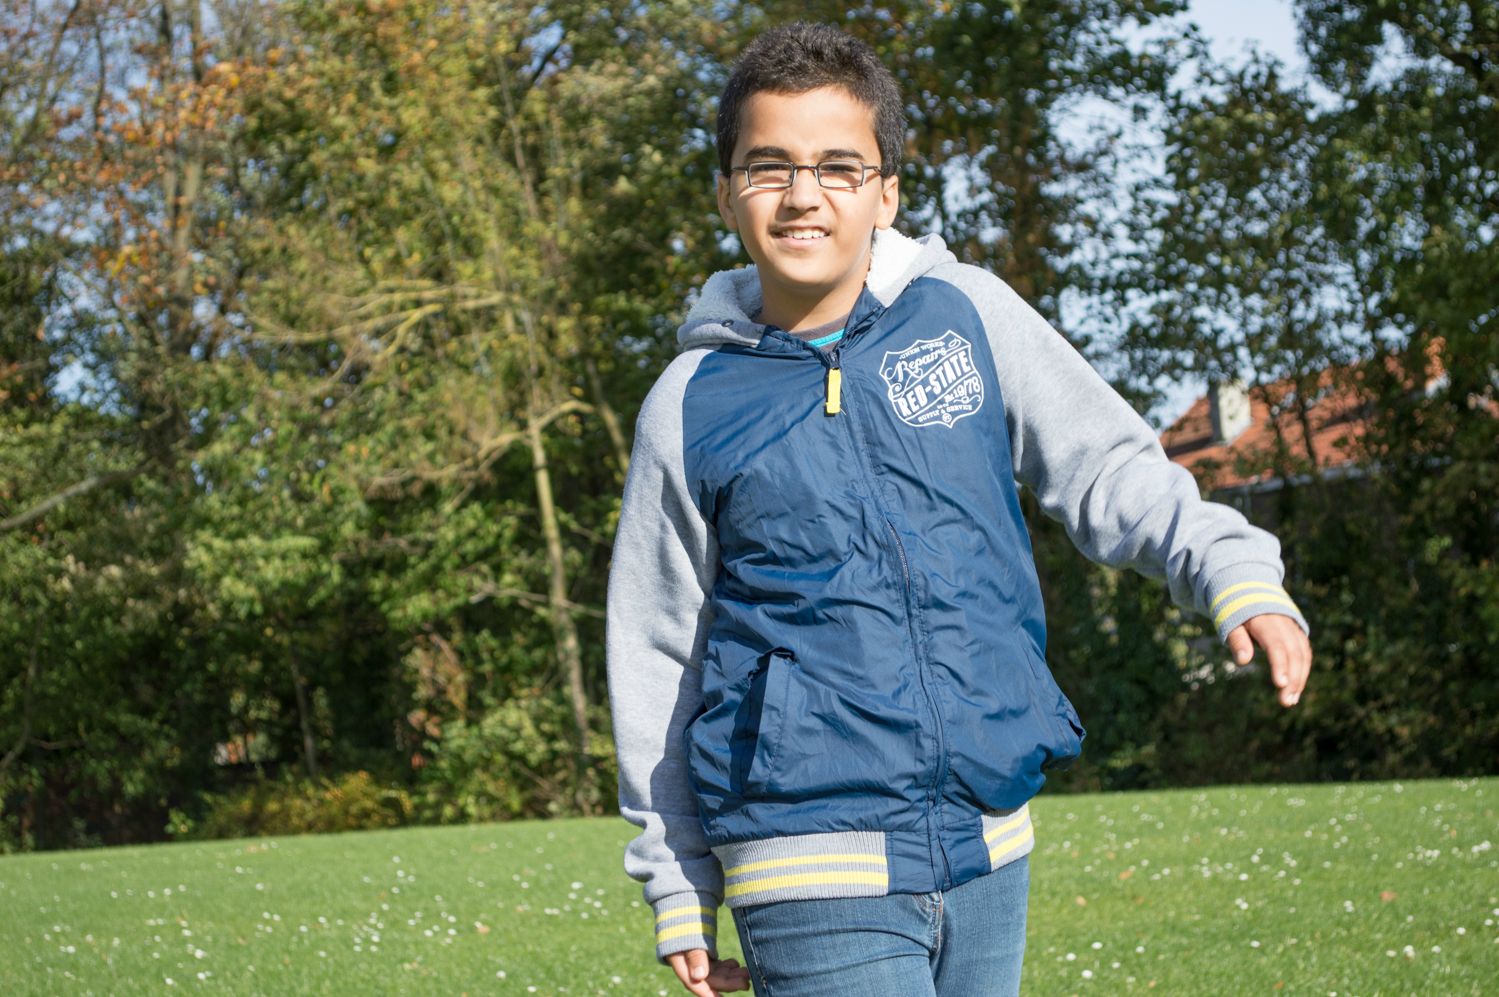
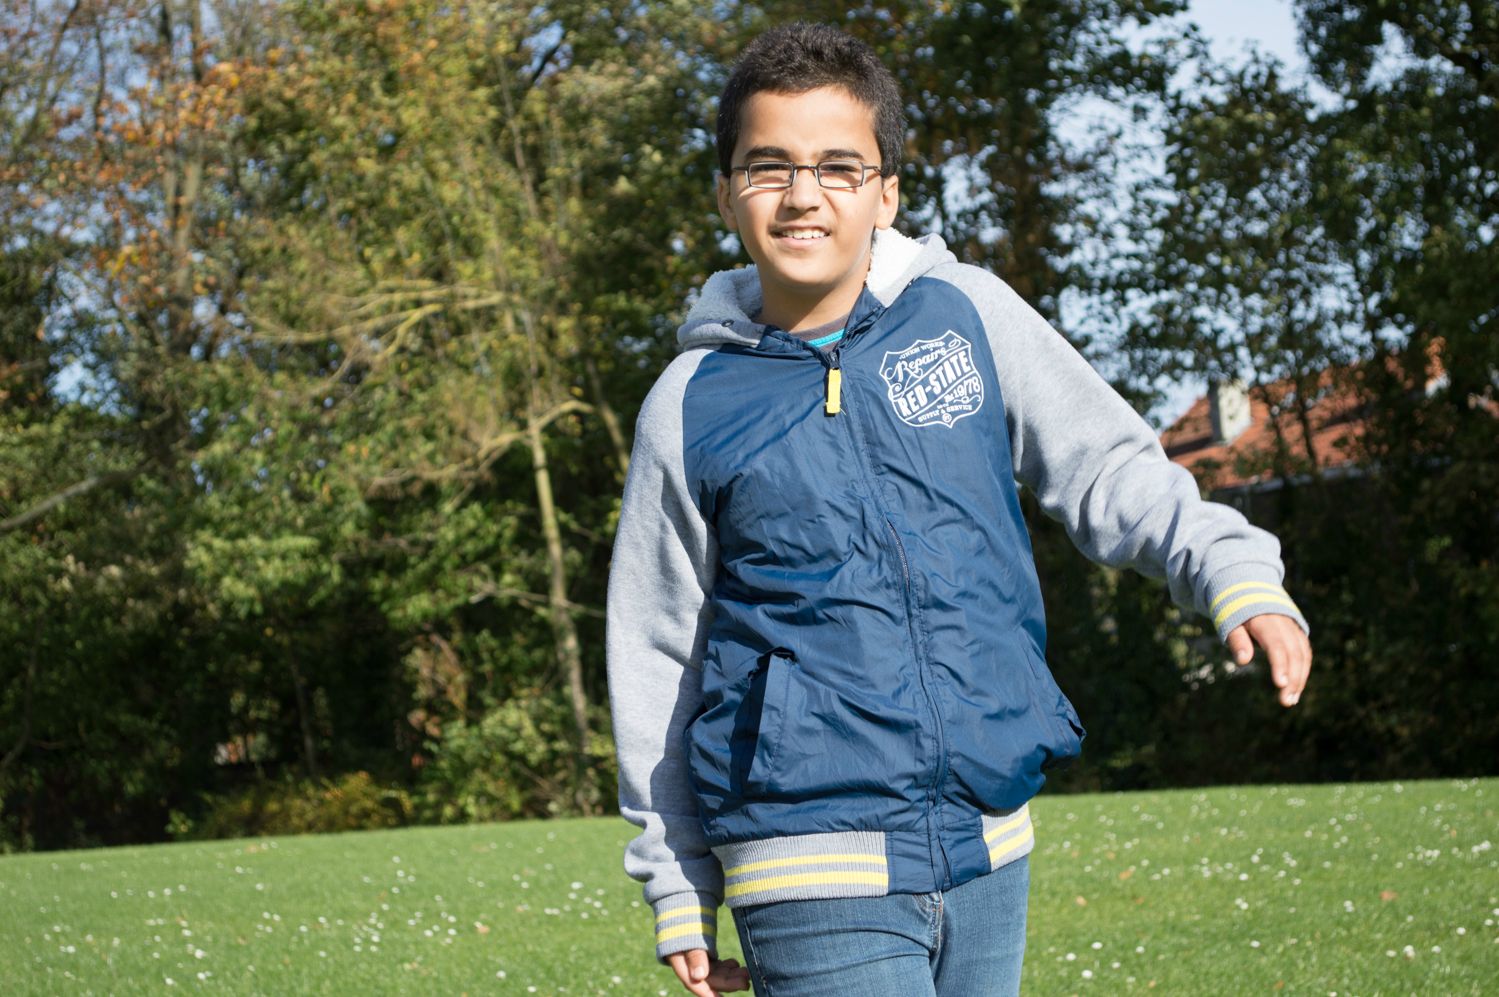
Getting a correct exposure is about balance between the details and colors you want to see. The more detail, the better the exposure. I'm not talking about being able to see words on a sign a mile away, I'm talking about contrast, detecting subtle changes in color. Look at the color in the hood to the right (the boy's left) of his face. In the first image, you can clearly see the gray hood with white lining, but can't see the texture of the lining - so I'd say that area is just slightly over exposed. In #2, that whole area is white, with no detail at all - so it is definitely over exposed.

It is also important to have a computer monitor with accurate colors and brightness/contrast - calibration is important. There are some wishy-washy guides to work through calibration, OS X has a decent one built in, or you can go to a hardware calibration with a Spyder or something similar. These will try to match white balance (temperature), brightness, contrast to be more accurate to what you see with your eye, and in some cases, to be accurate with prints.

I'll need some time to process what you just said. Its not making any sense to me.
 
Fyi, You have come along way from just 2 weeks ago, when Over Exposure was obvious
http://www.thephotoforum.com/forum/...2045-my-long-exposure-picture-too-bright.html

Now, you are getting more detailed and more fine in making that exposure more proper.

It's just experience and being critical of your own photos. And you are getting there ... as you learn more, you become more critical of your own photos.

Just practice practice practice especially on one stationary object and playing with the exposure levels.
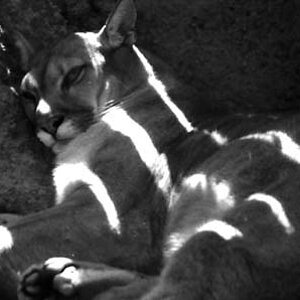
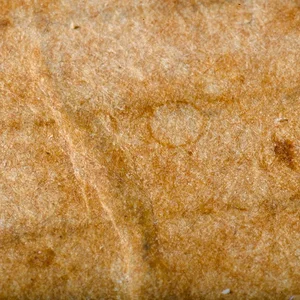
Your 2 pictures are worlds better than from the other thread.

After you get the exposure turned down a bit you will then probably look at the colors to see if "what is in" your photo is "what you see in your eyes".
That's where I went after my exposures got good. making the colors what I see, or better.


Also, I mentioned this before and Lew reminded me of it.

Learn your camera inside and out.
Learn what each button and function does. At first you will "know" what they do but not understand it. This will come in practice of testing each feature/function one at a time. And over time it will become second nature to change something.

It took me some time for me to know what to change and how to do it on the camera. I read alot about my camera in a "How to d7000" book. Invaluable as they teach you why you change something too.

You are learning at a faster clip than I did (I wasn't on this forum yet either and I did it by myself), and you had previous experience. The jump to digital I've basically ignored what I knew in the past as what I knew in the past wasn't at any level of what I'm learning now .. if that makes any sense.

It's coming together :)
When i'm on the streets i see a perfect shot that is about to happen right before my eyes, but i'm still too nervous to go for that shot. The last two pictures in the thread "conquering the streets" i've posted two pictures i messed up because i was nervous. I know what i want and what looks good to me. I just need confidence.
 
Hamlet, Lew has given you some excellent pointers in terms of what you need to know to get the "right" exposures. From a technical point of view, the goal of a "good" exposure is to have as much of the image having pixel values that are away from 0,0,0 (solid black) or 255,255,255 (solid white). Then, with post processing software, you can manipulate their relative values, contributions, etc. The complication is that we tend to see about 14 stops of dynamic range with our eyes, whereas most camera JPG's cover a dynamic range of about 6-8 stops. That means, that if you expose so that the highlights have "some" detail in them (ie, values below 255,255,255), then the pixels at the low end will end up with no information (0,0,0), giving you potentially large areas that are essentially just black with no detail. If you expose for the detail in the dark side, your midrange to hight brightness areas will probably be rendered white (or close to total white). So the trick is to figure out what exposure gives you enough detail in the highlights you care about, and still show some detail in the lower end (the almost black).

Negative film generally has greater dynamic range than do digital sensors (between 10-14 stops of latitude depending on the film and processing), so film could give deliciously well-gradated tones ranging from deep darks (but with detail) to bright whites (again, with detail). Digital cameras can approximate via processing (HDR, tone-mapping, enfusing, blending), what was possible to do with film in a few steps. Still, good exposure is a fundamental property that allows us to extract the maximum amount of information from each image.

Keith has pointed out that the histogram is generated from the JPG image (not the RAW), so the way the JPG is generated by the camera will affect how the histogram appears. If you want to verify this for yourself, set your camera on a tripod and photograph a static scene. Set up your WB to daylight. Set up your exposure so that the right side is NOT clipped, but has some values very close to the right side. Lock that exposure in. Now change the WB to another setting (say, tungsten), and shoot the exact same scene with the exact same exposure. When you compare the resulting histogram to the histogram of the first image, you'll see that they are not the same. Now, the RAW files from the two images will be identical, but the JPG's generated from them will not be.
All my recent shots were done in raw including the ones in this thread. What you said in bold up there is making a lot of sense to me now that i'm editing raw pictures first hand. I can manipulate the picture to a great extent, but the pure white and black parts have lost the ability to show what that part actually represents in reality.
 
The thing is, that even if you shoot entirely in RAW, for the image to be visible (on your LCD, for instance), a JPG version is created by the camera (taking into account all the picture style, WB parameters you've chosen), and a thumbnail of that JPG is stored with the RAW. The histogram is then computed from that JPG. In generating that JPG, the camera also had to throw away a lot of data. So when you edit the RAW file, you have access to all the data the camera recorded.

However not all RAW converters convert in exactly the same way. So the Adobe RAW converter may give a different result compared to the RAW converter built into the firmware, and may again be somewhat different from the raw converter supplied by your camera's manufacturer. It can be a real eye-opener to see how different the resulting JPG files actually are.
 

Create an account or login to comment

You must be a member in order to leave a comment

Create account

Create an account on our community. It's easy!

Log in

Already have an account? Log in here.

Back
Top Bottom