McQueen278
TPF Noob!
- Joined
- Mar 24, 2008
- Messages
- 388
- Reaction score
- 0
- Location
- Ann Arbor, MI.
- Can others edit my Photos
- Photos NOT OK to edit
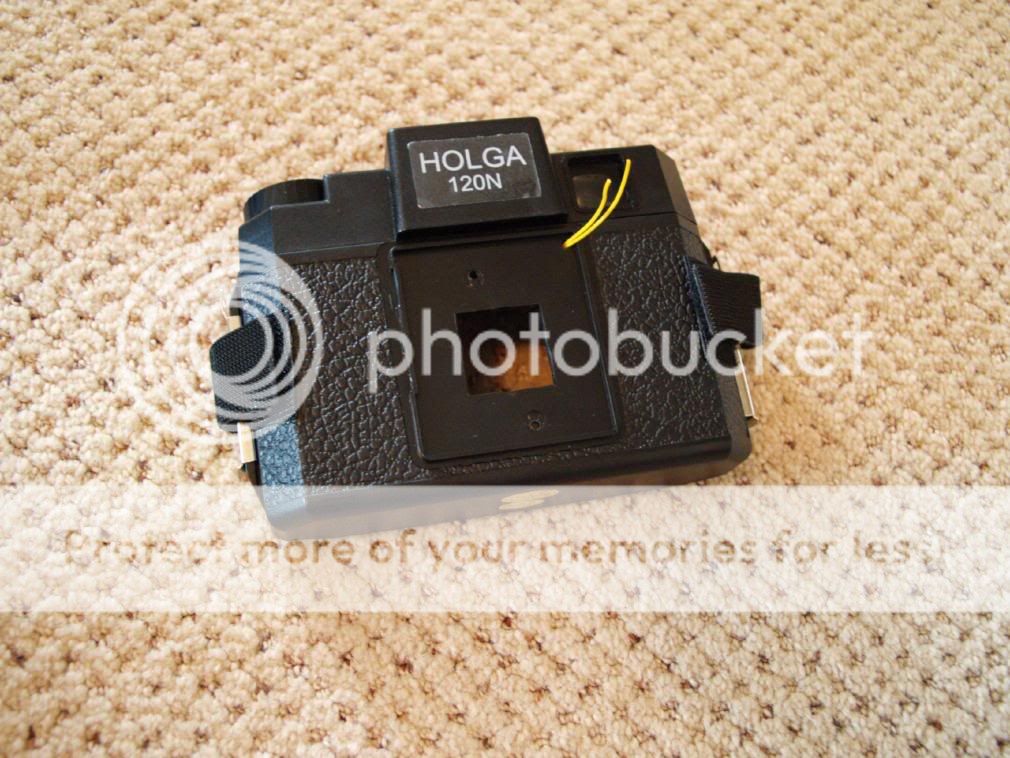
This used to be the lens and shutter mechanism on my Holga, but I was getting frustrated with th film counter on the Holga and wasting film so I did this. It's still a work in progress because it is too far away from the sensor and can only macro focus. Still it was fun.
First I took the two screws out that hold the shutter and lens assembly to the body. You need to remove the film mask to get to the screws. Once the screws are off you will have to cut the flash sync wires.
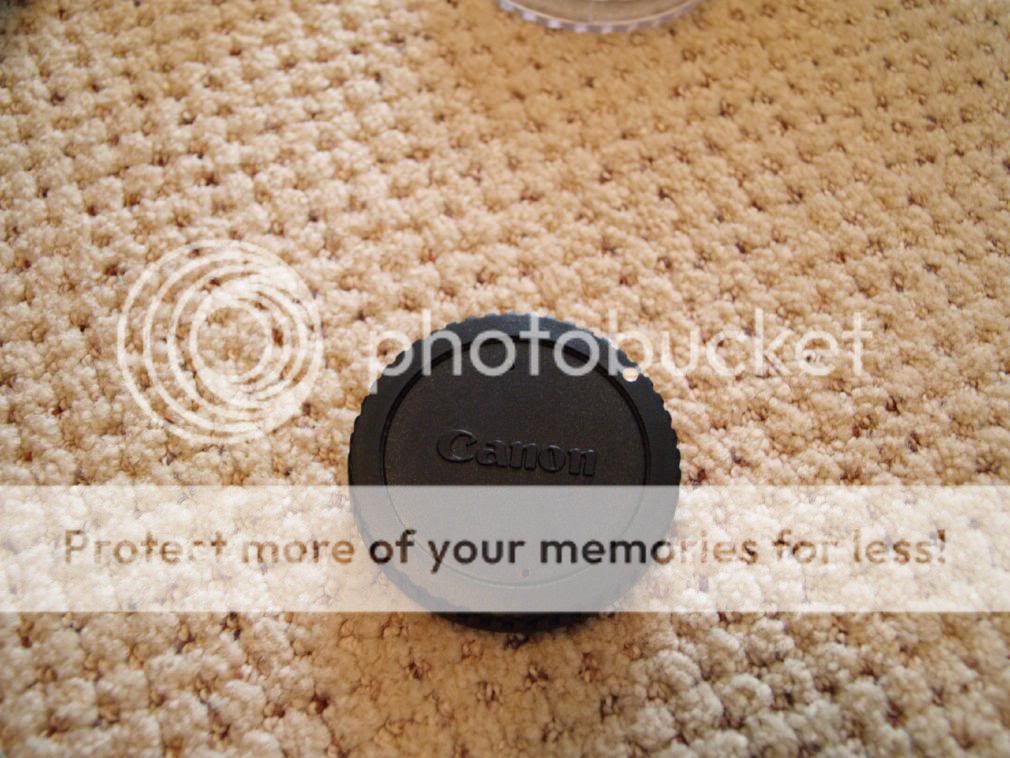
Then go find yourself a spare body cap. I got mine for 5 bucks from a camera store.
Now put the screws back into the lens assembly.
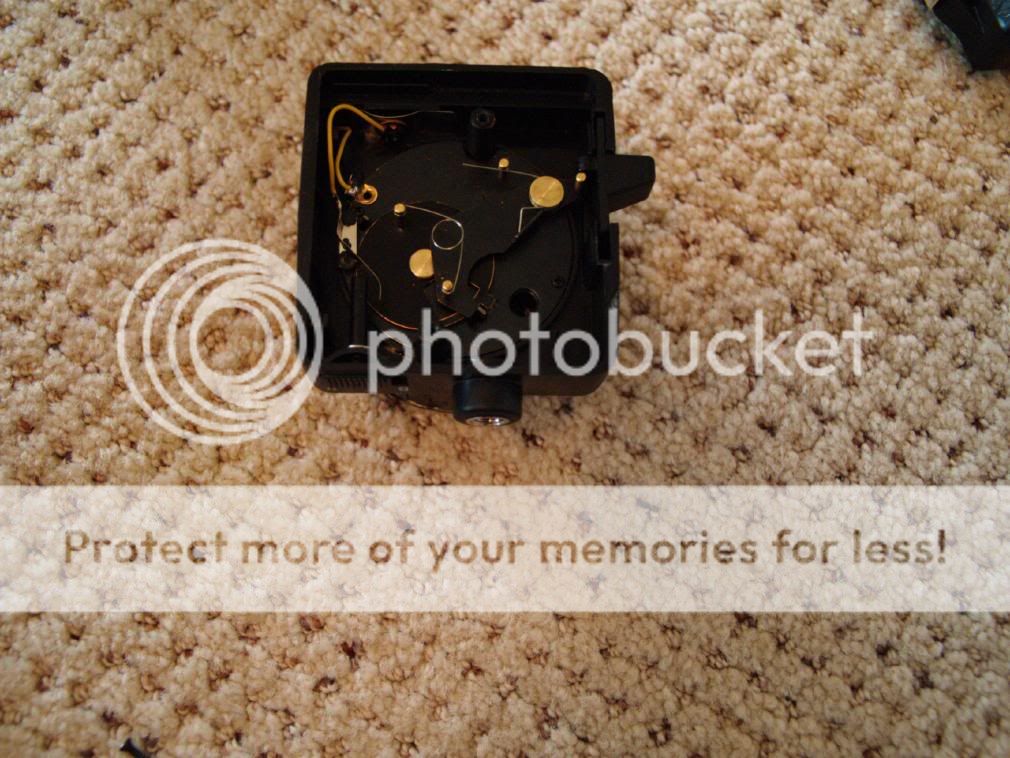
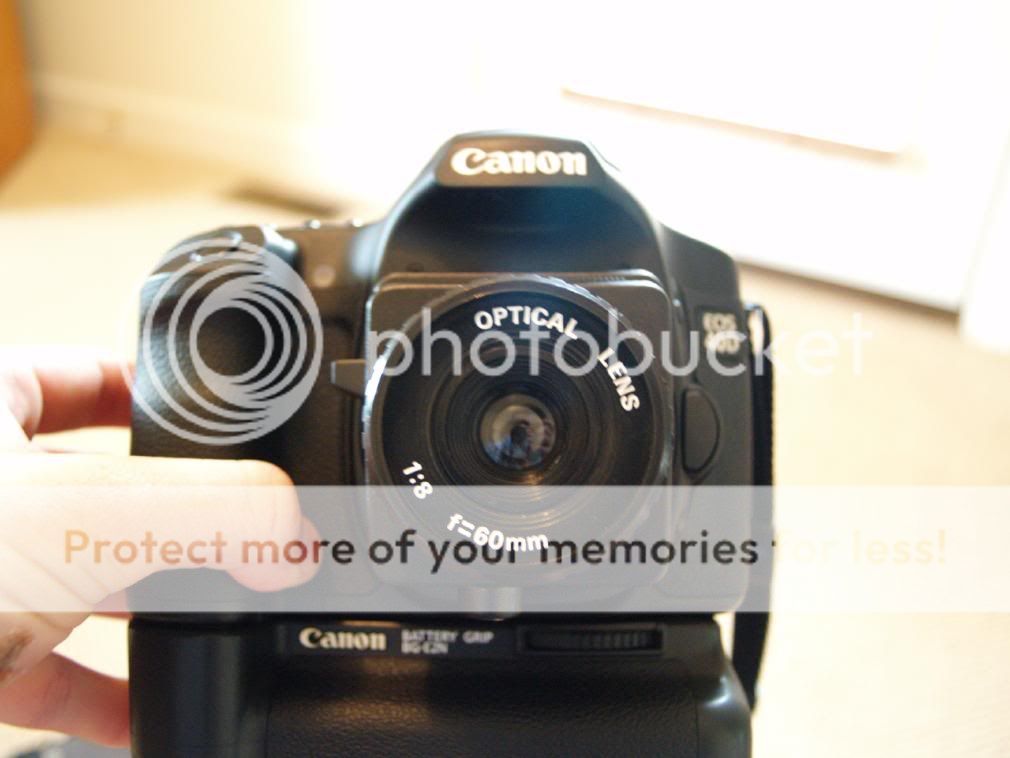
Put some type of marking medium on the end of the screws. I used car chalk. Now line up the lens assembly so that it lines up with the camera properly. Touch the screws to the body cap once it's lined up so that the car chalk transfers to the body cap. Now drill two small holes where the screws left their mark. Then drill a larger hole in the middle of the body cap. Screw the cap and lens assembly together. It should look like this.

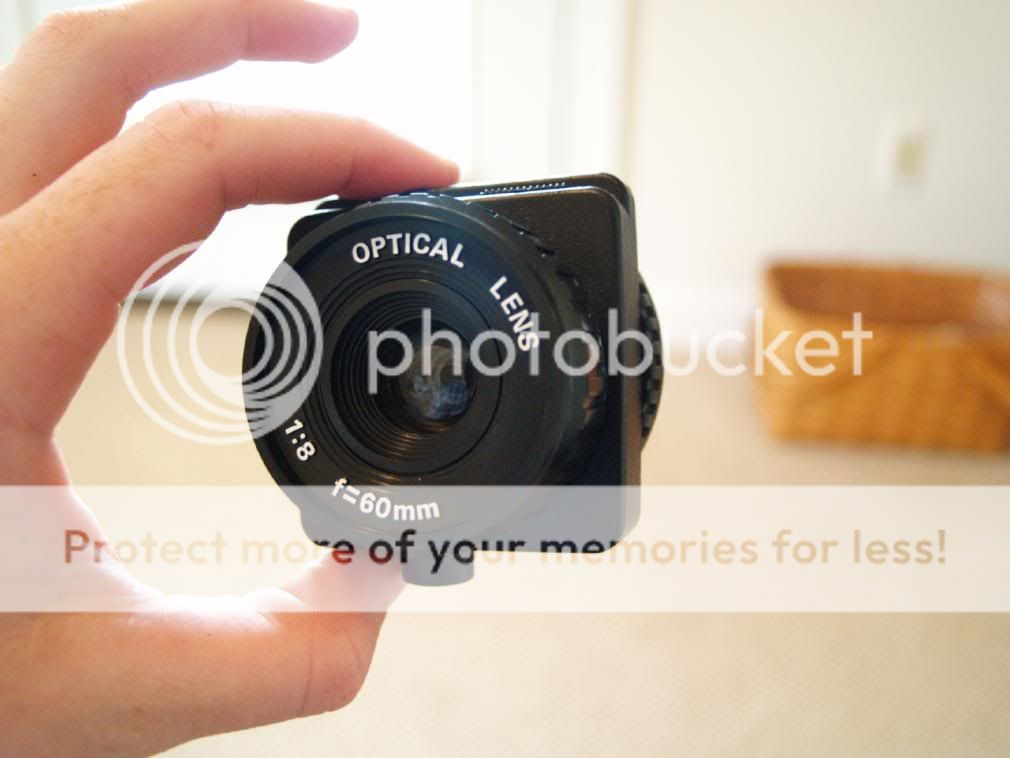
You're done. Either hold the shutter open with the bulb setting on your camera and use the shutter on the Holga that is roughly 1/150 or use the bulb setting on the Holga and use the camera to adjust the shutter speed to whatever works.
It's a fun little project, but when I get the time I'm going to take it back apart and lose the shutter assembly and move the lens closer to the sensor so it can focus to infinity. I can't find the pictures I took with the lens, but I'll find them and post them later.
First I took the two screws out that hold the shutter and lens assembly to the body. You need to remove the film mask to get to the screws. Once the screws are off you will have to cut the flash sync wires.
Then go find yourself a spare body cap. I got mine for 5 bucks from a camera store.
Now put the screws back into the lens assembly.
Put some type of marking medium on the end of the screws. I used car chalk. Now line up the lens assembly so that it lines up with the camera properly. Touch the screws to the body cap once it's lined up so that the car chalk transfers to the body cap. Now drill two small holes where the screws left their mark. Then drill a larger hole in the middle of the body cap. Screw the cap and lens assembly together. It should look like this.
You're done. Either hold the shutter open with the bulb setting on your camera and use the shutter on the Holga that is roughly 1/150 or use the bulb setting on the Holga and use the camera to adjust the shutter speed to whatever works.
It's a fun little project, but when I get the time I'm going to take it back apart and lose the shutter assembly and move the lens closer to the sensor so it can focus to infinity. I can't find the pictures I took with the lens, but I'll find them and post them later.
Last edited:

")


![[No title]](/data/xfmg/thumbnail/41/41796-690c109012575e084970902dbd3894ba.jpg?1734176108)
![[No title]](/data/xfmg/thumbnail/41/41797-ed370d68dae70f5b0a7252ec2d525912.jpg?1734176109)


