Some amateur shots I have taken

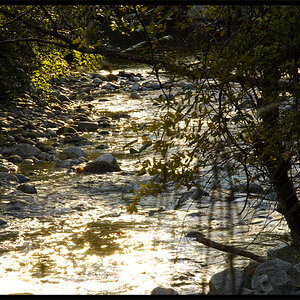
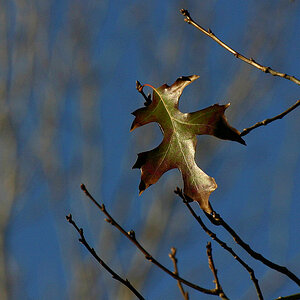
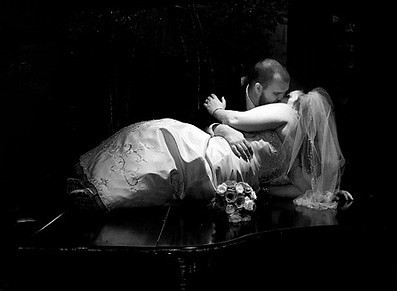
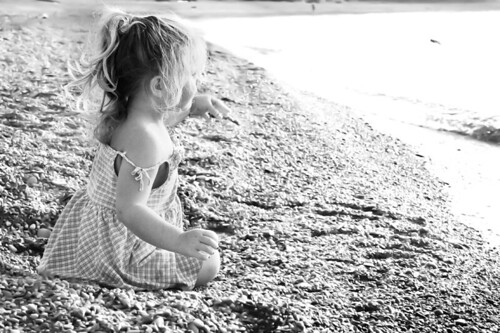
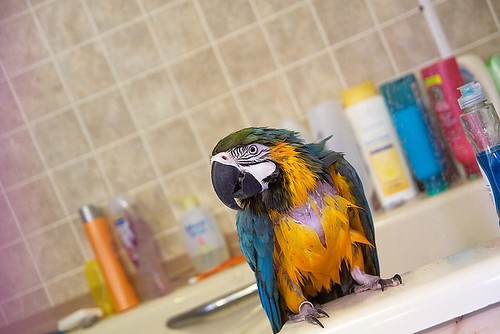
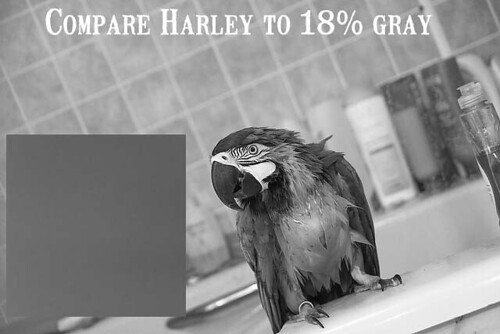
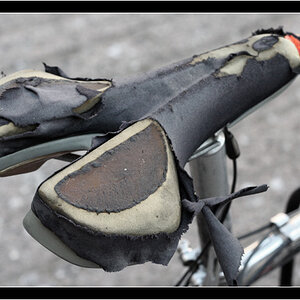
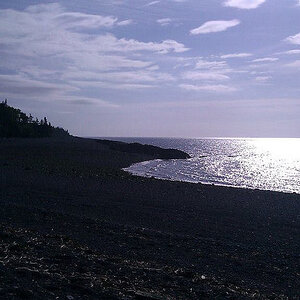
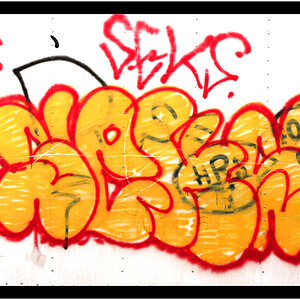
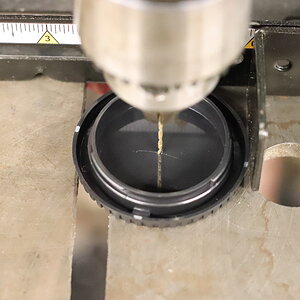
Here are a few more I have done recently. I tend to like the blurred background and focusing the eye on the object Im shooting. I apologize for the excessive use of vignette, I dont know why I like the way it makes the pictures look...Probably an amateur mistake.
$7769986672_99cfb4b60d_b.jpg

$7769993650_62ca67d203_b.jpg
$7769989450_40465630a3_b.jpg
$7763100350_aea78652cb_b.jpg
$7763112310_cbf8774ea8_b.jpg
$7763127922_e3b180d63a_b.jpg
$7763069138_ffc03fb2f9_b.jpg
$7763068626_469f6900a5_b.jpg$7763073404_acd9226e0c_b.jpg
 
The color version of the car is Awesome!
 
You have a great eye and a really great start here. You need your monitor calibrated. What you are seeing in the dark details of your images won't be there when you print. Especially in the car photos.
A vignette is fine if you can't tell it was applied in post processing. When it looks like someone laid something black over the outside of your image in a square or rectangle you aren't using it well. So, you don't necessarily have to give it up as a poor choice, you have to learn how to use it better.

Thanks..I have an eye for knowing what looks cool, I just lack the technical skills to capture it the way my mind is seeing it. My pictures have a tendency to be overexposed on the outdoor shots, and Im forced to enhance the colors in editing software. I dont want to have to do that...Im just starting to play with the manual settings when shooting, but it is hard to tell detail on the cameras viewfinder in the sunlight. So its mostly trial and error at this point. Look at the shot of the old hotrod, in the windshield you can see my reflection, and I was bummed out when I saw that...
 
Turn on the histogram and the highlight warnings in your camera. The histogram will show you if anything is going off the chart at either end of the spectrum and the highlight warnings will blink over anything you have blown out. The screen on your camera is in no way reliable for setting exposure without those.

I looked at your exif data in a few and you are doing well with playing around in manual. Do you understand how aperture and shutter control focus as well? And do you understand how they control light? It seems like you are using the ISO properly so I'd guess you have a fair clue at least how SS and F/ work.

Have you adjusted your monitor at all for photography? Monitors out of the box are incredibly bright and very high in contrast. They're set up for gaming and internet which is what the general population is using them for most. For photography you will need to reduce brightness and contrast to about 75%. Monitors also tend to be cool in coloring, so you will tend to error to the orange in faces or warm in anything else.
 
Turn on the histogram and the highlight warnings in your camera. The histogram will show you if anything is going off the chart at either end of the spectrum and the highlight warnings will blink over anything you have blown out. The screen on your camera is in no way reliable for setting exposure without those.

Gotcha, Ill give that a shot, my camera should have that feature.Im using a Nikon D3200. I purchased that because I read good reviews on it being a very good entry level camera that gets out of it's own way.
Do you understand how aperture and shutter control focus as well? And do you understand how they control light? It seems like you are using the ISO properly so I'd guess you have a fair clue at least how SS and F/ work.

Yes and no..I know aperture is the amount that the lens diaphragm opens up, so more opening with longer shutter speeds would would be really bright and wash the photo out. I can see how changing these setting change the way the photo looks, however I simply cant judge off the top of my head where I need to be. Perfect example, is i have been trying to take action shots at my son's indoor Karate class. The lighting florescent with an open wall of windows. No matter what I do the pictures either blur or look like crap.. I dont want the washed out look of using the flash and generally Im too far away for the flash to have an effect. Plus it is distracting. This is where I cant tell which setting work best. I get an idea of how I want the photo to look, I just cant do it...I tend to like focused subjects with blurred backgrounds.
Have you adjusted your monitor at all for photography? Monitors out of the box are incredibly bright and very high in contrast. They're set up for gaming and internet which is what the general population is using them for most. For photography you will need to reduce brightness and contrast to about 75%. Monitors also tend to be cool in coloring, so you will tend to error to the orange in faces or warm in anything else.
Ill give that a shot, I am on a laptop..

PS thanks for being helpful and not condescending like some people..
Laptop is your problem. I wondered why some images were dark and some were looking pretty good. Do you have an external monitor to hook your laptop up to?
Laptops are THE WORST for photography and editing because every slight move of the screen changes the calibration on it. Even a slight move of your head can change the calibration. It can be done, but you need to get a calibration device and program and set your laptop up where it and you will not move at all. Calibrate every time you are working on photos.

I am off to find a little bit of easy info on aperture and shutter speed for you.
 
Here is the first tutorial I have for you. It's on metering and understanding your meter better. I am HOPING that the links in this still work:


[FONT=Arial, sans-serif]In camera meters don't measure the light in your scene. It's not like a scale or a tape measure that measures the ACTUAL LIGHT in any quantitative measurement. It measures what the reflected light from your subject looks like. A light meter actually measures the LIGHT of your scene and tells you what proper exposure settings should be. It's a ruler for light.[/FONT]


[FONT=Arial, sans-serif]Now you are saying... um... ok.... what is the difference? Let's use snow as an example: A foot of light fluffy snow could weigh 1 ounce. A foot of heavy wet snow would weigh more like 1 pound. They both APPEAR the same-it's a foot of snow!!! But in reality one is heavier. It's the same with light. Things can look the same, but they aren't.[/FONT]


[FONT=Arial, sans-serif]Your camera's meter takes that reflection off of whatever you are metering-could be snow, could be a black backdrop. No matter what it is, your camera tries to make that reading equal middle of the road or middle gray on the light to dark scale. (This is changing in newer cameras, but the basics always will hold pretty true) The camera doesn't know if you are metering a black scene or a white scene. It only knows that average exposure should be middle gray.[/FONT]

[FONT=Arial, sans-serif]Take a look at a black and white photo.[/FONT]

[FONT=Arial, sans-serif]
5222347712_e624674922.jpg
[/FONT]
[FONT=Arial, sans-serif]If I had metered off her dress it would have made her dress middle gray... This color:[/FONT]
[FONT=Arial, sans-serif]
5669701760_6673f951d4.jpg
[/FONT]
[FONT=Arial, sans-serif]Her dress would be really underexposed at that color. If I metered the background the camera would have tried to make that middle gray. Her dress would have been blown out. On this particular image I probably would have metered skin if I wanted something to be middle gray.[/FONT]


[FONT=Arial, sans-serif]Now that you know that much, you also have to consider what the metering modes are using your scene and trying to average to middle gray.[/FONT]
[FONT=Arial, sans-serif]Evaluative metering is measuring the whole scene. Sky, water, child playing in the sand... EVERYTHING and it's trying to make it average middle gray. Just like a grade in school it adds all of those pixels up and tries to equal middle gray when it divides them out. On the beach with the sky and water? Probably not going to be extremely accurate. For example this photo of Haley on the beach.[/FONT]
[FONT=Arial, sans-serif]
5629395008_bed501f63b.jpg
[/FONT]
[FONT=Arial, sans-serif]Convert it to grayscale and look at the bright and dark of it:[/FONT]
[FONT=Arial, sans-serif]
5557193130_1aed6a6f8a.jpg
[/FONT]


[FONT=Arial, sans-serif]If I average the pixels out this is the gray they come out. [/FONT]


[FONT=Arial, sans-serif]
5556608597_a74cebc8f7.jpg
[/FONT]


[FONT=Arial, sans-serif]Compare that to middle gray and it's a lot brighter tone-and there was a lot of dark stone in that one.[/FONT]
[FONT=Arial, sans-serif]If you're on a white sandy beach on a bright day your gorgeous child playing in the sand is probably going to be drastically underexposed. You have lots of bright sky pixels, lots of bright sand pixels and a few dark ocean and child pixels... The bright ones win and hold the average up. In high contrast situations like my beach example evaluative doesn't really work well.[/FONT]
[FONT=Arial, sans-serif]Consider an average setting like maybe your living room (assuming your walls are fairly light) with your kids playing? It might work really well![/FONT]


[FONT=Arial, sans-serif]Center Weighted average metering takes all of the pixels into consideration, but like a mid term and final test is worth more points than any other test, so are the pixels in the center of your scene. It averages all of them together and counts the center ones multiple times to make them more important than the outer pixels. It would sure help with that beach scene to make the pixels that were of your child more important. Closer at least!!![/FONT]


[FONT=Arial, sans-serif]Then there is Spot Metering. Your meter only evaluates the pixels you put your SPOT on. This works well if you can train yourself to look at the scene in terms of light and dark and decide what you want to be the middle tone. White, non-african/asian/indian etc skin is not usually middle gray It's much lighter. Think of when you convert to black and white. Is skin ever that color ^ up there? Nope. I find that your average grass is a good middle gray outside. My light oak hardwood floors indoors are a good middle of the road. For the image of Haley I would have metered Haley's skin on the back of her arm and then set my exposure to about +1 or JUST before the skin would blow out.[/FONT]


[FONT=Arial, sans-serif]So, now that you understand metering a little better and have a better friendship with your meter it'll be easier to make it do what you want it to do. [/FONT]
 
You have the basics down and know that Aperture and Shutter control light, but let's go over it just in case.

Aperture is how opened or closed the diaphragms in your lens are.
Just like a faucet. If it's wide open it lets a lot of light flow through and if it's closed down only a little flows through.
I find it easier to teach people to think that the f/ is written as % CLOSED your lens is when they are starting.
So an F/2 lens is 2% closed.
$7775923476_9dc880369f_b.jpg

The aperture is much like the iris in your eye as well...
Aperture affects focus also. Think about your eyes. If you squint down you can see more things in focus. Those of us who are getting old and blind squint so we can see in more detail. A lens that is stopped down brings more things into focus. This is your "Depth Of Field" or "depth of focus." DOF is the amount of the image from front to back that is in reasonably sharp detail.
One of the guys here used this analogy for Depth of field: Think of your DOF as a brick wall. Everything in front of the wall is not sharp and everything behind the wall is not sharp, but the thickness of the wall is what is sharp. He tells it a bit better than I do, but I'm hoping you get the gist of it here!
You can play with a DOF calculator and see for yourself how much will be in sharp focus by putting in your camera and aperture here: Online Depth of Field Calculator


SHUTTER SPEED
Shutter speed is how fast or slow your shutter opens and closes. It is written as a fraction of a second. Back to elementary math for anyone (like me) who has tossed all that out of the window...
If you have 10 pieces of a pie and you take 1 you have 1/10. If you take the same pie and cut it into 100 pieces and take 1 piece you have 1/100. The higher that bottom number the faster your shutter is working. Some cameras don't even show the 1/ any more. I don't know if yours does or doesn't, but if it does just toss the 1/ out. If you are going 10 miles an hour you're pretty slow. If you are going 250MPH you are moving a bit faster.
If your shutter is open for a long time or 1/10 of a second you get a lot flowing through it. If it is only open for a much smaller amount of time you get less flowing through it. Faster shutter speed=less light

Shutter ALSO controls focus creatively.
If your shutter is opened for a long time you can move, your subject can move, etc. That is recorded in the image as a blur. If your shutter opens and closes extremely fast there is no time for anyone or anything to move. Motion is stopped. Faster shutter speed stops motion. Slow shutter speed shows motion.
 
First key is to NOT throw flash in when you are learning manual. Flash changes a lot of rules and you can set nearly anything in that is underexposed and it will make your settings work for you. I know you will need to use flash to get images, this is just for when you are practicing learning how to set your manual settings.


You now need to learn to prioritize your needs and limitations.
If you are using a variable aperture lens when you are learning manual you can have a few headaches. That doesn't mean you can't do it! You absolutely can!!!
When you are using those lenses they change from f/3.5 (when you are using no zoom) to f/5.6 (when you are fully zoomed.) If you are going to be using a variable aperture zoom I usually tell people to set the camera at f/5.6 or whatever your maximum aperture is when you are fully zoomed. If you set your aperture according to the zoom the camera won't change things on you thereby messing with your settings causing the instant panic and confusion or vastly over/underexposed images. That can be tough in the winter or indoors. It's best if you can get outside in good light to really practice. You will get to the point that you can use the lower aperture on your lens and be aware of what you need, but when starting out it's best to take things that can throw you out of the mix.


First you have to have a few guidelines and know where to go with your settings.
Here a few guidelines that I follow and give to students.


Shutter-
Hand held (STILL LIFE) no lower than 1/80 on any lens less than 50mm. For any other lens equal to or greater than the the reciprocal length of the lens. Some teach that it should be TWICE the length and that's a good guide to start with-Especially if you aren't really steady holding the camera. So, a lens of 200mm you would shoot at a minimum of 1/400 shutter speed.


If the subject breathes 1/125
If it breathes and MOVES 1/250
If it breathes and runs like the wind 1/500 (I use this for football)


Aperture-
Should be equal to or greater than the number of people in the scene. If you are closer than 6-8 feet away add one more f/. (this is not a REAL scientific anything, it just kind of works by accident for depth of field) If I am shooting a couple of subjects I might push my aperture up a little bit to be safe.


ISO/ASA-Is the speed of film from back in the day. The slower the speed of the film the less you will be prone to getting noise issues in your images. The higher the ISO=more noise. That doesn't mean you can't use high ISO's, you can, but there are tricks to learn when you get really up there in the #'s. That's another tutorial.

Simply use the lowest ISO you can use and STILL GET PROPER EXPOSURE. NEVER underexpose to use a lower ISO. You'll make the noise worse by trying to bring it up in post processing.

OK... Back to exposure and the thought process I go through in setting it:
So first we have to remember middle gray... that's what the camera is trying to make
5669701760_6673f951d4.jpg


Let's go through a hypothetical shoot inside the average house. We'll be in a room with middle of the road beige carpeting and light colored walls. Not much outdoor light coming through, just the average room lights. We'll be taking pictures of the kids playing. They're not running laps around us, but they're doing SOMETHING. A DSLR camera with ISO capability up to 12800 and a prime lens of f/1.8.

To start set your camera at ISO 100 (your baseline)


What do you NEED to take this picture?
With kids shutter speed is the first thing we need to address. We have to stop them in their tracks to keep them from being one big blur. They are kids and they are moving, but not running so we need a decent shutter but not overly fast. 1/125 would probably do it, but 1/160 would be better if we can use it!!! So set your shutter @ 1/160.

Now Aperture. You could try using f/1.8. Your Depth of Field may be so shallow that you discover that the focus you thought you had nailed? Is off. You PROBABLY will need f/2.8 just to make focusing a little easier, so that is what I am going to go with. If the kids aren't close together in that wall of DOF you may need to go even higher-remember depth of field or depth of focus is controlled by aperture!


Ok, we now have 1/160ss and f/2.8. What does the meter say? Vastly underexposed? Probably not registering on the meter! LOL!


Your image is so underexposed that it's not registering on the meter, right?
You have eliminated your F/ and your SS that leaves you to start raising your ISO. You're probably going to be up around 2000+ in ISO. (I am skipping the HIGH ISO tutorial, so we'll just assume you are ok at high ISO's for now)


For this example I am going to use my Harley because I don't have little children.
5669752992_891349b49a.jpg

Notice that I have middle beige walls and tub in my bathroom. What do you think they'd look like in grayscale? Probably lighter than middle gray, right?
5669194055_0029fd15fa.jpg

Using what I know about the brightness of the room and what the camera is trying to see I would expose this so that the meter reads overexposed a bit. Or brighter than middle gray. 0 on my meter = middle gray. My scene is brighter than middle gray, so I expose brighter than that on my meter. That comparison of Harley to 18% gray is what I want your mind's eye to see in your scene every time you shoot.


Did you see how I decided what I needed from the 3? That is the process you need to think through for every INITIAL shot in a shoot.
1. What is MOST important? Here it is stopping motion.
2. What is the second most important? F/ was second because we have to get the kids in focus!
3. Your last resort!
Just starting out it might be slow to set the first setting, but after that it is pretty easy.


Here is where people get their fingers tangled in changing their settings: You don't have to change CONSTANTLY!!! Only when your LIGHT changes! AND! You don't have to always use full manual to control whatever it is you need to control. Aperture and Shutter priority are great tools if you can easily keep an eye on what the other setting is doing and make sure it remains in that safe zone.


Let's change that scene a little. We'll try to produce a more dramatic light photo where everything is dark but the light on the child's face. Tricky tricky!!!
4892225275_50b5cd24fa.jpg

Where to meter? If you metered the whole scene here this is the average you'd get:
5669782414_f2b2b38127.jpg

Way too dark. So now what? I'd probably meter the skin, but (KEY) I have to remember what PROPER exposure is in this instance. It probably doesn't mean metering to 0! I would want the skin to be brighter than 0 or middle gray on my meter maybe a full stop! His shirt is probably a good middle gray.


*****Most of the time metering isn't making 0, it's making proper exposure for the situation.*****


These are tutorials I have posted elsewhere so some of you have seen them before. I have tweaked them, but the basics are all the same!


I have had people ask me how I got that gray average of everything so I wanted to add that... Convert the image to grayscale and in photoshop use Filters>blur>average.


The first question always is: What happens when I can't go any more in my ISO, f/ or shutter speed and be safe? That's when you NEED flash. That is a whole new ball of wax to open and that situation isn't one you should be concentrating on for your learning the basics steps. If you find yourself in that situation and need to make exposure set your settings just like we did here. When the meter says you are underexposed turn on your flash and go. Just remember that those settings are a little different because you didn't make exposure, you let the flash and camera take over when you hit the limit.
 
Whew.. that is a lot and some of it is a very cut up part of a much larger tutorial, so ask if I have confused you!
 

Most reactions

New Topics

Back
Top