Sony a6400

VidThreeNorth

No longer a newbie, moving up!
Joined
Oct 21, 2016
Messages
1,151
Reaction score
199
Can others edit my Photos
Photos NOT OK to edit
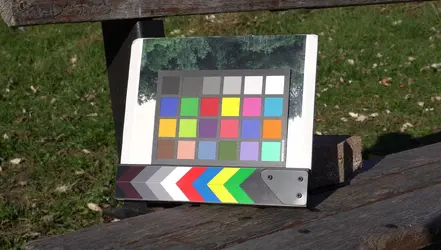
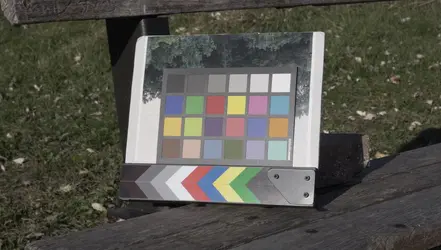
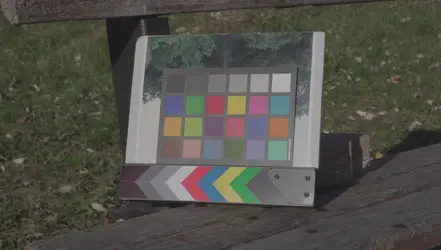
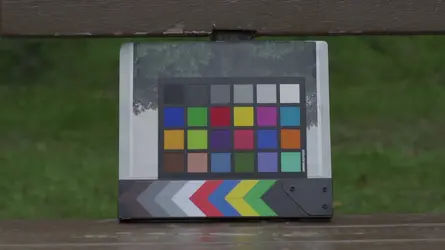
Sony a6400, Firmware version 2.00 w/SELP1650 Lens
[2020-11-08 23:08 added above subtitle.]

In the early part of the year I decided that for video, I would buy a Panasonic G95 and a Sony a6400, and a couple of expensive lenses. The was going to be the core, around which I would add accessories like a good tripod and microphone, and other accessories. Not much went as planned. I got the G85 instead of the G95, and a couple of good mics and a good tripod with a powered pan and tilt head, and that was good.

Then things went badly wrong with a particular store, which failed to honor a sale price. Months after I was supposed to have my a6400, I still had all the my money -- I was not ripped off in that sense, but the opportunity to get a good price (the Sony Spring sale) was over. The situation put me in a generally bad mood, and I looked around for alternatives. A good price on the Sony FDR-AX53 camcorder came up and I settled on buying that instead. It was a major change in plans. I still set aside money for a good lens or two for the G85, but I was re-thinking my kit.
[2020-10-17 18:16 slight re-write.]

The AX53 camcorder is weak on the wide-angle end. I was already "adequately" covered on the wide angle end, with the Panasonic 12-60mm 3.5-5.6 kit lens effectively covering down to a full-frame camera 24mm equivalent view. I also had my 8mm SLR Magic lens that, actually, for video really does work well enough within its limits (essentially limited to F8.0 and optically "ok" but not great). I could still get something nice to improve that coverage.

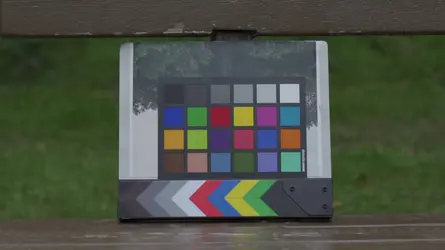
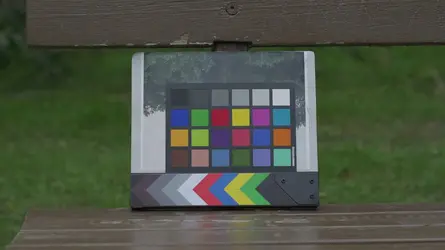
Then the "semi-unexpected" happened. I found an a6400 at a slightly better price than the Spring Sony sale. It was the camera I had planned, and the better price was nice, but despite its advantages -- even over my current setup with the G85 and the AX53, I simply did not really need it now. The main advantage now is the better auto-focus system. Beyond that, it has better stills resolution, better dynamic range, the flip up screen, better mic placement, weather resistance (not generally as good as the G85, but definitely better than the AX53) and the Sony "Picture Profiles", including Log gammas. But none of that is really critical. And buying it meant using up the money I had left for the better lenses and further accessories for this year.

So I was not enthusiastic about buying the a6400 at this point. But thinking about it, I could see that someday later, I would might find its advantages useful. And now, with less chances to work on my preferred projects, I have time to start learning how to use the "Picture Profiles" -- which is not going to be an easy topic for me.

That is what I have done. For now, I am still busy learning to use the AX53 and the G85 for video, so I have decided to use the a6400 mainly as a stills camera. As such, I will not be posting much about my (almost non-existent) experiences using it for video. Occasionally, I might have something to post here. But if there are questions about this camera, I might have a better chance of answering than otherwise.

What a strange year. . . .
 
Last edited:
As a "studio camera", whether for stills or for video, the flip-up screen can be handy for a quick setup. I have a small HDMI screen which I can use, but, for a horizontal layout, the a6400 screen will often be enough. It also allows me to avoid plugging a cable into the easy-to-damage "micro-HDMI" port.
[2020-10-17 18:12 clarification.]

Here I've pictured a fake setup where a front facing display can help. Setting up lighting around a small table display can be done more quickly when one does not have to walk back behind a camera to see what has been done.

Picture taken on my GF3 with a quick process in Corel Paintshop Pro.
 

Attachments

  • P1020012d-smrtfx.jpg
    P1020012d-smrtfx.jpg
    1.3 MB · Views: 141
Last edited:
a6400, Picture Profiles, SLOG2, Stills

I have been keeping an eye on LOG profile issues for quite a while now. I was not trying to learn it all. Since I did not have a camera using any particular Log profile (unless you count Panasonic CineLikeD as a Log). But I was fairly sure I understood the issues and particularly, what was causing them and generally, what to do about them. I felt that the bulk of the problem was coming from the fact that people were trying to stretch 8-bit colour too much.

So a while back I made the general comment that if you are starting with an 8-bit camera file and aiming at an 8-bit distribution file, then you should try to come reasonably close to your final "look" while you are recording (my wording is probably not exact).

There have been a few attempts to correct the issues with varying results. I will post one right now, and eventually another that I expect will probably work. There may be more, but I am not really that interested in continuing on researching this. Simply put, I will only look further until I find a couple of solutions that work well enough for me.

The following video by "DSLR Video Shooter" (Caleb Pike) is one that explains the problems and proposes changes that I expect will work well enough. However, I probably will not end up using it unless or until I start using something other than Pinnacle for processing. Actually, I expect to start using DaVinci Resolve eventually. The problem with Pinnacle is that the interface for these corrections does not correspond with the controls in other programs -- even with Corel Paintshop Pro, and the analytical tools I need are also not present. So although I can come close to a target "look", it is difficult to get exactly what I want.

"Why Sony Video Color SUCKS and How to FIX IT!",
Posted Sep 15, 2020 by "DSLR Video Shooter", [Length 7:15]
""

But I have set up my a6400 the way that is recommended and will be evaluating it, at least for now, by using it for stills.

The method I am using to evaluate it is to re-define PP10 as recommended in the video, and then apply it to still pictures, and save both JPEG and raw versions of the stills. Then I can process the raw version in Paintshop Pro (or any other still processor) to create a "target" image, and then reprocess the camera's JPEG and see if I can come close to the target, or maybe even produce a picture that I prefer over the "target".

I am uploading a pair of files as an example of this.

"V3N00078 -1b-rsz1080-C4.jpg"
- this version was created directly from the raw file, mainly based on Corel PaintShop Pro "Smart Photo Fix" recommendations

"V3N00078-PP10-C2.JPG"
- this version was created by the camera using the custom "Picture Profile" described by "DSLR Video Shooter" in the above video.

So I will be trying to adjust the version created by the custom picture profile to either look like the version I created from the raw version, or perhaps even better.

[2020-11-07 19:21]
I have added another pair of files showing a processed raw and the PP version, this is just to add a little variety.

"V3N00044-raw4-rsz2156-C3.jpg"
- the processed raw, adjusted to my taste.

"V3N00044-slog-rsz1920-C1.JPG"
- the modified S-Log2 version created by the camera.

[2020-11-17 16:25 Uploaded "V3N00044-slog2-GIMP-Histgrm.jpg"
The histogram shows a lot of extra room at either end despite having a very high dynamic range with the bright clouds in the sky and dark shadows down around the river bank.]
 

Attachments

  • V3N00078 -1b-rsz1080-C4.jpg
    V3N00078 -1b-rsz1080-C4.jpg
    706.1 KB · Views: 105
  • V3N00078-PP10-C2.JPG
    V3N00078-PP10-C2.JPG
    563.1 KB · Views: 110
  • V3N00044-raw4-rsz2156-C3.jpg
    V3N00044-raw4-rsz2156-C3.jpg
    663.1 KB · Views: 109
  • V3N00044-slog-rsz1920-C1.JPG
    V3N00044-slog-rsz1920-C1.JPG
    455.6 KB · Views: 103
  • V3N00044-slog2-GIMP-Histgrm.jpg
    V3N00044-slog2-GIMP-Histgrm.jpg
    60.3 KB · Views: 123
Last edited:
I researched the basics of the Picture Profiles and I have Sony's official general descriptions of the intentions of each profile. In order to better understand them, I decided to list out the options for a Picture Profile and the two main parameters in the default settings:

Default Picture Profile List:
[2020-12-08 14:32 added "Base ISO" values. Actually, I could not find confirmation that these are the "Base" ISOs. They are the lowest that are manually settable for each of my current PP settings. That tends to mean that they are the "Base" ISO settings, but not necessarily, so I might be wrong.]

PP1
--Black Level 0
--Gamma Movie
--Black Gamma
----Range Middle
----Level 0
--Knee
----Mode Auto
----Auto Set
------Max Point 100%
------Sensitivity Mid
----Manual Set
------Point 95%
------Slope 0
--Color Mode Movie
--Saturation 0
--Color Phase 0
--Color Depth
----R 0
----G 0
----B 0
----C 0
----M 0
----Y 0
--Detail
----Level 0
----Adjust
------Mode Auto
------V/H Balance 0
------B/W Balance Type3
------Limit 7
------Crispening 0
------Hi-Light Detail 0
--Copy [PP2 etc]
--Reset
"Base ISO" 100
[2020-11-07 01:26 Re-done: the forum text editor removed my formatting spaces, so I replaced them with dashes]
[2020-11-08 23:03 Corrections: I missed some data in the original post. Now it is complete.]


[NOTE: Because of the number of parameters possible I decided not to record them all for each Picture Profile. Instead, I have removed everything except the "Gamma" and the "Color Mode" for the other Picture Profiles in this list. The parameters are there, I am just leaving them out for now. If you change them in a particular "PP", then to get the defaults back, just select the "Reset" for that PP. Right now, I am now sure whether the "Copy" option is to "Copy to" or "Copy from". Eventually I will have to test it and see.]

PP2
Gamma Still
Color Mode Still
"Base ISO" 100

PP3
Gamma ITU709
Color Mode Pro
"Base ISO" 100

PP4
Gamma ITU709
Color Mode ITU709 Matrix
"Base ISO" 100

PP5
Gamma Cine1
Color Mode Cinema
"Base ISO" 100

PP6
Gamma Cine2
Color Mode Cinema
"Base ISO" 100

PP7
Gamma S-Log2
Color Mode S-Gamut
"Base ISO" ?

PP8
Gamma S-Log3
Color Mode S-Gamut3.Cine
"Base ISO" ?

PP9
Gamma S-Log3
Color Mode S-Gamut3
"Base ISO" 500

PP10
Gamma HLG2
Color Mode BT.2020
"Base ISO" ?

Sony's General Descriptions for the Default PP's (what they intended)

"Picture Profile presets

PP1
Example setting using the [Movie] gamma
(Standard setting for movies when not using Picture Profile)

PP2 Example setting using the [Still] gamma
(Standard setting for still images when not using Picture Profile)

PP3 Example setting for natural color tone using the [ITU709] gamma
PP4 Example setting for a color tone faithful to the ITU709 standard
PP5 Example setting using the [Cine1] gamma
PP6 Example setting using the [Cine2] gamma
PP7 Recommended setting for shooting with the [S-Log2] gamma.
This preset is a combination of the [S-Log2] gamma and the [S-Gamut] color mode.

PP8 Recommended setting for shooting with the [S-Log3] gamma and the [S-Gamut3.Cine] color mode.
This preset is a combination of those two configurations.

PP9 Recommended setting for shooting with the [S-Log3] gamma and the [S-Gamut3] color mode.
This preset is a combination of those two configurations.

PP10 Example setting using the [HLG2] gamma and the [BT.2020] color mode
  • When you shoot images using S-Log gamma, select among the PP7, PP8, and PP9 presets for shooting. "
---
[2020-1107 15:11]

The following are lists of all the "Gamma" and "Color Mode" options for the Picture Profiles in the a6400. Apparently the PP options might be a bit different from camera to camera, and maybe from firmware version to firmware version. For example, I have heard of "S-Log" and "S-Log1" Gammas which were available on at least one other camera in the past. Neither is on the Sony a6400 version 2.0.

Gamma: (14 options)
Movie, Still, Cine1, Cine2, Cine3, Cine4,
ITU709, ITU709(800%), S-Log2, S-Log3,
HLG, HLG1, HLG2, HLG3

Color Mode: (11 options)
Movie, Still, Cinema, Pro, ITU709 Matrix,
Black & White, S-Gamut, S-Gamut3.Cine,
S-Gamut3, BT.2020, 709
 
Last edited:
More About the Picture Profiles:

There is more information about the Picture Profiles online. I think that a good place to start is:

"Setting basic contrast/coloring (Gamma/Color Mode)"
"| Help Guide for Creators | Setting basic contrast/coloring (Gamma/Color Mode)"

As I wrote above, there is too much for me to look into in detail. As I have mentioned before, I do not intend to study PP's in depth. Instead, I intend to find a couple of settings I like and get to know them as best as I can, and probably limit myself to using that much.

The second setting that I will be looking at is in "The Hybrid Shooter"'s review of the a6400.

"Sony A6400 Review + Thoughts about Sony A6600",
Posted Sep 12, 2019 by "The Hybrid Shooter", [Length 15:57]
""

At ~07:00 he mentions his custom version of PP8 (Gamma changed to Cine4). I have a feeling that this might turn out to be my "general use" setting. If this is what he was referring to in his G85 review, then it should suit me well. I have been using his "modified Natural" setting in my G85 and it has worked well on that camera, and he describes that setting as an attempt to come close to the setting he uses in the a6400. This seems to be the setting he was referring to in that video.
 
My Current Picture Profile Settings on my A6400

For now, I have reset all the Profiles and then changed PP7 to the "DSLR Video Shooter" S-Log2 w/ITU709 Matrix, and PP8 to "Hybrid Shooter's" Cine4 w/S-Gamut3.Cine. I am planning to use "PP9" in the future to test other new combinations that might be useful.

"PP10", for now is being left standard (HLG2 w/BT.2020), though in the future, I might change it to another HLG combination. I think it might be a good idea for me to record some clips in a setting that can, at least theoretically be for newer HDR TVs fairly directly. I do not have such a TV right now, so this is another idea I might abandon fairly soon.

About This Set of Tests:

This set of tests was done primarily to evaluate the two custom settings I am using for my PP7 and PP8 (see the above note about "My Current Picture Profile Settings . . ."). Beyond that, it is the first time I am looking at an HLG setting (PP10) which is intended for fairly direct viewing on a High Dynamic Range TV. All the files in this set are EV = 0.0.

About the Uploaded Frame Samples:

I recorded the "control" clips in Full HD, but all the a6400 clips were UHD @ 60 mbps. As I write this, I plan to upload versions of the frame captures all in 1920 x 1080, since I was concerned with the gammas and the colours, which will not be affected by the reductions. In retrospect though, after months of uploading sample captures from many cameras, I wish I had uploaded more "full resolution detail crops". While I don't want to comment on general image quality which is generally more dependent on particular lenses, noise levels are important, and in this case, particularly relevant when deciding on usability of the lower contrast modes. Researching experiences using S-Log2 in particular, just about everyone comments on bad shadow noise performance, and most recommend "exposing to the right", often to an extreme level. Pictures I have taken, and these sample frames, definitely confirm that the noise level is an important consideration. If I only upload reduced samples, you will not have the opportunity of seeing how bad the noise actually is, unless you do some further research on your own.


"Sa5k-00002-Nat-EV0-15h44m46s198-C1.jpg"

- from Sony a5000, Natural, EV=0, no modifications

The "Control" for this test was my Sony a5000 using its "Natural" picture mode with no changes. As I recorded this, the zebra (set to 100%) was showing, so I followed it up with another at EV = -1.

I also recorded a second clip at EV= -1.0 but looking at the numbers for this clip, it does not look like I will need the second clip. There is no clipping at either end of the gamma here.

"black" Luma: 68.5
"black + 1" Luma: 91.7
"black + 2" Luma: 135.0
"white - 2" Luma: 178.4
"white - 1" Luma: 214.9
"white" Luma: 242.4

Contrast = 214.9 - 91.7 = 123.2


"Sa64c-C0004-PP1-Movie-EV0-16h39m02s254-rsz-C1.jpg"

This baseline setting PP=Off with EV = 0.0 is Sony's version of "rec709". The "white" chip was completely clipped with every pixel I measured at 255 for all colours.

"black" Luma: 85.9
"black + 1" Luma: 107.7
"black + 2" Luma: 150.9
"white - 2" Luma: 201.1
"white - 1" Luma: 245.9
"white" Luma: 255.0 (Clipped)

Contrast = 245.9 - 107.7 = 138.2


"Sa64c-C0007-PP7-SLog2-EV0-19h30m41s189-rsz-C1.jpg"

This is my modified PP7 using S-Log2 with ITU709 Matrix as recommended by "DSLR Video Shooter".

"black" Luma: 64.1
"black + 1" Luma: 73.9
"black + 2" Luma: 92.4
"white - 2" Luma: 110.8
"white - 1" Luma: 128.0
"white" Luma: 144.6

Contrast = 128.0 - 73.9 = 54.1


"Sa64c-C0010-PP8-Cine4-EV0-19h57m12s971-rsz-C1.jpg"

- Cine4, S-Gamut3.Cine, EV = 0.0

This setting is almost noise free from "white" down to "white - 1", and then noisy, but still not visibly, to "black + 2", and then moderately noisy down to "black". Unfortunately, I don't know of any standard that can be used to quantify this opinion -- at least not yet. If I find one, then I might have to re-evaluate this comment. The bottom line is that it looks more generally usable than S-Log2, both from the generally low noise level and because it should handle colour corrections.


"black" Luma: 84.4
"black + 1" Luma: 106.5
"black + 2" Luma: 142.3
"white - 2" Luma: 181.9
"white - 1" Luma: 206.9
"white" Luma: 226.3

Contrast = 206.9 - 106.5 = 100.4


"Sa64c-C0013-PP10-HLG2-EV0-20h30m42s078-rsz-C1.jpg"

HLG2 w/BT.2020. The HLG settings are intended for fairly direct display on HDR TV's. I do not have such a TV, so I cannot judge how well that works. But as a general colour mode, subject to post production, it does look fairly usable.

"black" Luma: 70.6
"black + 1" Luma: 85.6
"black + 2" Luma: 114.7
"white - 2" Luma: 145.3
"white - 1" Luma: 170.9
"white" Luma: 192.6

Contrast = 170.9 - 85.6 = 85.3


"SPP-Graph01-C70.jpg"

This graph is based on the data currently completed. EV = 0.0 for all the tests so far. It was interesting to see that the only set of data that "clipped" was the "PP1"/PP="Off" default "Movie" setting. The default "Natural" setting for the a5000 which was the Control had enough dynamic range to cover it.

Looking at this much, I think that the "modified PP8" using Cine4 and S-Gamut3.Cine certainly does look adequate for general use. However, PP10 "HLG2 and BT.2020" does not look bad either, though I would probably replace "BT.2020" with "ITU709 Matrix" if that is possible.

Regarding the "modified PP7" using S-Log2 with ITU709 Matrix, looking at how low it is on the graph, clearly there is a lot of room for raising the exposure. The captured frame was certainly noisy. The general advice I have heard for dealing with the noise is to "expose it to the right". Some people are using it by setting the zebra at 95% and then adjusting exposure to just below the point where the zebras appear. I ran into a suggestion to over expose by about 2 stops. It looks like either will work.

[2020-11-18 14:34]
I apologize for my clumsiness. There is a small error in the above graph. The "PP1" end point at the "white" was put at 250 instead of at 255, which is clipped. But I used a broken line to indicate that it was not a trustworthy data-point anyway. I have always done that when the values were clipped. I am not planning on posting a corrected graph because there is no practical effect and so it is not worth the effort. Just ignore the broken line section.
 

Attachments

  • Sa5k-00002-Nat-EV0-15h44m46s198-C1.jpg
    Sa5k-00002-Nat-EV0-15h44m46s198-C1.jpg
    408.3 KB · Views: 116
  • Sa64c-C0004-PP1-Movie-EV0-16h39m02s254-rsz-C1.jpg
    Sa64c-C0004-PP1-Movie-EV0-16h39m02s254-rsz-C1.jpg
    531.7 KB · Views: 106
  • Sa64c-C0007-PP7-SLog2-EV0-19h30m41s189-rsz-C1.jpg
    Sa64c-C0007-PP7-SLog2-EV0-19h30m41s189-rsz-C1.jpg
    252.4 KB · Views: 116
  • Sa64c-C0010-PP8-Cine4-EV0-19h57m12s971-rsz-C1.jpg
    Sa64c-C0010-PP8-Cine4-EV0-19h57m12s971-rsz-C1.jpg
    424.5 KB · Views: 112
  • Sa64c-C0013-PP10-HLG2-EV0-20h30m42s078-rsz-C1.jpg
    Sa64c-C0013-PP10-HLG2-EV0-20h30m42s078-rsz-C1.jpg
    381.5 KB · Views: 111
  • SPP-Graph01-C70.jpg
    1.9 MB · Views: 97
Last edited:
Sony a64c Picture Profiles, Part 2

All the sample clips I recorded for the previous report and this one were recorded in the same session. On the one hand, that gave me the benefit of having consistent light conditions due in part to the clear skies, and also because the time frame was fairly short, so the angle of the sun was very similar between clips that were related. Unfortunately, there was a small negative to doing it this way. When I record over multiple sessions, sometimes I see something in one clip that points me to a change I want to test in a later clip. But when I record a large group in a short time span, I do not have the opportunity to look at them.

In this case, I correctly anticipated that I would need the increased exposure versions of S-Log2, and the decreased exposure of PP1, but I did not anticipate that it would also be beneficial to try increased exposure for PP10 and maybe also for PP8. Instead, I went down a stop for the extra clips for those profiles. While I did get useful information from all my recording tests, in retrospect, I would have done better to replace a couple of the files. I will probably do more testing someday later, but probably not this year.


"Sa64c-C0005-PP1-Movie-EVmns1-46m43s270-Rsz1920-C1.jpg"
- PP1 (same as PP = "OFF"), Movie/Movie, EV = -1.0

"black" Luma: 52.5
"black + 1" Luma: 69.0
"black + 2" Luma: 101.6
"white - 2" Luma: 138.5
"white - 1" Luma: 179.3
"white" Luma: 221.7

Contrast = 179.3 - 69.0 = 110.3

Decreasing the EV decreased the contrast quite a bit. I have seen that before. For this lighting situation, EV = -1 is about right for this profile. If you check the sample frame in a histogram you will see that the blacks actually did get into clipping range. This is not a profile that I will use on a sunny day.


"Sa64c-C0008-PP7-SLog2-EVplus1-02m04s789-rsz1920-C1.jpg"
- PP7: S-Log2, 709 Matrix, EV = +1.0

"black" Luma: 83.3
"black + 1" Luma: 96.8
"black + 2" Luma: 115.6
"white - 2" Luma: 136.4
"white - 1" Luma: 154.2
"white" Luma: 171.4

Contrast = 154.2 - 96.8 = 57.4

This clip and the next explore what I expect might be the way I will actually use S-Log2. As I wrote before, the most common suggestion has been to "expose to the right" using a 95% zebra as a limit, but I also ran across a comment that "EV = +2.0" was a useful setting. So I decided to test "EV = +2.0". I am testing "EV = +1.0" in this clip as an intermediate step, in order to understand the way things are changing. Combining the data, I might be able to predict what will happen if I make other changes.


"Sa64c-C0009-PP7-SLog2-EVplus2-18m17s345=rsz1920-C1.jpg"
- PP7: S-Log2, ITU709 Matrix, EV = +2.0

"black" Luma: 106.6
"black + 1" Luma: 120.6
"black + 2" Luma: 141.8
"white - 2" Luma: 163.1
"white - 1" Luma: 182.6
"white" Luma: 199.4

Contrast = 182.6 - 120.6 = 62.0

The results of the "S-Log2" tests surprised me. The "Contrast" that I calculated did not change substantially between EV = +0.0, +1.0 and +2.0. The histograms did not substantially change except that they shifted to higher values (to the right). I will try to check the number of actual colours in each frame. Regarding gamma, it does not appear that there was any differences between the images except for the shift "upwards." The main advantage of exposing to the right should be to decrease noise.


S-Log2 and Noise:

This set of tests was not intended to look at noise issues and it is not well suited for serious conclusions. First, I did not reduce the "detail" parameter which is the main control for sharpening, and also affects noise. There might be another control that affects noise too, but I have not looked that far into the settings. Second, the test settings used were 4k, 30 fps, 60 mbps and otherwise, auto. If I had used 100 mbps, then there could be slightly higher noise, or 1080p resolution might also reduce noise, if pixel data is aggregated in any way. However, I might have a good indication of noise control due to exposure, so I will see what I have:

"Sa64c-C0007-PP7-EV0-19h30m41s189.png"
- PP7: S-Log2, ITU709 Matrix, EV = 0.0 [not posted]

"black"
Red:
65, 67, 63, 65, 68,
Green:
63, 63, 61, 63, 64
Standard Deviation: 0.9797959 ?
Blue:
64, 64, 62, 64, 65

"Sa64c-C0008-PP7-SLog2-EVplus1-23h02m04s789.png"
- PP7: S-Log2, 709 Matrix, EV = +1.0 [not posted]

"black"
Red:
86, 83, 82, 84, 88,
Green:
82, 81, 80, 82, 86
Standard Deviation: 2.0396078 ?
Blue:
83, 82, 81, 83, 87

"Sa64c-C0009-PP7-SLog2-EVplus2-23h18m17s345.png"
- PP7: S-Log2, ITU709 Matrix, EV = +2.0 [not posted]

"black"
Red:
108, 105, 107, 107, 109,
Green:
106, 105, 105, 105, 109
Standard Deviation: 1.5491933 ?
Blue:
107, 105, 106, 106, 109

From this much, the Standard Deviation results don't seem to indicate a consistent reduction in noise for increased exposure. I don't have time to pursue this issue right now, so this is as far as I will examine the issue. If anyone "sees something" in this data, then mention it.


"Sa64c-C0011-PP8-Cine4-EVmns1-42m39s257-rsz1920-C1.jpg"
- PP8: Cine4, S-Gamut3-Cine, EV = -1.0

"black" Luma: 57.0
"black + 1" Luma: 72.7
"black + 2" Luma: 101.3
"white - 2" Luma: 131.5
"white - 1" Luma: 167.3
"white" Luma: 193.8

Contrast = 167.3 - 72.7 = 94.6

Comparing the results of this file with "C0010" which used "EV = 0" I think that if I had used "EV = +1.0" instead, the "white" might have clipped. I think "exposing to the right" might have given me another 1/3 stop for this scenario, but that is about all. So "C0010" probably turned out to be good for this situation.


"Sa64c-C0014-PP10-HLG2-EVmns1-56m33s697-rsz1920-C1.jpg"
- PP10: HLG2, BT.2020, EV = -1.0

File "013" had a lot of room for higher exposure and I think I should have tried EV = +1.0 instead of this file, but since this is the only other file I made for PP10, I decided to at least get the data from it.

The saturation on this setting is higher than I like, so I was hoping that I might be able to use it with "ITU709 Matrix". But "ITU709 Matrix" is not available for HLG2. There is a "709" setting available. After this set of files was created, I changed PP10 to use Color Mode "709". As I write this, I have not used it yet.
[2020-1127 15:52
After seeing Gerald Undone's gamma tests from the A7iii and reading Sony's descriptions of HLG2 and HLG3, I have decided to skip past my use of HLG2 w/"709" for now and I have set PP10 to "HLG3" w/"709". As Gerald Undone said, and confirmed by Sony, the main difference between "HLG2" and "HLG3" is that the very highest brightness range is compressed. About all this does is help when sky is present. Bright clouds and the sun will be brought down. So I skipped the HLG2 w/"709" setting without having used it to record any pictures or video. I might return to testing it someday, but it will not be a priority.]

"black" Luma: 50.8
"black + 1" Luma: 59.9
"black + 2" Luma: 79.3
"white - 2" Luma: 105.5
"white - 1" Luma: 132.0
"white" Luma: 157.6

Contrast = 132.0 - 59.9 = 72.1

Contrast is a bit lower than the earlier file which might mean that a higher EV than 0.0 would have an even higher contrast, but I think it would still prove acceptable, and probably just a bit lower than the "C9010" file ("Cine4").

The more I see of this, the more I think I might prefer HLG2 over Cine4. Also, I am starting to get curious about the other "Cine" gammas. Unfortunately, I don't have the time to push ahead with more research right now, so maybe next year. . . .


"Sa64c-PP-Graph02-C65.jpg"

This graph shows the gammas from my tests of PP1 and PP10 at EV = 0.0 and EV = -1.0. In this file the "PP1" line ends correctly at 255.

"Sa64c-PP-Graph03-C69.jpg"

This graph shows the gammas from my tests of PP7 and PP8.

[2020-1126 20:40]
"Sa64c-C0008-PP7-SLog2-EVplus1-GHist.png"
This is the histogram from the capture from the "C0008" video file which is the "PP7, S-Log2" at EV = +1.0. If I find the files for EV = 0.0 and/or EV = +2.0 then I might also upload those later. Really, the main thing to observe is that all these particular histograms look essentially alike except they shift to the right as exposure increases. In my opinion, I do not see the tightness of the histogram as appropriate for the situation. The real result is that in post, the colours will get stretched out risking banding. For this 8-bit colour situation, gammas like S-Log2 should only be used when necessary.
 

Attachments

  • Sa64c-C0005-PP1-Movie-EVmns1-46m43s270-Rsz1920-C1.jpg
    Sa64c-C0005-PP1-Movie-EVmns1-46m43s270-Rsz1920-C1.jpg
    457 KB · Views: 102
  • Sa64c-C0008-PP7-SLog2-EVplus1-02m04s789-rsz1920-C1.jpg
    Sa64c-C0008-PP7-SLog2-EVplus1-02m04s789-rsz1920-C1.jpg
    338 KB · Views: 124
  • Sa64c-C0009-PP7-SLog2-EVplus2-18m17s345=rsz1920-C1.jpg
    Sa64c-C0009-PP7-SLog2-EVplus2-18m17s345=rsz1920-C1.jpg
    342.5 KB · Views: 114
  • Sa64c-C0011-PP8-Cine4-EVmns1-42m39s257-rsz1920-C1.jpg
    Sa64c-C0011-PP8-Cine4-EVmns1-42m39s257-rsz1920-C1.jpg
    369.7 KB · Views: 99
  • Sa64c-C0014-PP10-HLG2-EVmns1-56m33s697-rsz1920-C1.jpg
    Sa64c-C0014-PP10-HLG2-EVmns1-56m33s697-rsz1920-C1.jpg
    337.2 KB · Views: 120
  • Sa64c-PP-Graph02-C65.jpg
    1.9 MB · Views: 87
  • Sa64c-PP-Graph03-C69.jpg
    1.9 MB · Views: 91
  • Sa64c-C0008-PP7-SLog2-EVplus1-GHist.png
    Sa64c-C0008-PP7-SLog2-EVplus1-GHist.png
    19.5 KB · Views: 140
Last edited:
Sony Picture Profiles Across Sony Line:

I cannot make a real comment about the whole line of Sony products, but the there is a reason why I went to the trouble of doing a documented "partial range" gamma test for this particular model. There were a couple of good tests around, but only for full frame Sony cameras.

Gamma performance starts with the sensors, not the profile definitions. But the profile definitions can be tuned to the sensor and the support circuitry. While Sony's PPs might have the same names from one body to another, there is good reason to expect that, at the least, an APS-C sensor based body is not going to give the same results as a full frame sensor. Moreover, the latest Sony A7Siii is not going to be the same as the older 24MP A7iii.

Anyway, I have not tried to compare the a6400 with other Sony bodies to see how the Picture Profiles actually compare yet, and I don't know if I ever will. Maybe someone else will do it. Meanwhile, here is Gerald Undone's look at the gammas from the Sony a7iii -- probably their most successful full frame body so far:

"Sony Picture Profiles & Dynamic Range Guide (Cine vs S-Log vs HLG)"
posted Feb 11, 2019 by "Gerald Undone", [Length 16:18]
""
 
PP10, HLG3/709 Report

As I mentioned above, I have decided to redefine Picture Profile 10 on my a6400. I have set it to HLG3 gamma with 709 color space. I have not done a video file test yet, but I did use this for some still pictures. I think I was right about this combination. It should do well for most of my general video work, leaving my modified PP7 (S-Log2 with "ITU709 Matrix") for more extreme conditions. In fact, for the sample images I am uploading, I did not bother with the ARAW files at all. I simply made adjustments to the camera's JPEGs.

Samples: (6 pairs}
- for each pair, the "a" file is the camera's JPEG resized.
- the "b" file is adjusted to my taste. All adjustments done in Corel PaintShop Pro X9 "Smart Photo Fix"


"V3N00140a-rsz1920-C1.JPG"
"V3N00140b-SmFx-rsz1920-C2.jpg"

- road dividers

This was the first picture with this setting. Right from this file I could see that this setting was going to be fine. The dynamic range from the shadows in the background to the bright sun-lighted near-whites are enough for most of my videos. Also, the camera JPEGs are very close to a "final", so they are easy to judge.

Corel PS Pro X9 Smart Photo Fix Settings:
Brightness
Overall 28
Shadows -10
Highlights 20
Saturation 16
Focus 54
White Balance No
Black 2
White 26


"V3N00152a-rsz1920-C2.JPG"
"V3N00152d-SmFix-rsz1920-C2.jpg"

- sun and clouds

This file has the sun in the picture and is the worst case for dynamic range. I think it was the only one taken with an EV adjustment (EV = +1). The sun is partly obscured by clouds but is nearly full strength. Checking the original file's histogram showed a good use of the luma range, almost but not quite down to 0-black and just short of 255-white.

For the rest of the life of the camera, I might not run into a situation worse than this. So it is quite possible that I might never actually need to use S-Log2. I might use S-Log2 in some cases just to be sure, but compared to this, it does look like overkill. In fact, it is possible that HLG3 already exceeds the limits of the sensor which for me, would clearly make S-Log2 superfluous.

Here I have "faked HLG2" by holding down the whites and highlights, and I retained the shadow detail by not adjusting the blacks. Really, at this point there was not much to learn about this setting combination and I could have stopped here. Yes, a bit less lens flare would have been nice.

Smart Photo Fix
Brightness
Overall 28
Shadows 0
Highlights -10
Saturation 16
Focus 46
White Balance No
Black 0 [recommended 10]
White 0 [recommended 10]


"V3N00158a-rsz1280-C1.JPG"
"V3N00158b-SmFix-rsz1280-C2.jpg"

- backlighted plants

This picture, again, might have benefitted by using HLG2 which brings down the sky (sun and clouds), but in most cases I should be able to replicate that effect in post. In retrospect, I think a bit more depth of field might have been nice. ISO-250 or 500 should still be good for stills or in video.

Partial EXIF:
F-stop f/5.6
Exposure time 1/60 sec
ISO speed ISO-125
Exposure bias 0 step
Focal length 36 mm

Smart Photo Fix
Brightness
Overall 28
Shadows -10
Highlights 20
Saturation 33
Focus 58
White Balance No
Black 16
White 8


"V3N00170a-rsz1280.-C1JPG.jpg"
"V3N00170b-SmFix-rsz1280-C1.jpg"

- red leaves

From this picture onward I switched from "Auto" white balance to "daylight" to preserve some of the "golden hour" warmth. The difference is small enough to cover in post, but doing it this way is just another adjustment I can skip later. Same comment as above about depth of field.

Partial EXIF:
F-stop f/5.6
Exposure time 1/60 sec
ISO speed ISO-125
Exposure bias 0 step

Smart Photo Fix
Brightness
Overall 28
Shadows -10
Highlights 20
Saturation 17
Focus 74
White Balance No
Black 4
White 16


"V3N00174a-rsz1920-C2.JPG"
"V3N00174b-SmFix-rsz1920-C4.jpg"

- Tall grasses by the river

I could have pushed the saturation a touch further, or maybe shifted the colour to be more "golden" but this simple adjustment was fine.

Smart Photo Fix
Brightness
Overall 28
Shadows -10
Highlights 20
Saturation 28
Focus 48
White Balance No
Black 4
White 24


"V3N00184a-rsz1920-C3.JPG"
"V3N00184b-SmFix-rsz1920-C4.jpg"

Park bench

This picture, again, might have benefited by using HLG2, to keep the sky in-bounds. But bringing highlights down in post, again proved sufficient.

Smart Photo Fix
Brightness
Overall 28
Shadows -10
Highlights 0 [recommended 20]
Saturation 15
Focus 40
White Balance No
Black 12
White 0 [recommended 18]


Conclusions:

Aside from what I have written above, I suppose I can add that I am not wildly happy about the lens. It was designed back when 16 Megapixels were considered good. At 24 MP it's being pushed, but realistically, it is still fine for 4K video, and I like the convenience of the size, stabilization and the power zoom.

S-Log2 could be useful for productions using multiple Pro video cameras where S-Log2 is commonly used and thus, a standard workflow makes it convenient. But from what I have seen so far, I have doubts about whether using it would actually do me any good. If I need more dynamic range that I have seen from HLG3 so far, I might still do better by adjusting HLG3's internal parameters. That is something I have not even seen discussed. How far can I adjust the contrast from the base setting? Eventually, I will probably get around to finding that out.

I think I might just use this as my personal "base setting" for both video and stills. The results have been pretty good so far.
 

Attachments

  • V3N00140a-rsz1920-C1.JPG
    V3N00140a-rsz1920-C1.JPG
    393.4 KB · Views: 98
  • V3N00140b-SmFx-rsz1920-C2.jpg
    V3N00140b-SmFx-rsz1920-C2.jpg
    524.3 KB · Views: 102
  • V3N00152a-rsz1920-C2.JPG
    V3N00152a-rsz1920-C2.JPG
    667.3 KB · Views: 92
  • V3N00152d-SmFix2-rsz1920-C2.jpg
    V3N00152d-SmFix2-rsz1920-C2.jpg
    742.7 KB · Views: 93
  • V3N00158a-rsz1280-C1.JPG
    V3N00158a-rsz1280-C1.JPG
    391.5 KB · Views: 95
  • V3N00158b-SmFix-rsz1280-C2.jpg
    V3N00158b-SmFix-rsz1280-C2.jpg
    531.4 KB · Views: 91
  • V3N00170a-rsz1280.-C1JPG.jpg
    V3N00170a-rsz1280.-C1JPG.jpg
    265.2 KB · Views: 93
  • V3N00170b-SmFix-rsz1280-C1.jpg
    V3N00170b-SmFix-rsz1280-C1.jpg
    359.5 KB · Views: 97
  • V3N00174a-rsz1920-C2.JPG
    V3N00174a-rsz1920-C2.JPG
    704.6 KB · Views: 92
  • V3N00174b-SmFix-rsz1920-C4.jpg
    V3N00174b-SmFix-rsz1920-C4.jpg
    882.5 KB · Views: 96
  • V3N00184a-rsz1920-C3.JPG
    V3N00184a-rsz1920-C3.JPG
    816.7 KB · Views: 92
  • V3N00184b-SmFix-rsz1920-C4.jpg
    V3N00184b-SmFix-rsz1920-C4.jpg
    967.1 KB · Views: 90
"Base ISO"s

In general terms, the "Base ISO" for an "ISO invariant" camera is the ISO which is optimal for the design. It should provided the highest dynamic range. It is usually the lowest ISO that can be set, unless the camera supports "extended" ISO settings. I went through the Picture Profiles that I currently have set and I added what I think are the "Base ISO" values back in Comment #4 above. I left 7, 8 and 10 with a question mark because I have modified those profiles and I don't have the time to make changes to my camera right now to find out what the default values would have been. But here are the settings of my modified Picture Profiles as I have them currently set:

PP7
S-Log2/ITU709 Matrix
Base ISO 500

PP8
Cine4/S-Gamut3.Cine
Base ISO 200

PP10
HLG3/709
Base ISO 125
 
Last edited:
Sony Picture Profiles (more)

I have been busy doing research on the internet and lately there have been a lot of distractions and yes, some misinformation. Even when you find the "good information", it can be hard because some things are just complicated, or there is a lot to learn. In regard to this last problem, the following post covered a lot of data. I have watched this a few times now (yes, taking notes) and I think I will just have to see it a few times more, and do some of my own testing to see how things work on my a6400. It is a major examination of Sony's Picture Profiles, but based on the a7S III:

"Sony a7S III Guide for Picture Profiles & Exposure",
Posted Oct 7, 2020 by "Gerald Undone" [Length 49:26 LONG]
""

About Sharpening and Noise Reduction:

One thing about Gerald Undone's recommendations, and also most of the other knowledgeable sources on the Net, they all recommend reducing sharpening to -7 (basically "none") and adding sharpening in post. For the Sony Picture Profiles, the "sharpening" function is part of the "Detail" parameter. It is unclear, but "Detail" probably includes some of the "noise reduction" as well as the sharpening, so I am reluctant to reduce it to "none". My approach will be to reduce it in small stages to find an optimal balance. The reason is because sharpening depends on the lenses I will be using.

So far, the only "native" mount lens I have had for my Sony's (a5000 and a6400) is the "SELP1650" 16-50 F3.5-5.6 kit zoom, which is known to be low quality zoom. Among kit zooms for the major brands (Canon, Nikon, Olympus, Panasonic, Pentax and Sony) this particular lens seems to be the worst of the current kit zooms at any price. So I assume that it probably needs more sharpening than any other lens I am likely to use on these bodies. But all my other lenses have been adapted lenses, and while I like them for occasional "leisure" photography, they are all to some extent, impractical for "serious" photography.

So if I am going to experiment with reducing sharpening, I thought that I should use a more "serious" lens as an adjustment target. After poking around a bit, I found a used Sigma 30mm F2.8 DN prime auto-focus lens. This lens, though inexpensive, is known to have very good optical performance. The auto-focus is not quite "original brand" equivalent, but it is still a lot better than my adapted lenses, and the size and weight, though not as compact as the Sony "pancake" lenses, is still quite small.
[2020-12-23 22:04 I checked the test reports for this lens and apparently it was not as good as the 60mm. It is known to have chromatic aberration issues, and sharpness was only "good" rather than excellent. I still feel it will be a good target for my adjustment of the sharpening parameter.]

I should also note that I have found that my current PP10 ("HLG3" gamma w/"709" palette) seems to work best using EV = +0.7 for general exposures, and further compensations applied as usual.

I have uploaded two versions of a test still photo taken using my current PP10 and the Sigma 30mm F2.8 DN lens on the a6400:

"V3N00198.JPG" (original camera JPEG, not uploaded)

Size: 22,347,776 bytes
Dimensions 6000x 4000
Bit depth 24
Resolution unit 2
Color representation sRGB
F-stop f/5
Exposure time 1/160 sec.
ISO speed ISO-125
Exposure bias +0l.7 step
Focal length 30 mm
Max aperture 2.96875
Metering mode Pattern
35mm focal length 45
brightness: 8.50546875

both the samples are not retouched beyond resizing or cropping:

"V3N00198a-rsz1920-C3.jpg"
- This is is to resized version of the whole image

"V3N00198b-Crop1440-C1.jpg"
- This detail crop of the branches of the nearest tree shows over-sharpening. It is not horrible, but there is definitely room for improvement.

[2020-12-23 22:07]
"V3N00198d-SmFix-rsz1920-C4.jpg"
- I decided to upload this file because there might be some curiosity about the conditions under which the picture was taken. I have adjusted it to resemble the way everything looked that day. I might have pushed the saturation a bit past real, but this is how I remember it.
 

Attachments

  • V3N00198a-rsz1920-C3.JPG
    V3N00198a-rsz1920-C3.JPG
    927.3 KB · Views: 94
  • V3N00198b-Crop1440-C1.JPG
    V3N00198b-Crop1440-C1.JPG
    659.2 KB · Views: 88
  • V3N00198d-SmFix-rsz1920-C4.jpg
    V3N00198d-SmFix-rsz1920-C4.jpg
    1 MB · Views: 93
Last edited:
My Current Picture Profile Adjustments:

Before I get to the testing that I have done lately, I'll start by summarizing my current Picture Profile settings and give some reasons for the most recent changes.

PP1 - PP6: are all set at the factory default settings. I have not been using them yet.

PP7:
- S-Log2 with ITU-709.Matrix, Detail = -7 [as recommended by "DSLR Video Shooter"]
- as mentioned previously

PP8:
- Cine4 with S-Gamut3.Cine, Detail = -7 [as recommended by "The Hybrid Shooter"]
- as mentioned previously

PP9:
- HLG3 with "709", Detail = -2
- I was using HLG3 with "709" as PP10 until recently. After watching Gerald Undone's clip on the Sony Picture Profiles tested on the Sony A7Siii, and rereading the documentation in the online manual, I decided to restore PP10 to HLG2 with BT.2020. Having made that decision, I started testing for "over-sharpening" which I will discuss later "here". I tested "Detail = -1" fairly extensively and decided to change it to "Detail = -2". I think I will probably leave it at "-2" for now.

PP10:
- HLG2 with "BT.2020", Detail = -1
I was generally satisfied with the results I got from HLG3, but I thought about what HLG2's intention. In HLG2, the top of the reciprocity curve is held down compared HLG3. The result outdoors is a richer blue sky. It means that I can raise the exposure to gain shadow detail and reduce noise, but with less loss of clouds, and that afore mentioned darker blue sky. Wedding photographers should consider this setting because they have to contend with wedding fashions that generally include the extreme blacks in men's clothes and whites in wedding dresses. I think fabric detail in wedding dresses should be better maintained with HLG2.

My current use of BT.2020 is somewhat experimental. Gerald Undone recommended it in his examination of the Picture Profiles. Previously I felt it was risky since it was using a colour palette for which I have no hardware support. I do not have a monitor that was designed or intended for use beyond sRGB, so "709" is all I should be using. Moreover, it should not be hard to up-convert my videos from "709" to "2020". However, Gerald Undone has a point that looking at it the other way, there should not be a big problem down-converting from "2020" to "709" with current software either, and later, if I decided to re-use older camera files in newer projects, then the "stock" I have might look and work better if I start with "BT.2020" now.

If I am going to use "HLG2/BT.2020" which is the default for PP10, then I might as well use it in PP10, and since PP9 was leaving open to redefining, I moved "HLG3/709" to PP9. After that decision was made, I decided to test reductions in "Detail" which reduces sharpening, and I think, also reduces noise reduction. I have already tried "HLG3/709" at "Detail = -1", and will discuss that in the following report about "Adjusting HLG2 and HLG3 Over-sharpening".


Adjusting HLG2 and HLG3 Over-sharpening

As previously mentioned I decided to test reduction of the sharpening in HLG2 and HLG3 by decreasing the "Detail" setting parameter. I have mentioned before that the reason that I prefer not to reduce "Detail" down to -7 is because, as far as I know, it also reduces noise reduction, and I would rather keep noise reduction in camera as much as possible, for now.

For "fine tuning" the sharpening, it is best to do so for each lens. But that is a lot of effort and means I would need to remember the ideal setting for each lens and remember to make the settings when I changed lenses. I am not going to do that.

The next best approach is to test the sharpest lens I have in a variety of situations and just use the minimum setting for that lens. This approach means that I will be adding a small amount of sharpening for any lenses that are less sharp than my best lens. That approach is simpler and it is what I have chosen to do. It means that in most cases, even if I need to add sharpening, and I do not get it done, the resulting video would be so close to being fully corrected that it will usually not be noticeable anyway.

For this job, the Sigma 30mm F2.8 DN is technically not my sharpest lens, but it is close enough, and since it is autofocus, it is the sharpest lens I am likely to use for now. I will eventually either demonstrate its performance or post links to tests that I think are good enough. I am planning on doing the same for the Sony SELP1650 zoom.

What To Look For:

I will post full resolution "detail crops" for four pictures. What you are looking for are sharp (in focus) boundaries between objects. If there is "over sharpening", then you will see either black or white "outlines" of the boundaries that should not exist. It will probably happen at the boundaries between very dark and very light objects, but it can occur in lower contrast boundaries as well. If you look carefully, then you will find them in all the "detail crops" I have posted in this set. But these samples are, in my opinion, "acceptable". Other people might disagree. It is a judgment call.

This set of pictures used HLG2 with BT.2020 and "Detail = -1". Later, I will change my setting for PP10 to use "Detail = -2" I will eventually do more testing, but there is a good chance that I will not bother to go further than "-2".

Samples:

I am not uploading the original camera versions at all this time. Instead, the first images have been processed by adding some contrast and saturation, and yes, some additional sharpening, bringing them closer to a "final" version appearance. The detail "Crop" version on the other hand is direct from the camera file with no other changes. The processing changes were small enough that you will have no problem seeing where the "Crop" came from.


"V3N00305.JPG" (not uploaded)
- Playground equipment

Size: 18,677,760 Bytes
Modified: December 27, 2020, 12:22:25
Dimensions: 6000x 4000
Bit depth 24
Resolution Unit 2
Color representation sRGB
Compressed bits/pixel 6
Camera model ILC-6400
F-stop f/4.5
Exposure time 1/125 sec
ISO speed ISO-100
Exposure bias +1.3 step
Focal length 30mm
Max aperture 2.96875
Metering mode Pattern
35mm focal length 45
Brightness 8.72421875
White balance Auto
EXIF version 0231

Smart Photo Fix
Brightness
Overall 29 [Recommended 29]
Shadows -60
Highlights 10 [Recommended 10]
Saturation 16
Focus 39
White Balance No
Black 16
White 14 [Recommended 10]

"V3N00305a-rsz1920-C3.jpg"
"V3N00305b-Crop1440-C1.jpg"


The first and second pair of images show the most "outlining". It is actually very little. If these were actual video frames being displayed "at speed" (24 or 30 fps), it would not be noticed. If these pairs are demonstrating the worst of the "over-sharpening", then really, I do not have to change the settings further. But just in case, I will try reducing the "Detail" parameter down to "-2". I might not post samples of the results.


"V3N00312.JPG" (not uploaded)
- pile of branches with snow

Size: 14,647,296 Bytes
Modified: December 27, 2020, 12:30:32
Dimensions: 6000x 4000
Bit depth 24
Resolution Unit 2
Color representation sRGB
Compressed bits/pixel 5
Camera model ILC-6400
F-stop f/5
Exposure time 1/160 sec
ISO speed ISO-100
Exposure bias +1.3 step
Focal length 30mm
Max aperture 2.96875
Metering mode Pattern
35mm focal length 45
Brightness 8.37265625
White balance Auto
EXIF version 0231

Smart Photo Fix
Brightness
Overall 28 [Recommended 28]
Shadows -50
Highlights 20 [Recommended 20]
Saturation 23
Focus 50
White Balance No
Black 8
White 20 [Recommended 20]

"V3N00312a-rsz1920-C3.jpg"
"V3N00312b-Crop1440-C1.jpg"

- see comments above

"V3N00321.JPG" (not uploaded)
- brown grasses with snow

Size: 10,977,280 Bytes
Modified: December 27, 2020, 12:34:44
Dimensions: 6000x 4000
Bit depth 24
Resolution Unit 2
Color representation sRGB
Compressed bits/pixel 3
Camera model ILC-6400
F-stop f/5.6
Exposure time 1/200 sec
ISO speed ISO-100
Exposure bias +1.3 step
Focal length 30mm
Max aperture 2.96875
Metering mode Pattern
35mm focal length 45
Brightness 9.26328125
White balance Auto
EXIF version 0231

Smart Photo Fix
Brightness
Overall 24 [Recommended 28]
Shadows -40
Highlights 24 [Recommended 20]
Saturation 22
Focus 50
White Balance No
Black 6
White 20 [Recommended 24]

"V3N00321a-rsz1920-C2.jpg"
"V3N00321b-Crop1440-C1.jpg"


There is very little "outlining" on this sample for two reasons, first, most of the grasses are out of focus, and it only happens on sharp boundaries, second, the colours had very little contrast in the original JPEGs.


"V3N00350.JPG" (not uploaded)
- sunset with clouds

Size: 15,859,712 Bytes
Modified: December 29, 2020, 15:58:08
Dimensions: 4000x 6000
Bit depth 24
Resolution Unit 2
Color representation sRGB
Compressed bits/pixel 5
Camera model ILC-6400
F-stop f/5.6
Exposure time 1/160 sec
ISO speed ISO-100
Exposure bias +1.0 step
Focal length 30mm
Max aperture 2.96875
Metering mode Pattern
35mm focal length 45
Brightness 8.24765625
White balance Auto
EXIF version 0231

Smart Photo Fix
Brightness
Overall 28 [Recommended 28]
Shadows 0 [Recommended 0]
Highlights 10 [Recommended 10]
Saturation 32
Focus 41
White Balance No
Black 10
White 14 [Recommended 14]

"V3N00350a-rsz1280-C3.jpg"
"V3N00350b-Crop1080-C1.jpg"


While there is "outlining" in this sample, it is actually not much and it is hidden by real shadow darkness and relatively brighter clouds -- definitely not worth correcting.
 

Attachments

  • V3N00305a-rsz1920-C3.jpg
    V3N00305a-rsz1920-C3.jpg
    937.1 KB · Views: 81
  • V3N00305b-Crop1440-C1.jpg
    V3N00305b-Crop1440-C1.jpg
    542.4 KB · Views: 85
  • V3N00312a-rsz1920-C3.jpg
    V3N00312a-rsz1920-C3.jpg
    875 KB · Views: 74
  • V3N00312b-Crop1440-C1.jpg
    V3N00312b-Crop1440-C1.jpg
    421.5 KB · Views: 80
  • V3N00321a-rsz1920-C2.jpg
    V3N00321a-rsz1920-C2.jpg
    540.2 KB · Views: 77
  • V3N00321b-Crop1440-C1.jpg
    V3N00321b-Crop1440-C1.jpg
    213.9 KB · Views: 76
  • V3N00350a-rsz1280-C3.jpg
    V3N00350a-rsz1280-C3.jpg
    843.6 KB · Views: 76
  • V3N00350b-Crop1080-C1.jpg
    V3N00350b-Crop1080-C1.jpg
    283.3 KB · Views: 76
Sony a6400 Best Settings for Slow Motion:

[Rolling Shutter, Crop Factor and Bitrates]

Crop Factors for Full HD (1080p):

Over recent years I have drifted into using 4K almost exclusively. There were reasons for this. First, there are a lot of times that I am recording "one shot opportunities". That is to say, these are live situations where I will not have a chance to re-record later. Also, I am recording with editing anticipated, with resulting loss of quality. On the other hand, stylistically, I am not attracted to Slow Motion", and "Slow Motion" settings on all my cameras requires recording at Full HD (1080p) or smaller formats. The result of all this is that I have not been recording files that I can use slow motion. More specifically, I have recorded almost everything in 24 fps or 30 fps.

Recently, testing my new Sony Xperia 10 iii phone, I found that there was not much to adjust, and so I tried its "Slow Motion" function. That got me thinking about slow motion on my other cameras, and so over recent weeks I have recorded some files with Slow Motion use in mind.

The first thing I had to think about was how to set the camera to record a file for slow motion. The obvious method was to use the "S&Q" mode which is designed for "Time Lapse" or "Slow Motion". I consider this to be a good idea. It is not a "perfect" idea, but overall, I do like it. What is good about the "S&Q" mode is that on the "Mode Dial" it is located next to the "Movie Mode" and so, if you set "Movie Mode" up as your main mode, and "S&Q" up for a specific slow motion setting, it is easy to rotate the knob back and forth between them as needed. Well, it is "sort of easy". Actually, I find that the dial is very stiff, and difficult to turn, but my opinion about that is not going to be universal.

But this is not the only way to set up the camera to record for slow motion. The other way is to use the "XAVC-S HD" submenu and select a 60 or 120 fps setting and bitrate options. But I could not find a good analysis comparing these possibilities. The differences are either sound or no sound, need or adjustment in post, recorded frame rate, bit rate, crop factor, rolling shutter, and again, how you access the mode.

That's a lot of difference, and the combinations have limits or restrictions. Neither of the "S&Q" settings record sound, but all the "SAVC-S HD" settings include sound. Video bit rates available are 60 mbps for 120 fps, and 50 mbps for 60 fps for both "XAVC-S HD" or for "S&Q", but also 100 mbps at 120 fps only when using "XAVC-S HD". And then there is the crop factor.


DP Review "Sony a6400 review"

"Here's a look at how the a6400's footage is cropped (it's identical to the a6300), depending on which mode you're shooting in:"

[The following taken from a special graphic display:]
"4Kp/30 1.23x Crop
1080p/120 - 1.14x Crop
4Kp/24 and 1080p/60/30/24 - Full width"

"It's worth noting that our scene here doesn't tell you much about rolling shutter, but for comparison's sake, the a6400 has a shutter scan rate of 40ms when shooting 4K/24p and 31ms when shooting 4K/30p. The X-T30 has a scan rate of 23ms, which is much better and really tamps down on the jello effect or slanted verticals that rolling shutter can result in."


Looking at the results from my recordings, I had some doubts about the crop factor, so I felt I needed to confirm DP Review's numbers.


Testing "Slow Motion" Settings Sensor Crop

Lens: Pentax 50mm F2.0 lens @ ~F3.5
- Using my modified PP9 which is HLG3 w/709 palette, low sharp
- it was a very overcast day
- wind did not interfere with the test recordings (the target did not get moved by the wind)
- Focus method: Focus Peaking

All my tests and calculations are based on 30 fps target video files. For 24 fps, the S&Q recording files start out the same and the output timing is adjusted. That means the detail in each frame is exactly the same between the two possible output files (24 or 30 fps). The only difference is the time allotted to display the frame.

If 120 fps is selected through the "main" video controls 100 mbps is an added option. I did not test the 60 mbps option, but I expect that it will give the same result as the S&Q setting, except that it will also record the sound.

In theory, the 100 mbps recording should give an increase in image quality over the 60 mbps files. On the other hand, at 60 fps, the S&Q and the XAVC-S files are the same nominal bitrate. The only differences are the added sound track in the XAVC-S version and the fact that frame timing being adjusted in the S&Q version. There is a very small crop in the 60 fps files, but no, the frame for the videos is not quite "full width".

The Test Clips

- all the following clips were recorded with a target 30 fps, for ~1:40, so I can tell which S&Q setting was used
- Caps @ 20 sec. (per playback)

NOTE: The test clips have not been uploaded.

"C0002.MP4"
- main function setting, Codec XAVC-S HD, 1080 120 fps, 100 mbps
- Sound is recorded, the file needs to be "slowed down" in post
Windows 8.1
Size: 1,296,197,674 bytes
Created September 26, 2021, 15:24:41
Video
Length 01:45
Frame width 1920
Frame height 1080
Data rate 95,935 kbps
Total bitrate 97,473 kbps
Frame rate 119 frames/second
Audio
Bit rate 1,537 kbps
Channels 2 (stereo)
Audio sample rate 48 kHz

VLC
Stream 0
Codec H264 - MPEG-4 AVC (part 10) (avc1)
Type Video
Video resolution: 1920x1080
Buffer dimensions: 1920x1088
Frame rate 119.880120
Decoded format: -
Orientation: Top left
Color primaries: ITU-R BT.709
Color transfer function: Hybrid Log-Gamma
Color space: ITU-R BT.709 Range
Chroma location: Left
Stream 1
Codec: twos
Type Audio
Channels: Stereo
Samplre rate 48,000 Hz
Bits per sample 16


"C0003.MP4"
- S&Q recorded at 120 fps (est. 60 mpbs)
- No Sound is recorded, the file is pre-adjusted to 29.97 fps
Windows 8.1
Size: 876,740,825 bytes
Created September 26, 2021, 15:27:02
Video
Length 06:54 [414 seconds, (|x/60|+remainder) = 103.5 sec, ~1:43.5]
Frame width 1920
Frame height 1080
Data rate 15,079 kbps
Total bitrate 16,615 kbps
Frame rate 29 frames/second
Audio
Bit rate 1,535 kbps
Channels 2 (stereo)
Audio sample rate 48 kHz

VLC
Stream 0
Codec H264 - MPEG-4 AVC (part 10) (avc1)
Type Video
Video resolution: 1920x1080
Buffer dimensions: 1920x1088
Frame rate 29.970030
Decoded format: -
Orientation: Top left
Color primaries: ITU-R BT.709
Color transfer function: Hybrid Log-Gamma
Color space: ITU-R BT.709 Range
Chroma location: Left
Stream 1
Codec: twos
Type Audio
Channels: Stereo
Samplre rate 48,000 Hz
Bits per sample 16


"C0004.MP4"
- S&Q recorded at 60 fps (est 50 mbps)
- No Sound is recorded, the file is pre-adjusted to 29.97 fps
Windows 8.1
Size: 650,184,343 bytes
Created September 26, 2021, 15:29:19
Video
Length 03:26 [206 seconds, (-|x/2|+remainder = , ~1:43.0]
Frame width 1920
Frame height 1080
Data rate 23,283 kbps
Total bitrate 24,817 kbps
Frame rate 29 frames/second
Audio
Bit rate 1,533 kbps
Channels 2 (stereo)
Audio sample rate 48 kHz

VLC
Stream 0
Codec H264 - MPEG-4 AVC (part 10) (avc1)
Type Video
Video resolution: 1920x1080
Buffer dimensions: 1920x1088
Frame rate 29.970030
Decoded format: -
Orientation: Top left
Color primaries: ITU-R BT.709
Color transfer function: Hybrid Log-Gamma
Color space: ITU-R BT.709 Range
Chroma location: Left
Stream 1
Codec: twos
Type Audio
Channels: Stereo
Samplre rate 48,000 Hz
Bits per sample 16


"C0005.MP4"
- main function setting Codec Codec XAVC-S HD, 1080 60 fps, 50 mbps
- Sound is recorded, the file needs to be "slowed down" in post
Windows 8.1
Size: 658,570,194 bytes
Created September 26, 2021, 15:32:42
Video
Length 01:45 [206 seconds, (-|x/2|+remainder = , ~1:43.0]
Frame width 1920
Frame height 1080
Data rate 48,449 kbps
Total bitrate 49,979 kbps
Frame rate 59 frames/second
Audio
Bit rate 1,530 kbps
Channels 2 (stereo)
Audio sample rate 48 kHz

VLC
Stream 0
Codec H264 - MPEG-4 AVC (part 10) (avc1)
Type Video
Video resolution: 1920x1080
Buffer dimensions: 1920x1088
Frame rate 59.940060
Decoded format: -
Orientation: Top left
Color primaries: ITU-R BT.709
Color transfer function: Hybrid Log-Gamma
Color space: ITU-R BT.709 Range
Chroma location: Left
Stream 1
Codec: twos
Type Audio
Channels: Stereo
Samplre rate 48,000 Hz
Bits per sample 16

Calculating the Crop:

These are the locations of the target pixels as I measured them in the original files (video captures or the camera JPEG still)

"V3N00050.JPG" [Not uploaded]
Upper left 2233,1431
Upper right 3968,1419
Delta x = 3968 - 2233 = 1735
Target / Frame = 1735 / 6000 = 0.2892
Control

"01-a64c-Still-050-Rsz1920-C1.JPG"
Upper left 714,458
Upper right 1269,454

Delta x = 1269 - 714 = 555
Target / Frame = 555 / 1920 = 0.2891
Crop Factor 0.2891 / 0.2892 = 0.9997 ~ 1
- confirms resize procedure is acceptable

"02-C0002-XAVCSHD-120-100m-C1.jpg"
Upper left 682,334
Upper right 1316,330
Delta x = 1316 - 682 = 634
Target / Frame = 634 / 1920 = 0.3302
Crop Factor = 0.3302 / 0.2892 = 1.1418

"03-C0003-SQ-120-60m-C1.jpg"
Upper left 682,334
Upper right 1316,331
Delta x = 1316 - 682 = 634
Target / Frame = 634 / 1920 = 0.3302
Crop Factor = 0.3302 / 0.2892 = 1.1418

"04-C0005-XAVCSHD-60-50m-C1.jpg"
Upper left 714,359
Upper right 1272,356
Delta x = 1272 - 714 = 558
Target / Frame = 558 / 1920 = 0.2906
Crop Factor = 0.2906 / 0.2892 = 1.0048
- a very small crop

"05-C0004-SQ-60-50m-C1.jpg"
Upper left 714,358
Upper right 1272,356
Delta x = 1272 - 714 = 558
Target / Frame = 558 / 1920 = 0.2906
Crop Factor = 0.2906 / 0.2892 = 1.0048
- a very small crop


About the results:

My testing indicates a 0.9997 error level between my measurements from the full 6000 x 4000 file and the results when I measured the resized files. I believe the discrepancy is due to my "human error" taking measurements. A 50mm lens might give resulting data of a 49.985mm lens. I consider this to be an acceptable error level.


At 120 fps, the a6400 has a very small crop (1.0048) resulting in an effective field of view of a 50.24 mm lens. This is true for both the "S & Q" options (24 or 30 fps output files) and the XAVC-S setting at 100 mbps. I did not test the 60 mbps option. I do not believe this is a test error. I think that this small crop factor is real. However, it is not going to be significant for anything I expect to do with my camera.

At 60 fps, the crop factor of 1.1418 means that a true 50mm lens gives an image estimated as from a 57.09 mm lens. This can be rounded off to ~57mm.


Conclusions:

Looking at the nominal bitrates, the "S & Q" 120 fps setting and the 60 mbps version of 120 fps using XAVC-S FHD are theoretically the same and give worst image quality, but the actual sensor usage is almost full width. On the other hand, at 60 fps, the bitrates drop to about 50 mbps, and the image has a more noticeable crop, but the image quality is a bit better than the 120 fps versions I have mentioned so far. The exception however, is that XAVC-S FHD at 120 fps and 100 mbps has almost as good an image as the 60 fps files, and it also has a sound track, though it needs to be converted in post.

DP Review's report regarding crop factors is correct (close enough . . .). Using zooms, crop factors this small will very rarely be an issue. Working with primes, it is just significant enough that I am glad I got this testing done. Ironically, being able to view the images makes a big difference for me this time -- more than the numbers. There is just enough difference to affect a lens choice.


[Added Later, but Part of the Post]

I was not happy about the JPEG still picture I took. It had used the same Picture Profile as the videos, but due to the variable overcast of the day, light dropped to the point where I had problems finding the "top left" corner of my target (the colour chart).

After I started writing up this report, it occurred to me that I had the ARW file and so, I could re-finish the image and check my measurements:

From my ARW version

"V3N00050=R01b-SmrtFx.png" [not uploaded]

Upper Left 2245,1443
Upper Right 3980,1431
Total size: 6024 x 4024
Delta x = 3980 - 2245 = 1735
Target / Frame = 1735 / 6000 = 0.2892
2nd Control, confirmed, target width exactly the same!

Detail Crop from 1600,1200 to 4400,2010
[Crop from Y = 1200 to 2010
X = 1600 to 4400]

"06-V3N00050 -R01c-Crop-C2.jpg"
- a detail crop from my version of the ARAW confirms Delta X.

I botched the colour temperature, but that does not matter. My version made the upper left corner of the target clear enough to confirm my measurements. In fact, I was more accurate than I expected. I got exactly the same Delta X value.
 

Attachments

  • 01-a64c-Still-050-Rsz1920-C1.JPG
    01-a64c-Still-050-Rsz1920-C1.JPG
    279.4 KB · Views: 58
  • 02-C0002-XAVCSHD-120-100m-C1.jpg
    02-C0002-XAVCSHD-120-100m-C1.jpg
    224.3 KB · Views: 56
  • 03-C0003-SQ-120-60m-C1.jpg
    03-C0003-SQ-120-60m-C1.jpg
    223.6 KB · Views: 54
  • 04-C0005-XAVCSHD-60-50m-C1.jpg
    04-C0005-XAVCSHD-60-50m-C1.jpg
    262.5 KB · Views: 50
  • 05-C0004-SQ-60-50m-C1.jpg
    05-C0004-SQ-60-50m-C1.jpg
    263.8 KB · Views: 54
  • 06-V3N00050 -R01c-Crop-C2.jpg
    06-V3N00050 -R01c-Crop-C2.jpg
    315.5 KB · Views: 50
Testing the Sony 20mm F2.8 lens

This is part of my general camera testing. In this series of tests my overall goal is to find the limits of using the Sony a6400 with my modified "S-Log2" setting. I am using the modified Picture Profile to create a still JPEG file and then further processing the JPEG, which overall simulates a video recording and processing scenario. In this test, I also get an ARAW file, which I generally ignore.

The Sony 20mm F2.8 lens is an old APS-C design apparently intended more for compactness rather than image quality. These days it is not well regarded, so it raises the question "why would I buy such a lens?" The answer is that it is a question of balanced characteristics. Yes, compactness does help. It might have been better if I had kept my a5000, which combined with this lens is a particularly small camera. But it would be a less useful setup because the resulting problems from that body's "shutter shock" would likely make a tripod necessary. The electronic 1st curtain shutter mode on my a6400 makes this lens usable in a wider range of setups.

While nominally an F2.8 lens, the real "max aperture" is essentially F3.0. This is still better than my 16-50mm, F3.5-5.6 "kit zoom" (or any other such zoom I currently have available to mount using adapters).

As noted, the sample picture I am uploading was part of a test of video settings. Working with the modified "S-Log2" profile, it did not need that large an aperture and was exposed at F8.0 (deliberately over exposed by 2 stops at ISO-500 and 1/250 sec). The value of the larger aperture should not be dismissed. When light is very low, the a6400 struggles to focus automatically. Again, this sample situation did not have such a problem, but I did run into during pre-dawn testing. My testing was not thorough enough to identify the actual limit, so I should re-do the test someday.

Conclusions:

I think that the Sony 20mm F2.8 is an acceptable quality lens for video. I do also find it acceptable for stills, but I can understand that some people would prefer a sharper lens for that use.

Files:

"V3N00282a-rsz1600-C1.jpg"
- resized S-Log2 camera file

"V3N00282b-crop-C1.jpg"
- full resolution detail crop of the camera file from 1450,2360

"V3N00282c-Adjusted1600-C1.jpg"
- resized file after adjustments.
 

Attachments

  • V3N00282a-rsz1600-C1.jpg
    V3N00282a-rsz1600-C1.jpg
    189 KB · Views: 8
  • V3N00282b-crop-C1.jpg
    V3N00282b-crop-C1.jpg
    188.1 KB · Views: 8
  • V3N00282c-Adjusted1600-C1.jpg
    V3N00282c-Adjusted1600-C1.jpg
    295.2 KB · Views: 8
Last edited:
I have just confirmed that there has been no firmware update for the a6400 since June 2019 (version 2.0, which I am using). There are a couple of issues I wish Sony had upgraded. For now, I will mention that "Time Lapse" (interval recording) (Corrected 2022-11-19 15:32) is limited to Full HD. I could mention other improvements that would be possible for this camera, but the most basic issue is the fact that 1920 x 1080 (P) is the best quality that is available. Considering the camera records "4K" at up to 30 fps, this limit is technically unnecessary. A "time lapse" file is created by leaving extra time between the creation of each frame. So creating a "time lapse" file is technically easier than creating a regular file -- not harder. So if it can make a "full speed" UHD (4k) file, then there is little doubt that it can make a UHD time lapse file. So why is the a6400 limited to making these file in Full HD? I had hoped that by now Sony would update this camera by adding a UHD slow motion option available by now, but it has not happened.
[NOTE: I previously called the "time lapse" file a "slow motion" file which is the opposite of what I intended. Sorry for any confusion. 2022-11-19]

This is a good time to provide firmware updates for the a6400 and a6600, so I hope they will do so.
 
Last edited:

Most reactions

Back
Top