adamhiram
No longer a newbie, moving up!
- Joined
- Feb 6, 2015
- Messages
- 870
- Reaction score
- 588
- Can others edit my Photos
- Photos OK to edit
A few years ago while learning to photograph star trails, I learned of a few methods of stacking exposures to reduce noise or show greater detail. I used software such as StarStax and RegiStax, but they were pretty complicated to use and I felt like I was just blindly following instructions more than I was understanding how it worked. It also tended to take many hours to run for results that were just marginally better than the original.
I decided to try this "super resolution" method I found buried in my bookmarks, with some pretty decent results.
Summary of method used:
Shot with Nikon D500 and AF-S 70-300
300mm, f/5.6, 1/1000s, ISO 100
Original:
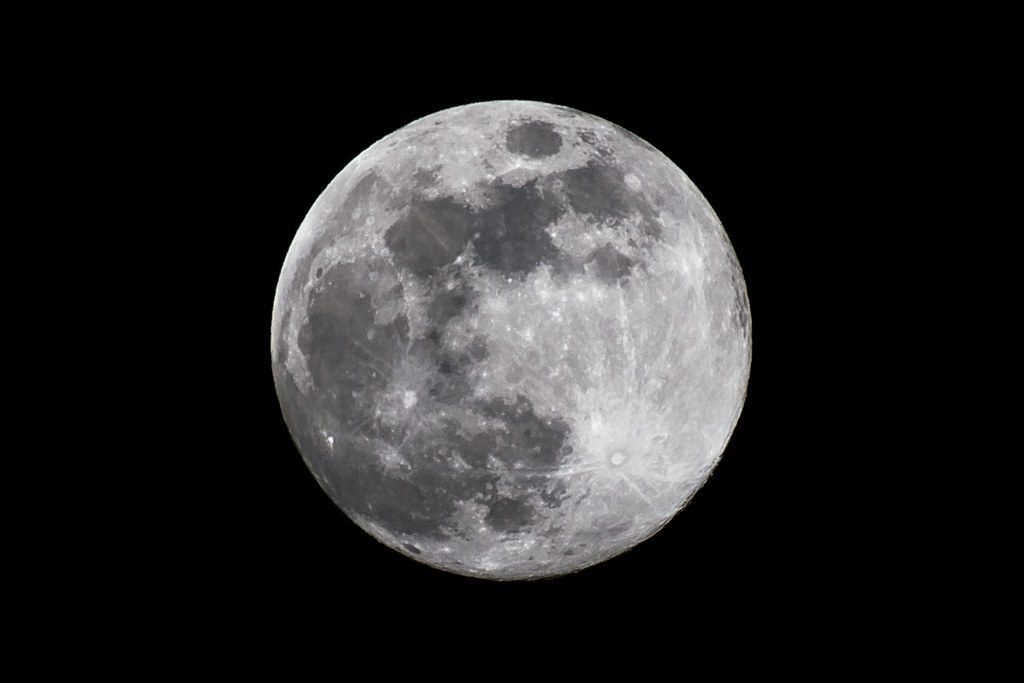
20180330-DSC_6800a-original by adamhiram, on Flickr
Stacked:
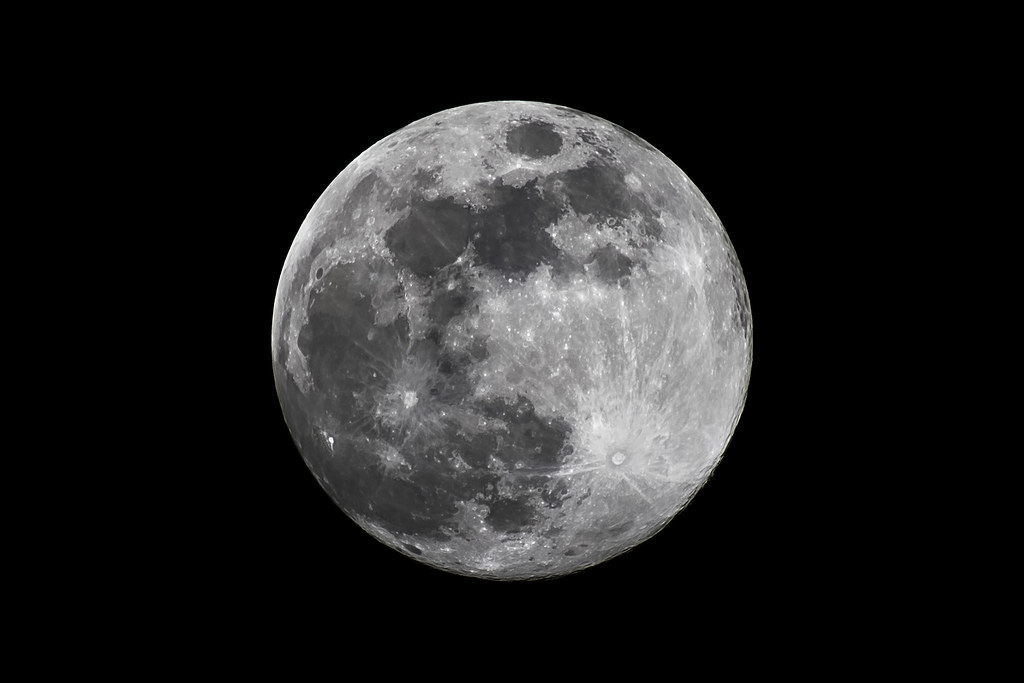
20180330-DSC_6800c-50stacked by adamhiram, on Flickr
I decided to try this "super resolution" method I found buried in my bookmarks, with some pretty decent results.
Summary of method used:
- Take multiple photos of the subject. I used a tripod to assist with consistent framing, but just used Continuous Slow (5fps) for 10 seconds to get 50 shots. The goal is to have some slight movement between exposures to capture different details in each shot, which I think I accomplished.
- Import into Lightroom and edit. I did my edits on the first photo and copied the settings to the other 49. Reduced shadows, boosted whites, darkened blacks, increased clarity, used tone curve to create some contrast between midtones and highlights, and some minor sharpening and noise reduction for better edge definition.
- Export images into Photoshop as layers. Select all 50 photos in Lightroom, right-click (control-click on Mac), Edit In > Open as Layers in Photoshop. Now I have a 10.5GB Photoshop document with 50 layers to work with.
- Resize to 200%. With the additional detail pulled from the stack of exposures, it actually seems possible to "zoom and enhance". Image > Image Size, use "Nearest Neighbor" resample algorithm.
- Align layers. In order to use this method to pull detail from multiple exposures, they all must be aligned. Even on a tripod, there is some slight movement between shots - both from camera shake, as well as the moon moving quickly across the sky. Select all layers and then Edit > Auto-Align Layers. Leave Projection set to Auto, and do not use any lens correction.
- Convert to Smart Object. With all layers still selected, right click on a layer and convert to a Smart Object. This makes the next step much easier.
- Change stack mode to "Mean". I tried a few methods, and this seemed to be the fastest and most automated method to combine layers to get the final product. Layer > Smart Objects > Stack Mode > Mean.
- Flatten image and sharpen. Flatten the final image and apply smart sharpening. I was actually able to sharpen the final output twice without introducing any noticeable noise or other artifacts. Filter > Sharpen > Smart Sharpen > 300%, 2px radius. 2nd pass amount was at 200%.
- Crop, and save. I started with a 21mp image, doubled its size for editing, then cropped to 25% of its original size, so if my calculations are correct my final result should be approximately 5.2mp. Much better than the original 1.3mp version.
Shot with Nikon D500 and AF-S 70-300
300mm, f/5.6, 1/1000s, ISO 100
Original:
20180330-DSC_6800a-original by adamhiram, on Flickr
Stacked:
20180330-DSC_6800c-50stacked by adamhiram, on Flickr
Last edited:


![[No title]](/data/xfmg/thumbnail/32/32169-37e80837cd927f85261d4e03344eef0d.jpg?1734161046)


![[No title]](/data/xfmg/thumbnail/34/34041-c8aed4d2c55b167d1ec03d9cfbaca453.jpg?1734164448)
