Here is what I found when I brought the image into Lightroom.
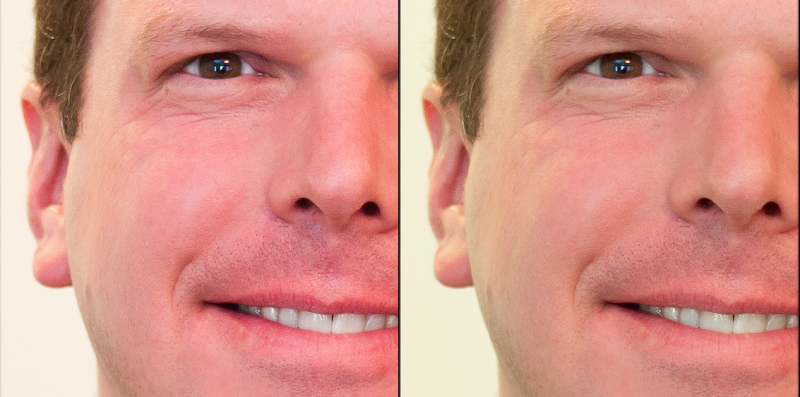
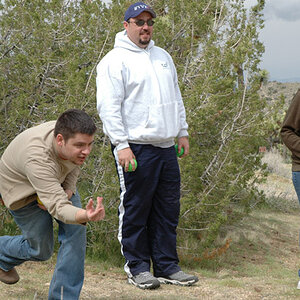
On the left is the original of jwbryson's first shot, from Flickr. In this before/after screen cap from Lightroom, all I have done is a basic tint adjustment, to cancel out excessive redness in the original image.In the left side and the right hand side of the man's face, one can see a significant "yellowness" to the light. This is caused by mixed source lighting. I did a Tint adjustment of Minus 30. That removed a lot of the excess redness.
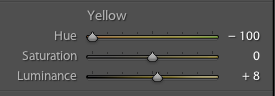
However, I could still see the yellow, coming from the background. To eliminate that, I went to the color adjustment, and in the Yellows, I moved the slider all the way to the left, and added +8 Luminance.
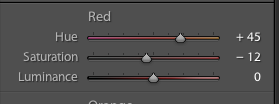
In the Red color, I added a Hue of +45, and reduced the saturation by -12 units.
In Fill Light, I added 23, to lighten up the sweater.
Overall, it looked pretty good. The image above is a FULL-sized, 2.7 megabyte JPEG, so it looks a bit soft on-screen when seen re-sized down. it could easily be "juiced up" with a contrast boost and a curves tweak,etc,etc. The image might still be a tad bit too warm, however. The main problem was the mixed lighting in the source JPEG I worked with; the yellow light coming in from the sides, and the excessive redness in the flesh tones made this a tricky image to start with. If I would have had a RAW file to start with, I think I could have done a lot more with it.















![[No title]](/data/xfmg/thumbnail/39/39446-903cfeac143cee6330a51546ecfdda92.jpg?1734173536)