coastalconn
Been spending a lot of time on here!
- Joined
- Mar 24, 2012
- Messages
- 3,594
- Reaction score
- 3,635
- Location
- Old Saybrook, CT
- Can others edit my Photos
- Photos NOT OK to edit
People ask me about my settings, so I figure that would be a good place to start. Generally my cameras are set up in only one way, with a few variables when I am wandering around in the woods. It has changed over the past 2 years as I have upgraded bodies and worried less and less about noise. A sharp noisy image is better than a blurry noise free image. I find for shooting birds, that shooting in Manual mode with auto-ISO is a dream. I use spot metering 90% of the time. Why? In manual mode I can control what aperture my lens will be sharpest at and I can control the shutter speed. Modern cameras are pretty good at figuring out exposure. As a basic guideline, I try to keep ss at 1/250th for stationary birds and at least 1/1600th for birds in flight, depending on the light and the speed of the bird. If a bird is back lit, bright white or black, I can quickly adjust exposure compensation as needed. I use back button focus and always keep my camera in AF-C (AI-Servo). I use 21 or 51-point dynamic focus and leave a3 on. (That’s a Nikon thing.) I like to think of a camera as a video game controller. Also, make sure you check your histogram and that you are not clipping highlights. So now that the basics are out of the way….
Practice, practice and practice some more. Shoot a lot. On a good long day in the summer I can hit 1500 clicks… Start with back yard birds, or even gulls if you are lucky enough to have them around. Gulls are a perfect way to practice birds in flight, as well as exposure. It quickly teaches you about exposure compensation and eliminating white blobs. Back yard birds can be quite fun also. Set up a few feeders with some natural perches around them and sit quietly and wait.
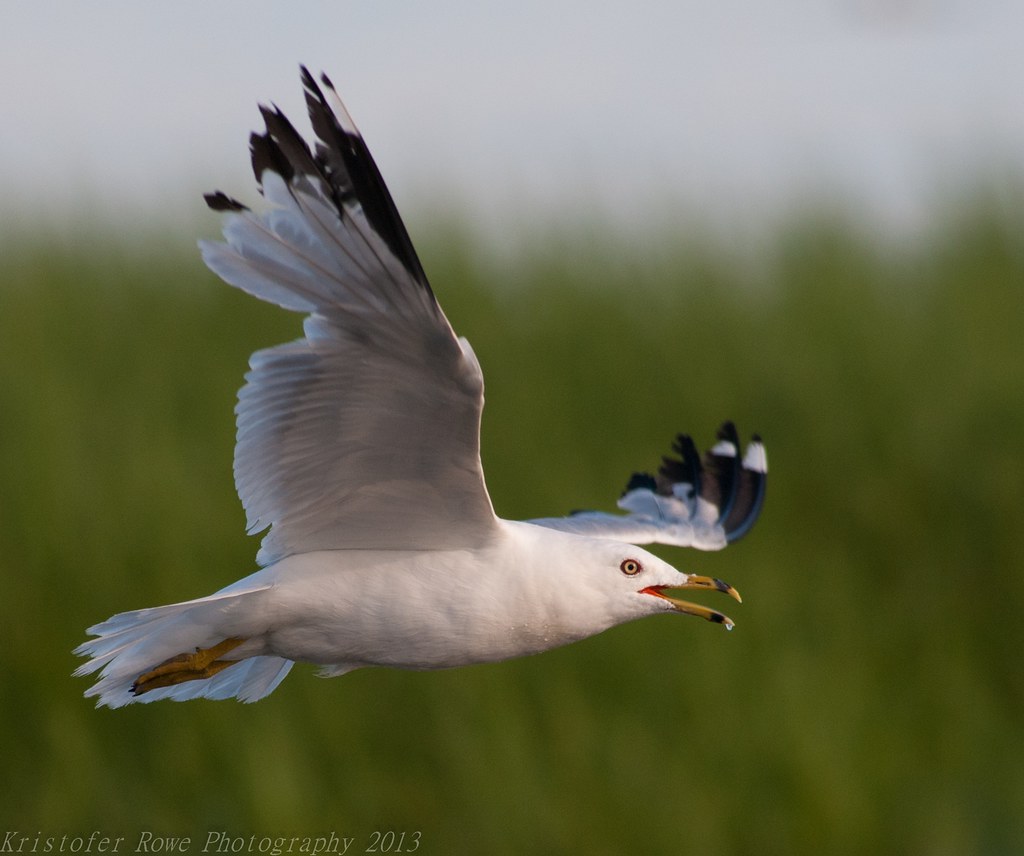 Practicing with gulls
So some of those back yard birds are in the shade? This leads me to my next point. Understanding light is the most important aspect of any type of photography. This is an element that makes bird photography so difficult. Often you have no idea where or when birds will appear. As you are quietly sitting in your back yard, really observe the birds. What direction do they come from? Where do they perch? You will probably start to realize they land and take off INTO the wind 99% of the time. Stash that little bit of knowledge in the back of your mind, it will come in handy at a later point. The next day wake up early and position yourself with the sun to your back as it rises or sets and you will start to “see the light”. There are 2 very important lessons here. 1- Observing your subjects and their actions is one of the most important of all aspects. 2- Knowing where your light source is located is extremely important as well. Of course this can’t always be controlled, but keeping it in mind can greatly help. I spent my first season really observing Osprey behavior and it paid off dividends knowing when and where to be.
Now that you have a basic understanding of settings, light and bird behavior, where are all the damn birds? There are a few good resources I have found, besides the obvious ones like asking friends. Most states have an Ornithological Association where people report bird sightings. A great website is eBird where you can see what is in your area by season, find hotspots and also see individual reports for species that you may be looking for. One day I was wandering through my trail and noticed a Tupperware container under a stump. At first, I thought it was garbage so I picked it up. I realized it had stuff inside and it turns out there is a thing called letterboxing. ( Letterboxing North America ) It’s sort of like geocaching. The important thing to note is that these letterboxes are hidden all over the country in public places that just happen to have lots of birds!
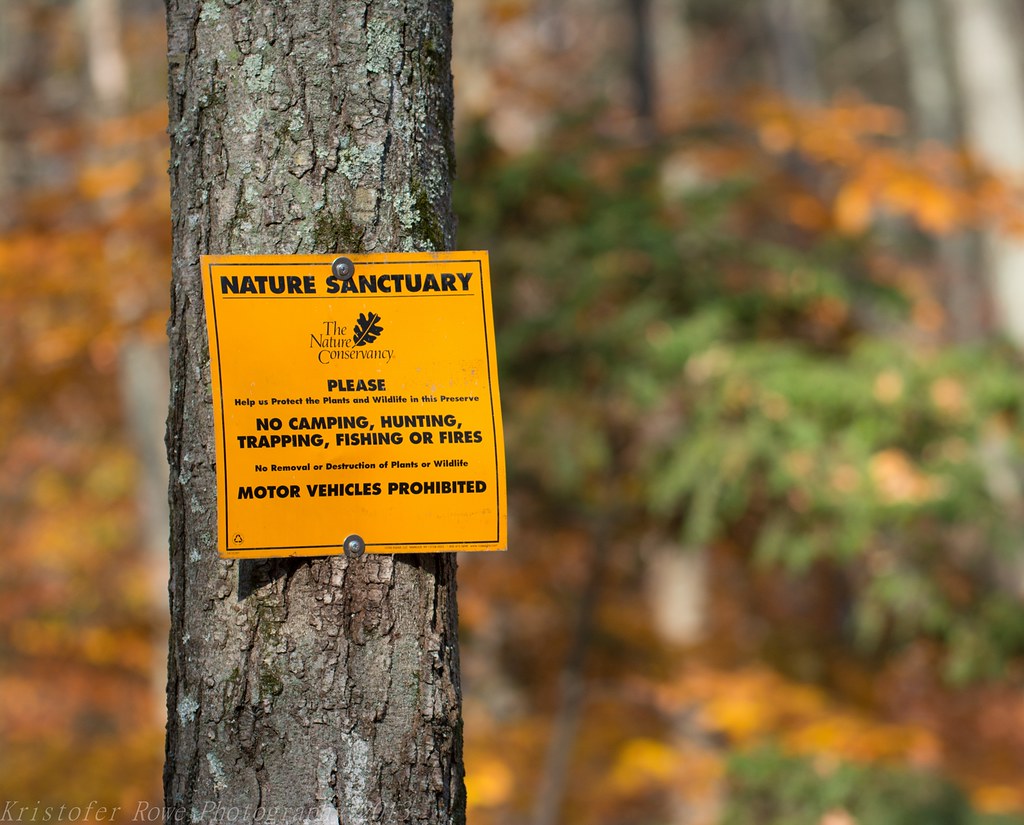 A trail I found
One thing I have become very good at is maximizing what I can afford. Many times I see those big expensive primes out there and get gear lust. In my humble opinion, never spend more on gear than a nice used car would cost. So a few things that are essential; A halfway decent camera that has the ability to fine tune your lenses. I have found that almost every lens I have ever used has benefited greatly from fine tuning. There are a bunch of ways to do it, google it. I constantly analyze all my images to see if my fine tune is just right. I look for the plane of sharpness and make sure there is no front/back focus. Lenses are the subject of huge debates and so many people have it ingrained that you must buy Canon/Nikon. The truth of the matter is that Tamron and Sigma are both producing some serious lenses that perform as well as the OEM’s for ½ to 1/3 the price. Something to consider is how you want to shoot. I personally shoot handheld 99% of the time, so having a relatively light lens is very important to me and I often carry 2 lenses and cameras on a dual shoulder strap setup.
So what exactly is sharp enough? That is a question that must be answered on an individual basis and is a subject of debate on many forums. An important thing to remember is intended output. Social media/fb? When you down size an image that much, many lenses will be sharp enough, especially if you can get a bird to occupy 50% or more of the frame. Things change when you want to print large, but I have a few 2x3 feet canvases that I printed from my 12 MP d300 that look quite stunning from normal viewing distances.
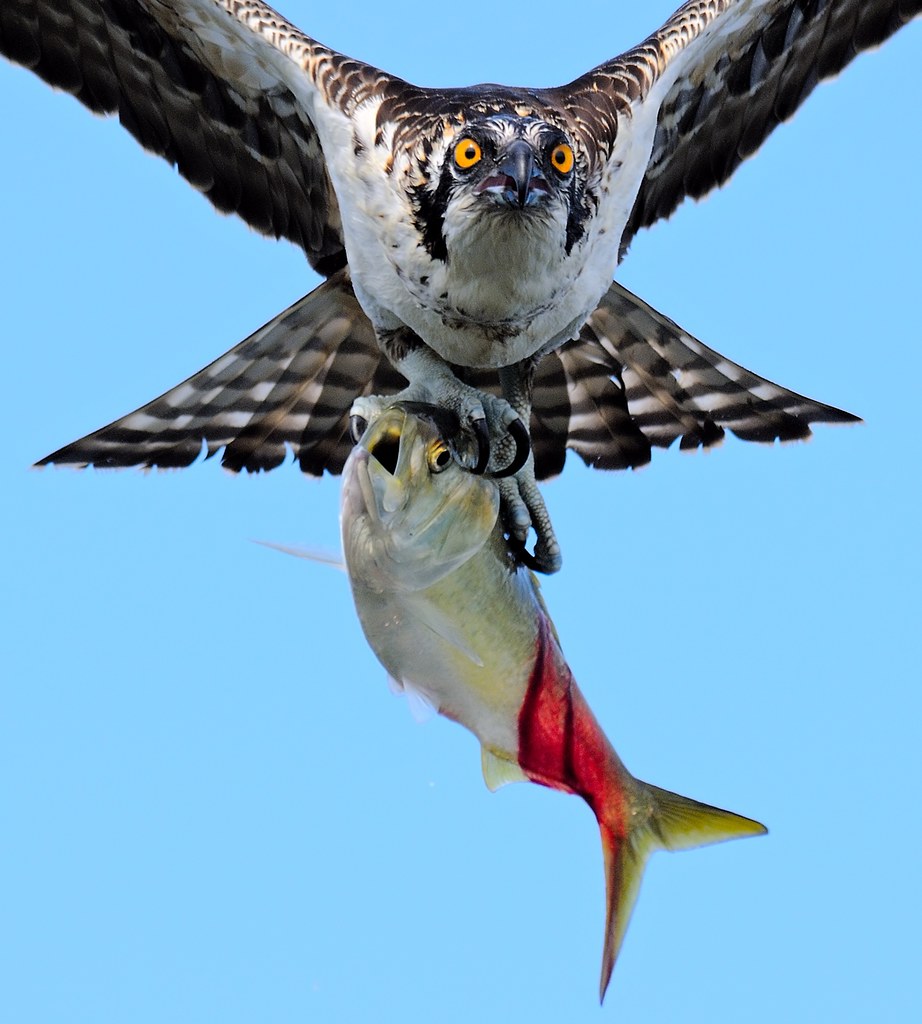 D300-Tamron 200-500
So we have our gear, settings, light and great knowledge of bird behavior. Now it is time to figure out how to get amazing images. The truth of the matter is that it mostly lies in field craft. The closer you get to your subjects, the more detailed, better images you will have. This takes time to figure out. Some birds are just not all that worried about humans. Some are super skittish. It depends on the bird and it takes some time to figure out which ones like you. Starting out in state parks is a great way, as many birds in these locations are much more use to human activity. Personally I wear camo. People always ask me if it helps, and the truth of the matter is, not really. The birds still know you are there, but it can help you blend in if you are stationary and quiet. I like camo because people don’t see you and you don’t have to deal with really dumb questions like, if you can see the moon with your lens. The other reason is being camoit is generally designed for the elements, keeping you cool/warm, ripstop, etc. Another important thing that always gets overlooked is proper footwear. Slipping on wet rocks is not fun for your body or gear.
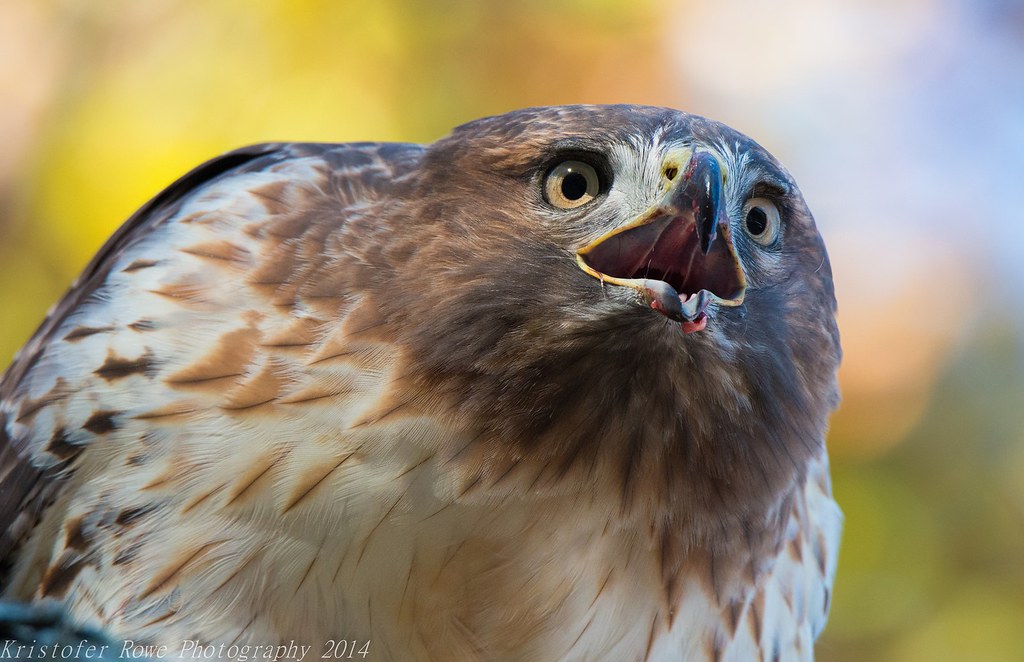 Getting close and knowing your subject
Persistence is another key to producing consistent, high quality images. In the summer I am often out shooting for 12 hours. Mid-day sun is not ideal, but being a chef I must take advantage of any time I have. Great shots do randomly happen, but for the most part it takes large chunks of time. I also never have a lens cap on or my gear stored in a bag. It rides shotgun and ready to go set at 1/1000th a sec, just in case I see something along the way.
Another thing that I see too often is “social photographers” Many times people like to go out in groups and make a raucous in the woods. I prefer to shoot alone. It is much easier to stay focused. It is also much easier to remain hidden and unobtrusive when you are alone. Once you find your spot, under NO circumstances should you share this with anyone. A good spot is more sacred than your internet passwords! One of my best spots might possibly be overrun with photographers this year as someone figured out where I shot and told “just a friend”. Somehow “just a friend” turned into 1 of 2 cameras stores in the state babbling away about where to find my owls to anyone that walks into their store… This will surely place undue stress on this family of owls..
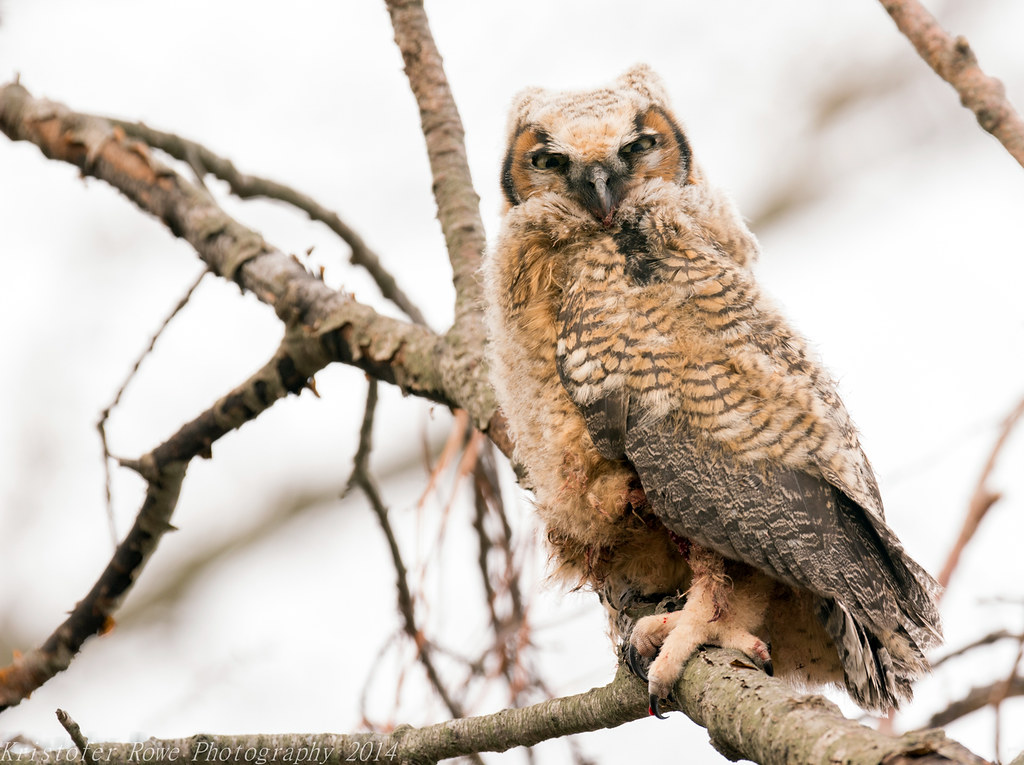 Baby Great Horn Owl
I have fallen into my own style of images. One thing I am known for is capturing emotions in birds. This takes all of the above lessons and takes it one step further. Click a lot! Wait for things to happen. Check your settings. Don’t be afraid to get down and dirty. Sometimes you just have to lay in mud, low tide sludge, wet beaches and snowbanks. A sniper position really changes perspective and compresses depth of field. I also have become known for my Osprey action shots, but that is the pinnacle of years of research and finding one of the osprey hotspots in New England. What’s your style? How do you want to separate yourself from others? These are important things to think about as you look through your viewfinder, a step to the left or right? Should I crouch, lay down or stand up? The smallest things can make the biggest difference.
So you have a fancy video game controller in your hand. You can spin that thumbwheel and go from 1/250th to 1/1000th (2 stops) with 6 clicks and you don’t have to think about it. Now it is time for the leap of faith. Stop looking at your subject through the viewfinder, start looking at the light, the background and anything that may ruin your images like stray branches or twigs. That is when the magic will start happening.
Be ready for the unexpected, birds can appear out of nowhere very quickly. When I am driving around, my camera is at the ready… Shutter speed set at 1/1000th and ready to go. Keep the sun at your back and the birds in your face!
Practice, practice and practice some more. Shoot a lot. On a good long day in the summer I can hit 1500 clicks… Start with back yard birds, or even gulls if you are lucky enough to have them around. Gulls are a perfect way to practice birds in flight, as well as exposure. It quickly teaches you about exposure compensation and eliminating white blobs. Back yard birds can be quite fun also. Set up a few feeders with some natural perches around them and sit quietly and wait.
 Practicing with gulls
So some of those back yard birds are in the shade? This leads me to my next point. Understanding light is the most important aspect of any type of photography. This is an element that makes bird photography so difficult. Often you have no idea where or when birds will appear. As you are quietly sitting in your back yard, really observe the birds. What direction do they come from? Where do they perch? You will probably start to realize they land and take off INTO the wind 99% of the time. Stash that little bit of knowledge in the back of your mind, it will come in handy at a later point. The next day wake up early and position yourself with the sun to your back as it rises or sets and you will start to “see the light”. There are 2 very important lessons here. 1- Observing your subjects and their actions is one of the most important of all aspects. 2- Knowing where your light source is located is extremely important as well. Of course this can’t always be controlled, but keeping it in mind can greatly help. I spent my first season really observing Osprey behavior and it paid off dividends knowing when and where to be.
Now that you have a basic understanding of settings, light and bird behavior, where are all the damn birds? There are a few good resources I have found, besides the obvious ones like asking friends. Most states have an Ornithological Association where people report bird sightings. A great website is eBird where you can see what is in your area by season, find hotspots and also see individual reports for species that you may be looking for. One day I was wandering through my trail and noticed a Tupperware container under a stump. At first, I thought it was garbage so I picked it up. I realized it had stuff inside and it turns out there is a thing called letterboxing. ( Letterboxing North America ) It’s sort of like geocaching. The important thing to note is that these letterboxes are hidden all over the country in public places that just happen to have lots of birds!
 A trail I found
 One thing I have become very good at is maximizing what I can afford. Many times I see those big expensive primes out there and get gear lust. In my humble opinion, never spend more on gear than a nice used car would cost. So a few things that are essential; A halfway decent camera that has the ability to fine tune your lenses. I have found that almost every lens I have ever used has benefited greatly from fine tuning. There are a bunch of ways to do it, google it. I constantly analyze all my images to see if my fine tune is just right. I look for the plane of sharpness and make sure there is no front/back focus. Lenses are the subject of huge debates and so many people have it ingrained that you must buy Canon/Nikon. The truth of the matter is that Tamron and Sigma are both producing some serious lenses that perform as well as the OEM’s for ½ to 1/3 the price. Something to consider is how you want to shoot. I personally shoot handheld 99% of the time, so having a relatively light lens is very important to me and I often carry 2 lenses and cameras on a dual shoulder strap setup.
So what exactly is sharp enough? That is a question that must be answered on an individual basis and is a subject of debate on many forums. An important thing to remember is intended output. Social media/fb? When you down size an image that much, many lenses will be sharp enough, especially if you can get a bird to occupy 50% or more of the frame. Things change when you want to print large, but I have a few 2x3 feet canvases that I printed from my 12 MP d300 that look quite stunning from normal viewing distances.
 D300-Tamron 200-500
So we have our gear, settings, light and great knowledge of bird behavior. Now it is time to figure out how to get amazing images. The truth of the matter is that it mostly lies in field craft. The closer you get to your subjects, the more detailed, better images you will have. This takes time to figure out. Some birds are just not all that worried about humans. Some are super skittish. It depends on the bird and it takes some time to figure out which ones like you. Starting out in state parks is a great way, as many birds in these locations are much more use to human activity. Personally I wear camo. People always ask me if it helps, and the truth of the matter is, not really. The birds still know you are there, but it can help you blend in if you are stationary and quiet. I like camo because people don’t see you and you don’t have to deal with really dumb questions like, if you can see the moon with your lens. The other reason is being camoit is generally designed for the elements, keeping you cool/warm, ripstop, etc. Another important thing that always gets overlooked is proper footwear. Slipping on wet rocks is not fun for your body or gear.
 Getting close and knowing your subject
Persistence is another key to producing consistent, high quality images. In the summer I am often out shooting for 12 hours. Mid-day sun is not ideal, but being a chef I must take advantage of any time I have. Great shots do randomly happen, but for the most part it takes large chunks of time. I also never have a lens cap on or my gear stored in a bag. It rides shotgun and ready to go set at 1/1000th a sec, just in case I see something along the way.
Another thing that I see too often is “social photographers” Many times people like to go out in groups and make a raucous in the woods. I prefer to shoot alone. It is much easier to stay focused. It is also much easier to remain hidden and unobtrusive when you are alone. Once you find your spot, under NO circumstances should you share this with anyone. A good spot is more sacred than your internet passwords! One of my best spots might possibly be overrun with photographers this year as someone figured out where I shot and told “just a friend”. Somehow “just a friend” turned into 1 of 2 cameras stores in the state babbling away about where to find my owls to anyone that walks into their store… This will surely place undue stress on this family of owls..
 Baby Great Horn Owl
I have fallen into my own style of images. One thing I am known for is capturing emotions in birds. This takes all of the above lessons and takes it one step further. Click a lot! Wait for things to happen. Check your settings. Don’t be afraid to get down and dirty. Sometimes you just have to lay in mud, low tide sludge, wet beaches and snowbanks. A sniper position really changes perspective and compresses depth of field. I also have become known for my Osprey action shots, but that is the pinnacle of years of research and finding one of the osprey hotspots in New England. What’s your style? How do you want to separate yourself from others? These are important things to think about as you look through your viewfinder, a step to the left or right? Should I crouch, lay down or stand up? The smallest things can make the biggest difference.
So you have a fancy video game controller in your hand. You can spin that thumbwheel and go from 1/250th to 1/1000th (2 stops) with 6 clicks and you don’t have to think about it. Now it is time for the leap of faith. Stop looking at your subject through the viewfinder, start looking at the light, the background and anything that may ruin your images like stray branches or twigs. That is when the magic will start happening.
Be ready for the unexpected, birds can appear out of nowhere very quickly. When I am driving around, my camera is at the ready… Shutter speed set at 1/1000th and ready to go. Keep the sun at your back and the birds in your face!
Last edited:


![[No title]](/data/xfmg/thumbnail/40/40305-2fbdc00adce4fac5e62dccb3f6f9c633.jpg?1619739413)
![[No title]](/data/xfmg/thumbnail/37/37540-73002ccb910b97978bc38658622a34d3.jpg?1619738133)

![[No title]](/data/xfmg/thumbnail/40/40302-79b0636c0b67a1ed65f8ad9e01c690e7.jpg?1619739412)
