My experimental photo class was just given an assignment to make prints with "Selectacolor." It is a process of coating with uv sensitive pigments and exposing much like a cyanotype. The problem is that there is virtually no literature on this technique. The only instructions we have are the ones that came with the Rockland pigments, which are vague at best. There is nothing that any of us can find online, and my instructor hasn't even made a successful print. My whole class is very frustrated, everyone is doing the same thing and having a different freakish result....I'm beginning to think that the stuff just doesn't work (which would explain why no one knows anything about it). If anyone has used it and knows what my class is doing wrong I would appreciate the input. Or if anyone has tried it and agrees that it is junk I would feel better too.
Navigation
Install the app
How to install the app on iOS
Follow along with the video below to see how to install our site as a web app on your home screen.

Note: This feature currently requires accessing the site using the built-in Safari browser.
More options
You are using an out of date browser. It may not display this or other websites correctly.
You should upgrade or use an alternative browser.
You should upgrade or use an alternative browser.
has anyone used Rockland Selectacolor?
- Thread starter shell23
- Start date
- Joined
- Sep 2, 2003
- Messages
- 34,544
- Reaction score
- 7,570
- Location
- In the mental ward of this forum
- Can others edit my Photos
- Photos NOT OK to edit
I have not heard of "Selectacolor". Strange that your instructor would have you all doing something that he hasn't mastered, leaving you all floundering. Ah well, interesting experiement, but if everyone is "failing" I would hope you all get a passing grade. ")
Sounds like a contact print method - why isn't it working? Are the images just not showing up?
Have you called someone at Rockland for advice? Sometimes these folks can be very helpful.
Hopefully someone who might have heard of this will weigh in here for you.
Sounds like a contact print method - why isn't it working? Are the images just not showing up?
Have you called someone at Rockland for advice? Sometimes these folks can be very helpful.
Hopefully someone who might have heard of this will weigh in here for you.
Rob
TPF Noob!
jadin
The Mad Hatter
- Joined
- Feb 18, 2004
- Messages
- 1,753
- Reaction score
- 10
- Location
- Down the Rabbit Hole.
- Website
- jadinhanson.smugmug.com
terri said:Strange that your instructor would have you all doing something that he hasn't mastered, leaving you all floundering.
Sounds like just the right choice for an 'experimental photo class'.
I can't figure out how to do it, maybe one of these young punks can. :mrgreen:- Joined
- Sep 2, 2003
- Messages
- 34,544
- Reaction score
- 7,570
- Location
- In the mental ward of this forum
- Can others edit my Photos
- Photos NOT OK to edit
But doable - sounds like basic contact printing to me:Rob said:
It could be they're not laying on the sensitizer thick enough, or not exposing it long enough, or that they weren't allowing the sensitized papers to dry in complete darkness and they're being fogged. There are any number of things that could cause erratic results.Alternative Processes: Some of the "daylight" processes like SelectaColor, FA-1 sensitizer, blueprint and platinotype, require a full-size negative for contact-printing. I'd like to make such a negative from a color print. How do I go about it?
Formerly, full size negative transparencies could only be made photographically, but now can be made digitally with any inkjet or laser printer, or photo-copier.
Start with any kind of original-- a black & white print, color print, black&white negative, color negative, black&white or color slide, digital photograph, or an illustration taken from a book or magazine. You can also start with a drawing or a solid object like a leaf (popular with beginners.)
If you have a scanner or a digital camera, you can scan the image and reverse it to make a black & white negative image, then print this onto transparency material with a printer or copier.
If you don't have access to a scanner, you can order a transparency from your artwork at an office-service store like OfficeMax or Kinko's.
You may prefer to make a full-size negative the traditional way-- photographically, by enlarging onto black-and-white litho film. If the litho film is a high-contrast type like Kodalith, for a full tonal range develop it in paper-developer like weak Dektol instead of the high-contrast Kodalith developer.
You can also make your own "litho film" by coating Liquid Light or Ag-Plus emulsion onto glass or clear acrylic.
What is the sensitivity of the room light processes?
Each process has different sensitivities, the FA-1 being the fastest and SelectaColor the slowest, but in general the closer you get to the spectrum of sunlight, the shorter the exposure will be. Next to sunlight itself, the fastest exposures are in order with mercury vapor lamp, sunlamp, arc light, blue photofloods, daylight florescents, UV fluorescents, etc. With SelectaColor, they will give an image in about 10 minutes or less at 10 inches distance. Slower than these sources are cool-white fluorescents and quartz halogen (bare bulb), that will take about 30 minutes to expose SelectaColor with less time for the other room light processes.
I appreciate Jadin's joke, but I also think it's irresponsible for an instructor to be unable to instruct. Don't try it if you can't show them how - otherwise, you end up with the situation that's being described: everyone in the class is frustrated. What a waste of time and money!
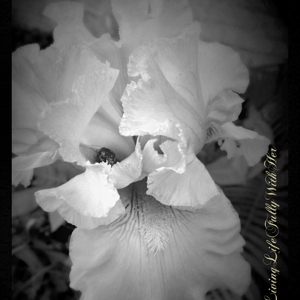
After about 7 tries I finally have begun to see results. I tried both sunlight and blacklight exposures and the sunlight gives the best results (although difficult in winter in Michigan!). The selectacolor pigments are not overly sensitive, and really do not fog unless in direct sunlight. I think the problem is the paper sizing. Rockland suggested to size with Acrylic polymer....but it was streaky and the pigment practically washed right off. I had some extra paper sized with arrowroot for an upcoming salt printing project and I gave it a try. (I had also tried pre-sized printmaking paper which was too absorbent, the pigments wouldn't rinse out in the unexposed areas). I finally began to see results with the arrowroot.
The pigment takes much longer to develop than Rockland suggests...in bright sunlight it still takes upwards of 35 minutes. Also the pigment is easy to coat evenly, but if your sizing isn't really smooth & even then the colors end up looking streaky and sloppy. The prints are interesting, they end up looking like a rich watercolor. I'll probably try it a few more times and see if I can get a cleaner looking print.
So basically the process is possible, it just seems inconsistent and takes a lot of trial and error. I appreciate all the input and I hope some one else ventures to try this process!
(In defense of my instructor, there were students in the class that really wanted to try the process and that's why she agreed to get us the materials, which we did not have to pay for at all. Also, it was made very clear that no one would be marked down if they did not get results)
- Joined
- Sep 2, 2003
- Messages
- 34,544
- Reaction score
- 7,570
- Location
- In the mental ward of this forum
- Can others edit my Photos
- Photos NOT OK to edit
Good luck with it! It looks like fun, but all contact printing looks cool to me.
leighann0
TPF Noob!
- Joined
- Aug 29, 2008
- Messages
- 3
- Reaction score
- 0
- Can others edit my Photos
- Photos NOT OK to edit
I am now experimenting with selectacolor on glass. I will update my results soon. Thanks for posting the time exposure for sunlight, that is a big help as I started off only exposing for 20 minutes and it wasn't working at all!
I am now doing 45 minute exposures. I'll keep you guys updated!
I am now doing 45 minute exposures. I'll keep you guys updated!
windrivermaiden
TPF Noob!
- Joined
- Nov 2, 2006
- Messages
- 230
- Reaction score
- 2
- Location
- So Cal
- Can others edit my Photos
- Photos NOT OK to edit
For what it's worth, this is what I know about exposing any colloid/gum dichromate mixutres:
Selectacolor is an aluminum dichromate colloid. It is pre mixed and I don't know what the dilution is. Dilution makes a great deal of difference to the exposure times in Dichromate solutions as does the "freshness" of the solution. Even in light proof containers at room temp, it looses it's predictability relatively quickly.
In my opinion, Aluminum Dichromate is harder to deal with than Potassium Dichromate. It is harder to get consistant exposures. Colloid and casien ( milk protien) are harder to control than gum arabic.
These are fussy mixtures. Humidity affects them, Light affects them, especially flurescent lights like in class room spaces, It may say "daylight" but that means very subdued light, not working with the lights on or near a window.
They suffer greatly from not being brushed enough when applied. The solution needs to start to "tug" the brush before it makes a stable layer of emulsion and then again too much brushing will pile the pigment up and leave bunchy areas with too much pigment and thin areas with too little. Speaking of brushing....the metal in some brush furels, react with the chemicals in the emusion and render it useless,
Once the emulsion is applied, it needs to be fully dry before exposure or it will sluff off the paper. Dry to the touch is not always dry. Rushing to expose, as is apt to happen in a classroom situation when one is ruled by time, will ruin the print .
The paper has to have the proper sizing. Too little and the pigments will stain, too much and the emulsion will slid off the paper.
There is a critical zone of exposure, I find it between 30 seconds to 5 minutes in sunlight at a dilution of 10% Potassium dichromate solution mixed 1:1 with gum arabic/pigment mix in which the gum is more than half the quantity by volume of the pigment mix. I'd have to look up my colloid and casien times, but they are similar.
There is a failure point at which the emusion is over exposed and will wash away as if it were not exposed at all. With my few times trying to expose with UV light indoors ( months of experience now vs years of printing in sunlight.) I am finding 8 to 12 minutes for decent exposure and a failure point at about 15 /17 minutes.
my suggestion is to buy the freshest batch you can find. Better yet, Go to Bostick and Sullivan and get the gum dichromate kit. you have to mix your own emulsion but your results will be better.
Make a step table, a transparency of value bars from 0 to 10 and then make trial exposures with the solution in a consistant light. Mid day sun is the best. using a dark slide to cover the negative, expose it in 10 second increments up to 5 minutes and then wash the test strip.
BE PATIENT!!!! Proper washing takes a lot of time. I use 4-20 minute baths of clear water MINIMUM!!!. sometimes it takes longer to clear the unexposed emulsion. Often, it will be in the third bath that I finally think "OK, This one is going to work." Before that, I will be looking at the print and seeing no real progress in clearing the unexposed gum and start to worry...yep, even after printing with this method for 8 years (omg is it really that long?) I still have days when it just doesn't want to cooperate! (today was one of those days...prints took over 2 hours to clear completely! )
I have not had much experience with doing prints on glass. I'm too much of a Klutz to want to put one more dangerous item into the mix. Its bad enough to be playing with harsh chemicals. LOL
windrivermaiden
TPF Noob!
- Joined
- Nov 2, 2006
- Messages
- 230
- Reaction score
- 2
- Location
- So Cal
- Can others edit my Photos
- Photos NOT OK to edit
OH! and skip the acrylic size and get ossified gelatin.. Knox brand, edible is easy to find. Harden it with a few drops of glycol, if you plan to do more than one layer of color. Acrylic polymer is a plastic, ... Gum, colloid and casien are organic polymers and don't like to cling to the plastic base of acrylic.
Again, for the beginner, I can't recommend B&S's gum dichromate kit enough. It might have arrowroot size, which is also good but has to be applied between layers if doing multiple colors. Also, If you have problems with their product, you can visit their web page and drop an email or call them. They want you to be successful.
Again, for the beginner, I can't recommend B&S's gum dichromate kit enough. It might have arrowroot size, which is also good but has to be applied between layers if doing multiple colors. Also, If you have problems with their product, you can visit their web page and drop an email or call them. They want you to be successful.
Hi there,
I've just been researching the Selectacolor process, which I found out about via www.alternativephotography.com and from there I went to www.rockaloid.com which has some instructions on the page and a contact form too. I found it really interesting to see that they recommend using a hallogen light (which has a wavelength close to sunlight apparently) to substitute or shorten exposure times for processes such as selectacolor and others too, like the cyanotype process. This sounds good, if it works (which it must, as far as I can see), because I also had problems regulating my cyanotype printing times in the past. Sunlight is, well, unreliable in the UK!
I'd be really interested in hearing any other comments on this process. Especially printing on walls or silver....
Also - apart from First Call Photographic, does anyone know where to get Selectacolor in the UK?
Thanks!
I just ordered |Selectacolor from Rockland, they suggest ringing their support line for help! Which is nice of them
This is the number they gave me.
(USA) 845-359-5559
Anyone else out there using this???????? Any experiences, tips, ideas would be really welcome.
R.
This is the number they gave me.
(USA) 845-359-5559
Anyone else out there using this???????? Any experiences, tips, ideas would be really welcome.
R.
scott610
TPF Noob!
- Joined
- Sep 2, 2013
- Messages
- 1
- Reaction score
- 0
- Location
- new orleans
- Can others edit my Photos
- Photos OK to edit
Hello ..I would like to try Selectacolor on a large piece of aluminum,,,, lets say 2' by 3' ... how big does the tranfer have to be...how is it supported to get exposure?...The pic is very colorful,,,Do I repeat the process with each color ? Wish Rockland would give more detail with the instruction....
- Joined
- Sep 2, 2003
- Messages
- 34,544
- Reaction score
- 7,570
- Location
- In the mental ward of this forum
- Can others edit my Photos
- Photos NOT OK to edit
Hello ..I would like to try Selectacolor on a large piece of aluminum,,,, lets say 2' by 3' ... how big does the tranfer have to be...how is it supported to get exposure?...The pic is very colorful,,,Do I repeat the process with each color ? Wish Rockland would give more detail with the instruction....
Hi scott610, you have opened up a very old thread so you may not get much in the way of answers...I've not used the product myself. Have you called the support line as mentioned above for the US? If the instructions that come with it aren't enough, I'm sure someone on the other end of the support line can answer a few questions.
vintagesnaps
Been spending a lot of time on here!
- Joined
- Jan 13, 2013
- Messages
- 9,119
- Reaction score
- 3,109
- Location
- US
- Can others edit my Photos
- Photos NOT OK to edit
I'm not familiar with this either, although after looking it up it seems to be somewhat like cyanotypes (although on nonporous surfaces instead of paper). I've only used a kit and haven't coated paper for cyanotypes myself yet.
I've been doing lumen prints which are somewhat similar but instead of coated paper use expired photo paper and fixer - it was trial and error for me to figure out the timing, the dilution of fixer, the results using various papers, etc. Sounds like calling the company for more info. might be the best idea.
I've been doing lumen prints which are somewhat similar but instead of coated paper use expired photo paper and fixer - it was trial and error for me to figure out the timing, the dilution of fixer, the results using various papers, etc. Sounds like calling the company for more info. might be the best idea.
Most reactions
-
 428
428 -
 322
322 -
 292
292 -
 281
281 -
 275
275 -
 231
231 -
 198
198 -
 177
177 -
 173
173 -
 163
163 -
 143
143 -
 142
142 -
 136
136 -
 126
126 -
 101
101
Similar threads
- Replies
- 7
- Views
- 1K
- Replies
- 20
- Views
- 2K
- Replies
- 0
- Views
- 1K