How to Photograph Stars at Arches National Park?

cbarnard7

No longer a newbie, moving up!
Joined
Jun 25, 2013
Messages
587
Reaction score
211
Location
Denver, Colorado
Can others edit my Photos
Photos NOT OK to edit
Hi All,

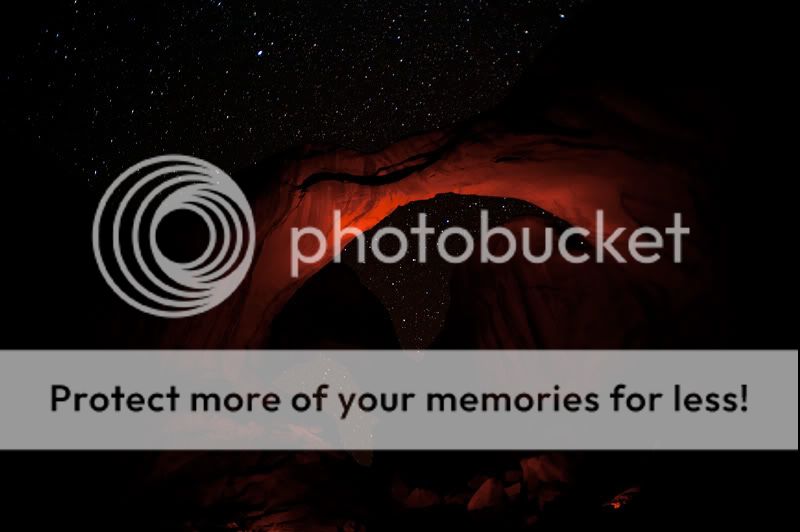
My wife and I are going to Arches/Canyonlands and Grand Canyon in a couple of weeks. I've seen some shots that I'd like to try to reproduce in which I can get an illuminated arch with a starry night sky above it. I'm not too interested in star trails, but rather a bright, foreground image of the arch and bright stars behind. I know a lot will have to do in LR or PS, but as far as controls and techniques, does anyone have any advice? What ISO and shutter speed do you think we're looking at here? I've heard using a headlamp to illuminate the arch is sufficient enough. Any takers? Thanks!
 
Start out with a long exposure for the stars. While the shutter is open pop the foreground with your flash or "Paint" it with flashlights. Some trial and error will probably be necessary. Alternatively, if your camera supports it, you can set the flash to rear-curtain release. This will fire the flash right before the shutter closes.
 
Take your minimum focal lenght (lenght your using) and divide it into, 500 for full frame or 600 for crop(not 100% sure if the 600 for crop applies). This will give you an approximate answer (in seconds) to how long your shutter can stay open without giving you trails. Your iso will need to be pretty high, 3200 or 6400. Iso will obviously be related to how fast your glass is, if you have very fast glass you will obviously be collecting a lot more light. Otherwise you may have to go for an even higher iso to keep shutter time down, preventing trails.

For light painting the arch stand off to the side of camera and use a torch, staying behind the camera will give a flatter effect and less attractive shadows in what you light with the torch. You could also take a separate exposure for the foreground and then blend in photoshop.

I hope this helps, it's what I have picked up on by reading about astro for the past few weeks.

Really excellent advice! Thanks for all of your help. I may go out and do a test run with my foreground of some rock by my house this week or something. There's a bunch of light pollution near me, so we'll have to see if it's even feasible. Thanks again!
 
No problem at all buddy ;) what body/glass are you using? I will dig up some of the links if you want/need them.
Also don't forget that the milkyway will move across the sky, you will have to take your position and time of night into account if and how you want it in your frame. Moon phase will also have a big effect on how many stars are visible, I'm sure you know that already.


Have a look through 500px and Flickr to give an idea of settings
 
Start out with a long exposure for the stars. While the shutter is open pop the foreground with your flash or "Paint" it with flashlights. Some trial and error will probably be necessary. Alternatively, if your camera supports it, you can set the flash to rear-curtain release. This will fire the flash right before the shutter closes.

Thanks for the advice! I'm sure there will be plenty of trial-and-error!
 
No problem at all buddy ;) what body/glass are you using? I will dig up some of the links if you want/need them.
Also don't forget that the milkyway will move across the sky, you will have to take your position and time of night into account if and how you want it in your frame. Moon phase will also have a big effect on how many stars are visible, I'm sure you know that already.


Have a look through 500px and Flickr to give an idea of settings

I'll be using a Nikon D5100 body with either an 18-55VR or 55-200VR lens. I'm excited as to how clear it will be when I'm photographing (I hope without rain/clouds)...It'll be nice without light pollution! Any other information will be helpful- thanks again! :)
 
David Kingham Photography | Nikon D7100 - Cropped Sensor for Night Photography?

ClarkVision Photograph - Milky Way Reflection at Echo Lake, Colorado (crop1)

Have a look through both of these pages to give an idea of settings, the second gets very indepth but is a great scource of info. The chap really knows his sh*t! See how you get on with the 18-55, maybe you could pick up an older af-d 2.8 wide angle off ebay if you really feel the need.
The samyang/rokinson manual focus 14 and 24mm are what a lot of people recommend for astro but a bit too much dollar if your not going to be using them a lot

Excellent links!

The 18-55 is f/3.5-5.6G. So, I may have to crank up the ISO a bit more at maybe 5000 or 6400, but I think it should be alright (I hope) from what I've been reading! I'd rather not rent a lens if possible (for fear I may ruin it or something on my hike) and will just have to make it work and fix it up nicely in LR5 later!
 
The formula Gary provided should work well for you ... I've tested different exposures with my 14mm lens and found that I can get away with 40-45 seconds and not yet notice the elongation of the stars, but at 60 seconds I can notice the stars are elongated. (by Gary's formula I should be able to do about 35-36 seconds which is pretty close and I admit I was trying to push it as long as I could.)

You will need a good dark sky. Light pollution will blow the shot. Also, the effects of light pollution are intensified if there's a lot of moisture in the air (what astronomers call "poor transparency") which reflects even more ground-based lighting.

You can download a copy of Stellarium and use it to model the location and times of the shoot to determine exactly where the Milky Way will be (and or adjust the time you plan to shoot.) Stellarium is open-source planetarium software and runs on pretty much all current operating systems (Mac, Linux, PC, etc.)
 
Take your minimum focal lenght (lenght your using) and divide it into, 500 for full frame or 600 for crop(not 100% sure if the 600 for crop applies). This will give you an approximate answer (in seconds) to how long your shutter can stay open without giving you trails. Your iso will need to be pretty high, 3200 or 6400. Iso will obviously be related to how fast your glass is, if you have very fast glass you will obviously be collecting a lot more light. Otherwise you may have to go for an even higher iso to keep shutter time down, preventing trails.

For light painting the arch stand off to the side of camera and use a torch, staying behind the camera will give a flatter effect and less attractive shadows in what you light with the torch. You could also take a separate exposure for the foreground and then blend in photoshop.

I hope this helps, it's what I have picked up on by reading about astro for the past few weeks.

Thanks for the tip about not getting trails. I saw it once and I couldn't find it again. I kept getting ho TO get trails.
 
No problem Devin, another option is to make a barn door tracker. This will let your camera track with the sky, the 500 rule can then be thrown out the window. You just need to make a separate exposure (depending on composition) for the foreground and layer it in ps.

The clarkvision link up ⤴ there is pretty much all you need to know.
 
OP - it sounds like you're referring to my arches/milkyway shot I posted a few weeks ago that was lit with a LED headlamp, correct? http://www.thephotoforum.com/forum/landscape-cityscape/336364-night-delicate-arch.html

+1 for everything said so far. remember that the phase of the moon will play a big role, try to go on a new moon night that has clear skies if you can. there is some light pollution from nearby towns, but its nothing compared to where you're currently at...wide and fast glass will be your friend, if you're going to light paint, I'd strongly recommend a flash, or at least something that has a normal daylight color temperature, the light painting in my shot was completely accidental and the LED light source made the post production harder than it needed to be (that is if I had planned to light paint it with something with better color temp). the timing that has been mentioned is good, there are slight star trails in my shot when viewed at 100%, I shot ~65s, when I should have probably been closer to 45s give or take, and I was at 16mm f3.2 ISO 4000 on a D800e IIRC...that was using the 14-24 f2.8 lens....but even with your 18-55, if you're there on a clear night with no moon, you should be able to get some good shots, you'll also want a good sturdy tripod and head, and a remote shutter release, you'll likely be shooting longer than the 30s in camera longest shutter speed, so you'll be using bulb mode, and holding the shutter release down for the whole time of the exposure (or you can get a timer remote that will do that automatically, but they cost more)....practice getting a proper star exposure before you go if you can, even if you need to drive out of denver a little bit, its a bit different than a lot of other 'normal' types of shooting...

have you been to arches before? if you're going to hike to delicate arch for stars, and you haven't been there before, I STRONGLY suggest you hike up in the daylight, maybe just before dusk, it is easy to get lost as a lot of the 'trail' is on slick rock terrain and not clearly defined or marked (both my wife and I have been there several times before and we still got off the trail a few times in the dark), it might be wise to hike up at dusk, shoot/relax up there during the night, and hike back at dawn when you can see better. and bring water too, its not an extremely difficult hike, ~3mi from the parking lot to delicate arch itself, but its not somewhere you want to be without water in the dark...plus if you're there all night you can shoot the milky way in different positions, since it will move across the sky over the course of the night (or rather the earth will be the one to move)...FWIW I had cell phone coverage at the actual arch, but none along the hike to it.
 
Done it before. Me and my friend arrived in town at night and I decided to give it a try. I have never been to the park before so it was really a spontaneous attempt.
I can't remember the arch that we went to, it was one of the easiest to access ones with relatively short trail to hike from the road. For me, I always take some test shots first to see how's the lighting situation. The position of the moon and stray lights from far away will affect how much light gets cast onto the landscape. Well, that night, it was just too dark and all I could see was silhouette of the arch.

So there are a few things you need to do. Bring a light source. Most likely you will need to use light painting to illuminate the arches. The arches are HUGE! Meaning light painting won't be as easy as if you are shooting a smaller object. If you let the light stay at one spot, you get over exposure there and under exposure everywhere else. I had my friend hid under a rock (I didn't tell him about rattle snakes and scorpions) and wave the light continuously back and forth to try to give the arch even lighting. It's difficult because the light I had was just a very dim bicycle light and it didn't do very well.

Focus is tricky because the arch is too dark. If you use a small aperture, you can get it in focus easier, but that means your exposure time increases by a lot. If you use large aperture(which I recommend), you won't be able to get the stars in focus in the same shot. That said, I recommend taking separate shot for the stars and then combine them in post. That way, you can use appropriate exposure for the stars and not have to worry about the arch.

I didn't think of these points when I was there, so these were the lessons I learned. I wish I had a second chance though. Arches National Park is really awesome.

DSC_8525_1.jpg


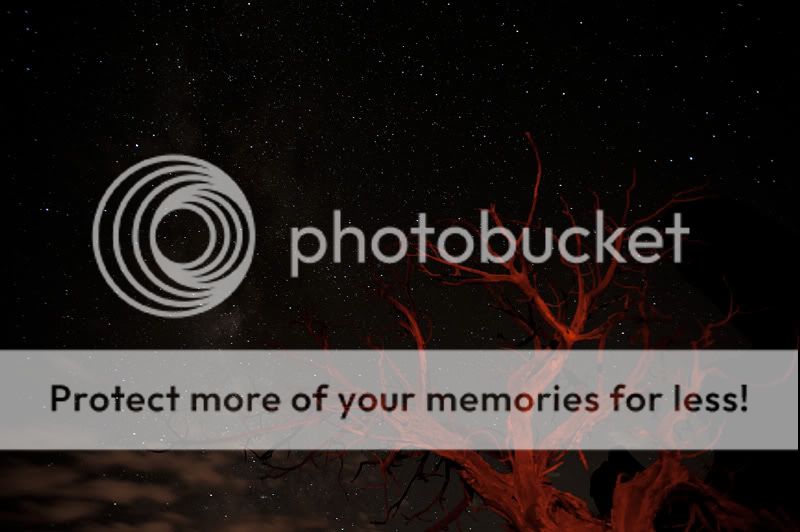
DSC_8507_1.jpg
 
BTW, I doubt the moon is going to do you much good, because you will be looking from under the arch, not above like most landscape shots. Which means, the arch will be sorta back-lit. Bring your own light source. Perhaps prepare a few different color filters to play with.

Not sure about you but when you have a light source, you get a ton of bugs crawling at it at night in the desert. I don't mind bugs so they don't bother me, but my friend freaked out. Had a good laugh though.
 

Most reactions

Back
Top