I've been wanting to contribute to this thread...so here it goes.
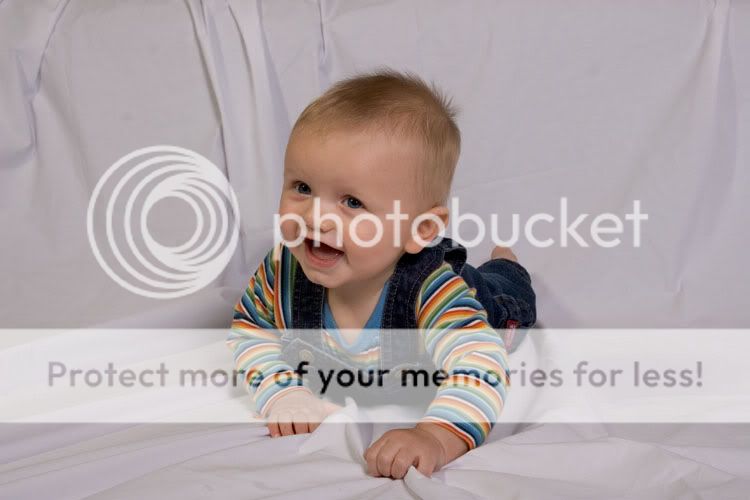
Here is the original image without any adjustments at all.
As you can see, it's a little underexposed and doesn't have any 'pop'.
I always do my shoots in RAW, so I made some adjustments in the conversion stage. I increased the exposure and may have given a few small tweaks to some other settings...but not anything worth remembering. This one is just a sample the I did on my work computer...on my home computer, I use Raw Shooter Essentials and turned up the noise suppression a little bit. I think the default on the program is none at all and if I don't add a bit, the shots look a little noisy, even at ISO 100. The important part is that when making the RAW adjustments, I was concerned with the exposure of the subject, not the background.
Once I got the image into Photoshop, the first step is make a duplicate layer. Then I 'extract' the subject from the background. There are several methods to doing this. The Extract Filter is a good one...but for this, I just used the magnetic lasso and traced around the subject. To make it easier, I make an adjustment levels layer and make it very contrasty. After the loop is complete, I switch to Quick Mask Mode and use the brush to paint the selection in and out to get it as close as I can. The spiky hair was the hardest part so I went over it a few times with varying sizes and opacity's. Then I switch back to regular selection mode, inverse the selection and create a layer mask. This gives me the backdrop layer so that's what I change the name of the layer to. To finish this step, I delete the levels adjustment layer. *edit* It probably would have been easier to just use the magic wand and select the white background. I do that fairly often but I like to switch it up from time to time so I don't get complacent.
I cropped the image...I could have done it before the first step as well.
To get the background how I want it. I use the healing brush and/or the clone stamp to get rid of the distracting folds in the sheet. Then I use levels to make the background white. Then I make the backdrop layer b&w, so that any color cast is eliminated. Sometimes levels cant make the backdrop look just how I want, so just paint it white with the brush. If I do want to keep parts of the sheet, I use a low opacity & soft brush and just add a white vignette to the edges.
Now on to the subject. I duplicate the background layer and name this new layer...Adrien, in this case. First I see if there is any
work required on the subject...blemishes etc. I think I missed a few spots between his eyes on this one...but I did touch up the bags under his eyes (he probably bumped his face in the last few days). I also make sure there is one, and only one, catch light in either eye. Usually, I clone out the fill catch light...but in this case, the main was too high so I just kept the fill. I usually use the burn tool to make sure the whites of the eyes are nice and bright. For an older subject, I'd also whiten the teeth at this point.
Then I use a levels adjustment layer, then a curves adjustment layer. Levels to adjust my darkest and lightest points and curves to add mid-tone contrast. Sometimes I use adjustment layers for color balance and saturation as well. The advantage of adjustment layers is that I can go back and fine tune each adjustment without changing the original layer.
Once I have the subject looking like I want, my next step is sharpening. I tried the LAB sharpening method (found somewhere on this site) but it doesn't seem to play well with a layered image...so I used the High Pass filter technique. It's basically the same sharpening as UnSharp Mask...but I like it because it's on it's own layer. I duplicate the Adrien layer and set the blending mode to overlay or soft light, run the High Pass filter with a radius of about 10. Then I adjust the opacity of the layer to get the right level of sharpening. Somewhere between 20-60% is usually good.
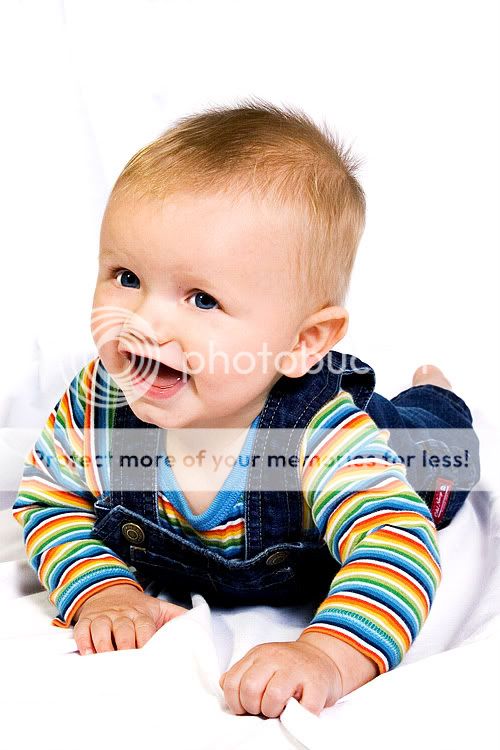
That should be the final look of the image. I save it as a PSD (I will have saved along the way as well). Then I flatten all layers and save a different copy as a JPEG for printing.
I hope I got all my steps in there. Here is the web version of that image.

 thumbup


![[No title]](/data/xfmg/thumbnail/34/34056-de7cd932b4cd702c2f77e0f5c9ec1aa2.jpg?1734164470)
![[No title]](/data/xfmg/thumbnail/32/32942-4440dd4ca2ff307a5d19277feedf1d94.jpg?1734162769)
![[No title]](/data/xfmg/thumbnail/40/40298-08fb67b2f2c98625b8ff8dcb00ed42a8.jpg?1734174708)