TWX
No longer a newbie, moving up!
- Joined
- Apr 30, 2019
- Messages
- 410
- Reaction score
- 103
- Can others edit my Photos
- Photos NOT OK to edit
- Thread Starter 🔹
- #31
So I went ahead and did it.
Step 1, first thing, I found opposing edges. This body cap has forty-eight ridges, found perpendicular points, every twelfth ridge.

Step 2, transfer marks to the backside of the cap.

Step 3, measure the width of the body cap with calipers.
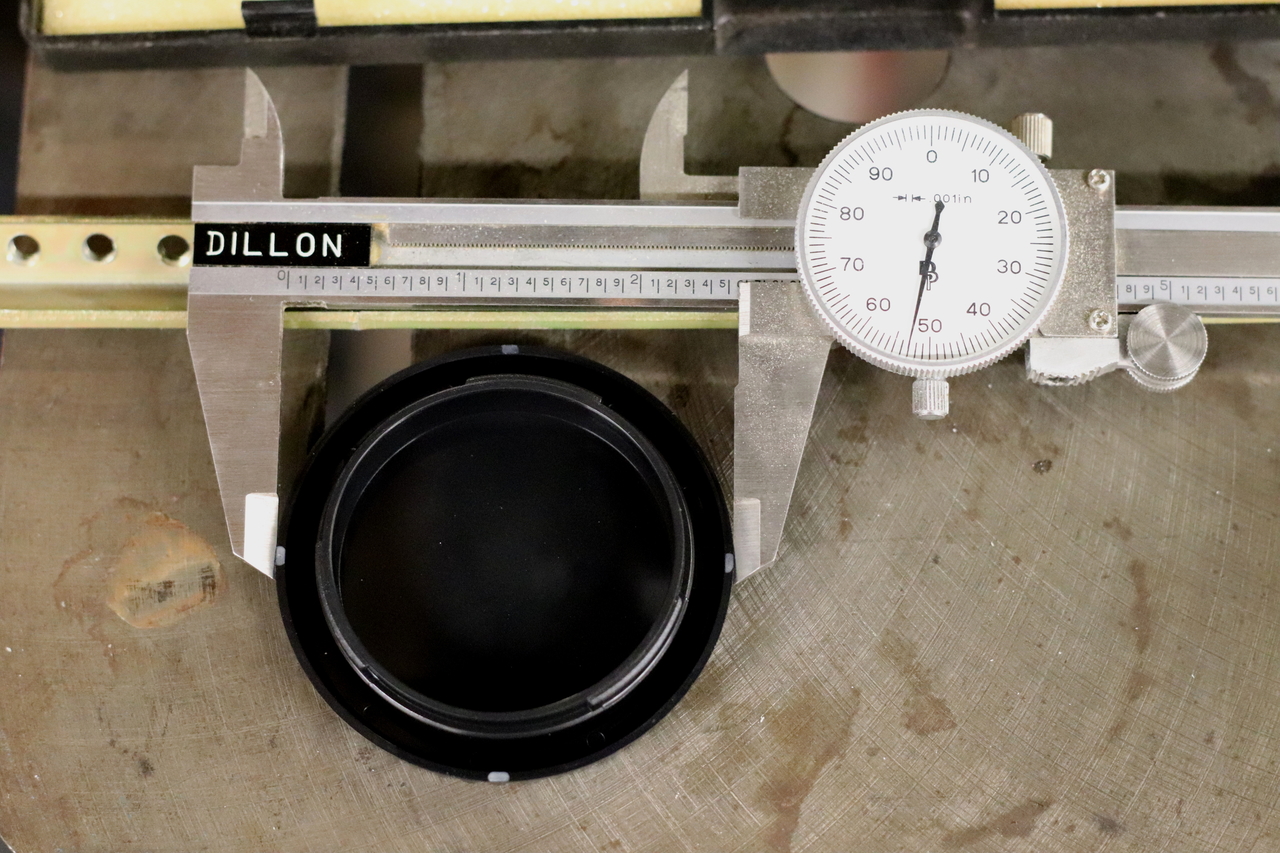
On taking this measurement (2.553 inches in this case) divide by two (1.2765 inches) to get the radius, and set the calipers to the radius.
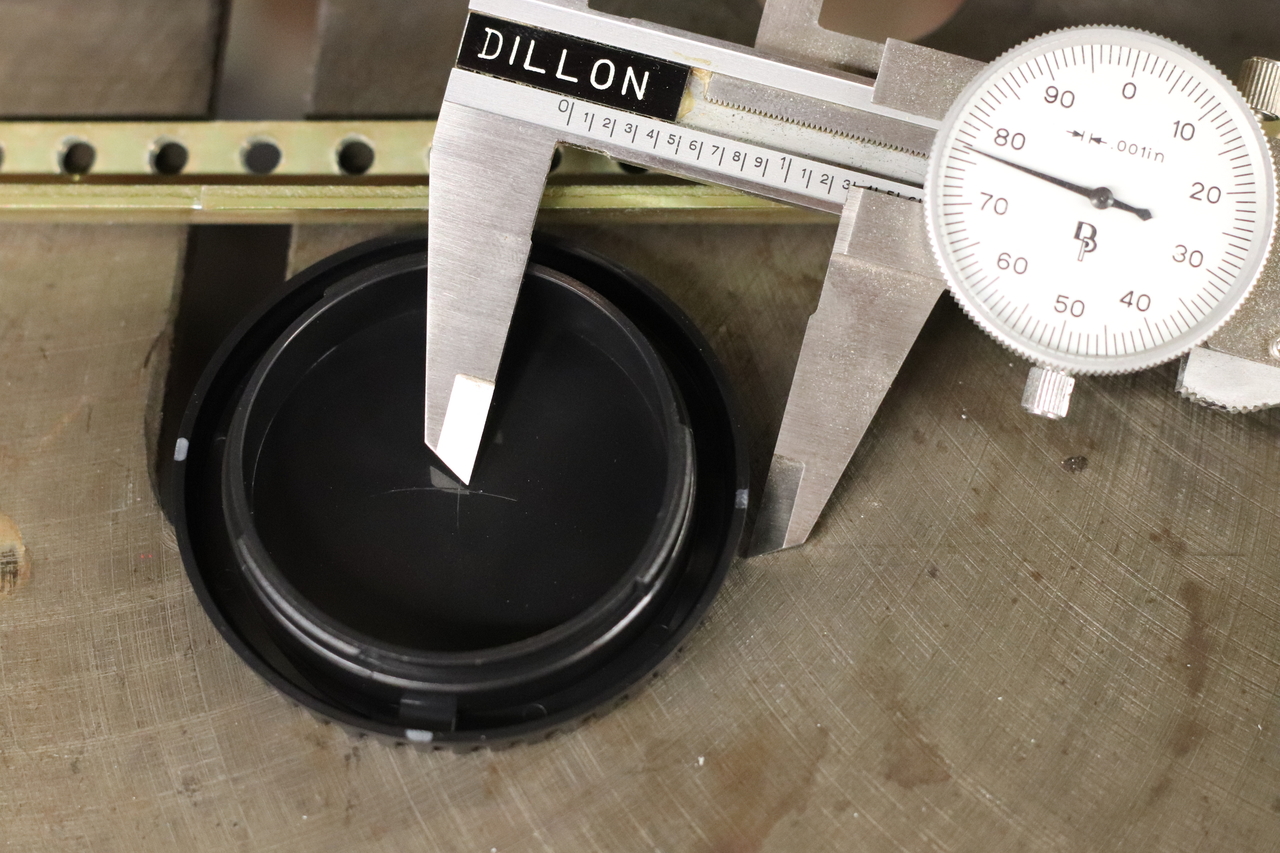
Step 4, pick one of the marked points on the perimeter, and score an arc in the vicnity of the center.

Step 5, pick another mark perpendicular to the first, and score a second arc. Where the arcs intersect is the center.
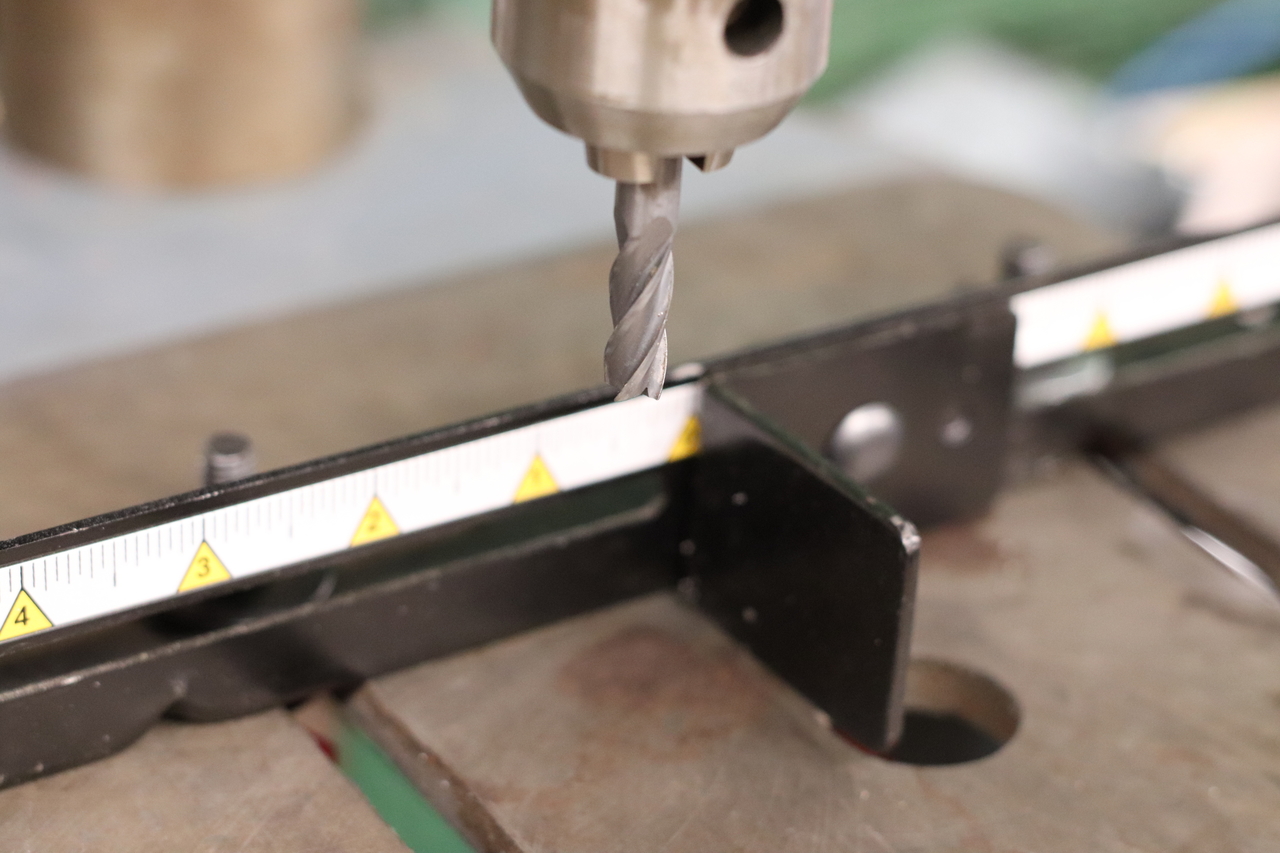
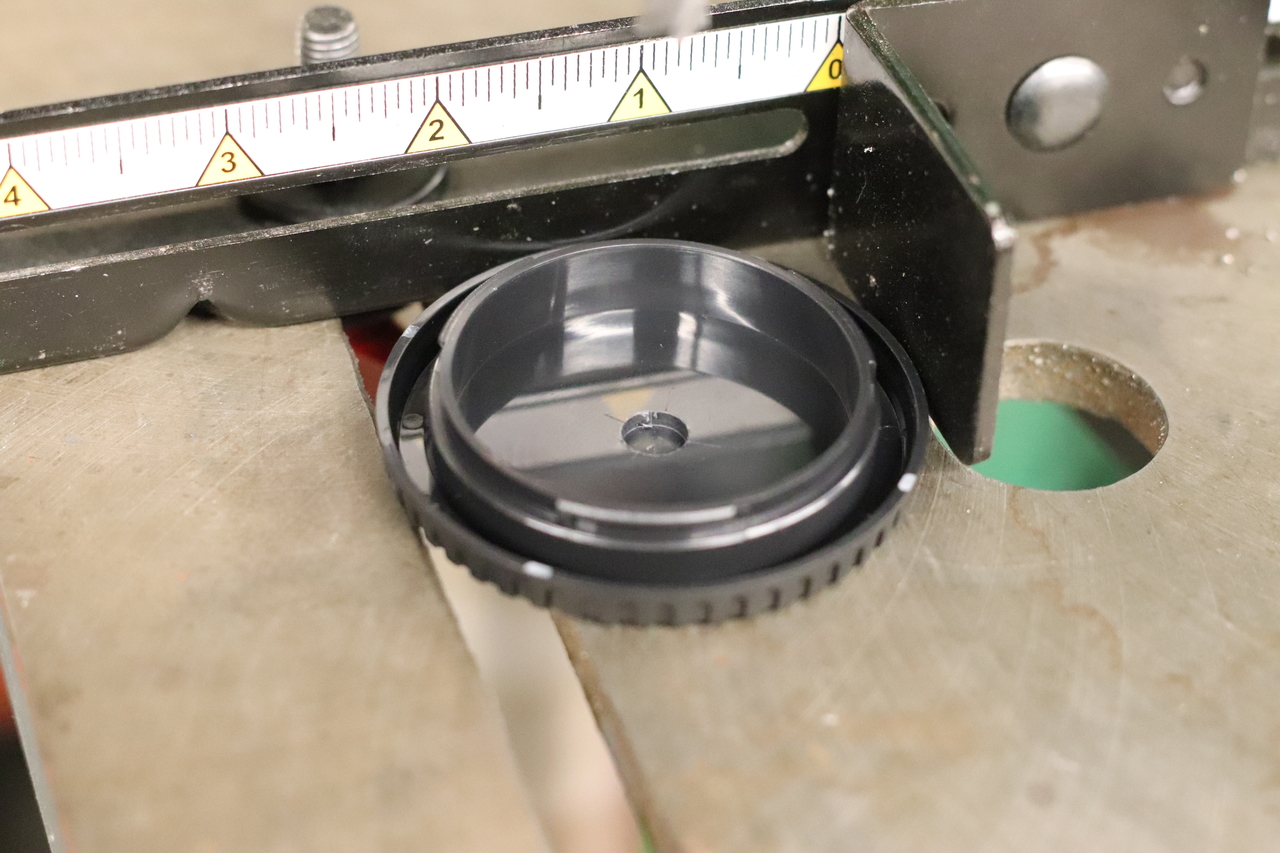
Step 6, chuck a small drillbit into the drill press, check centering/runout, and use this to hold the center of the body cap in order to hold it relative to the table.
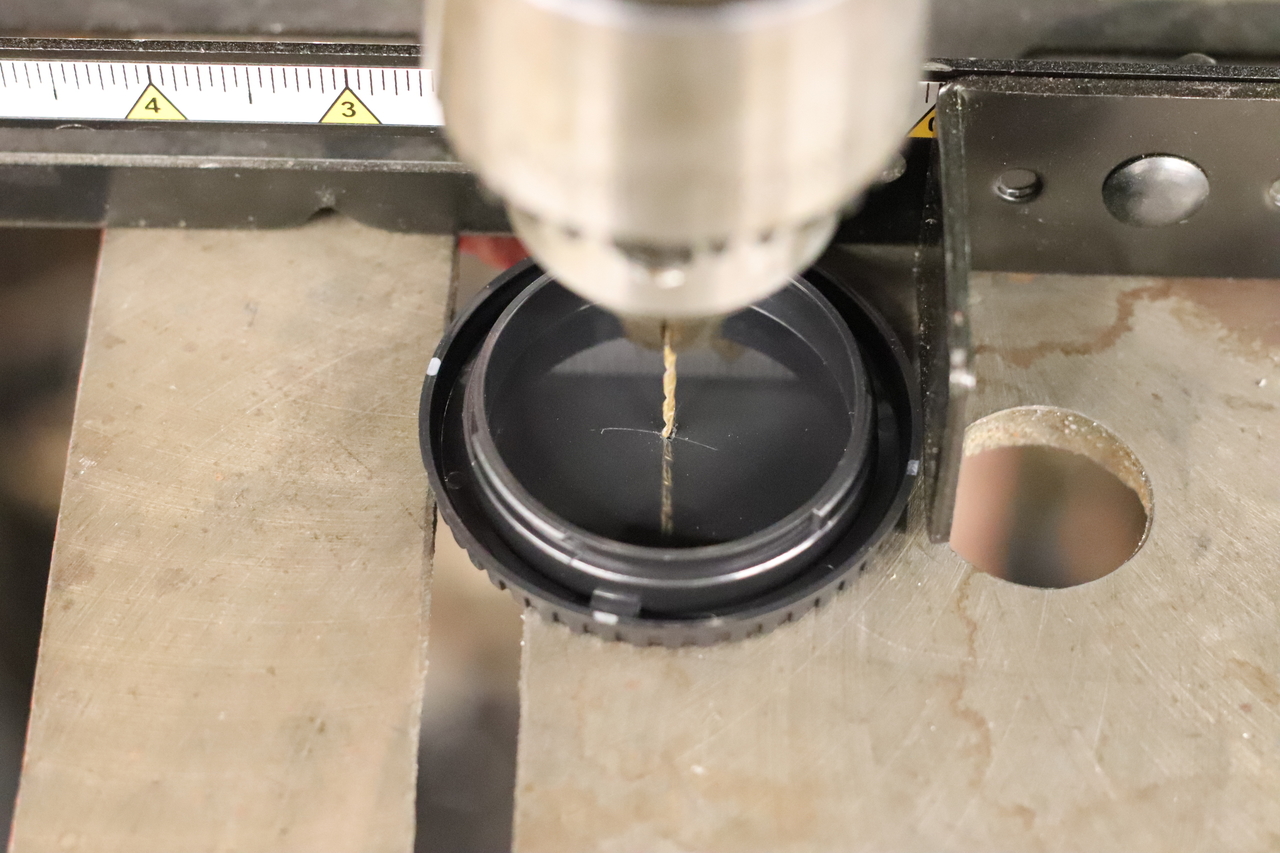
Use this to set the fence and stop to allow the body cap to be positioned in the same place each time.
Step 7, select an endmill.
The endmill should be reasonably small, but wider than the camera-obscura viewing angle based on the flange distance.
Step 8, chuck the endmill into the drill press, check for center and runout.
Step 9, lower the endmill to the table, lower the drillpress depth-stop, then use that depth-stop to raise the lowest point of the endmill to be just above the table.
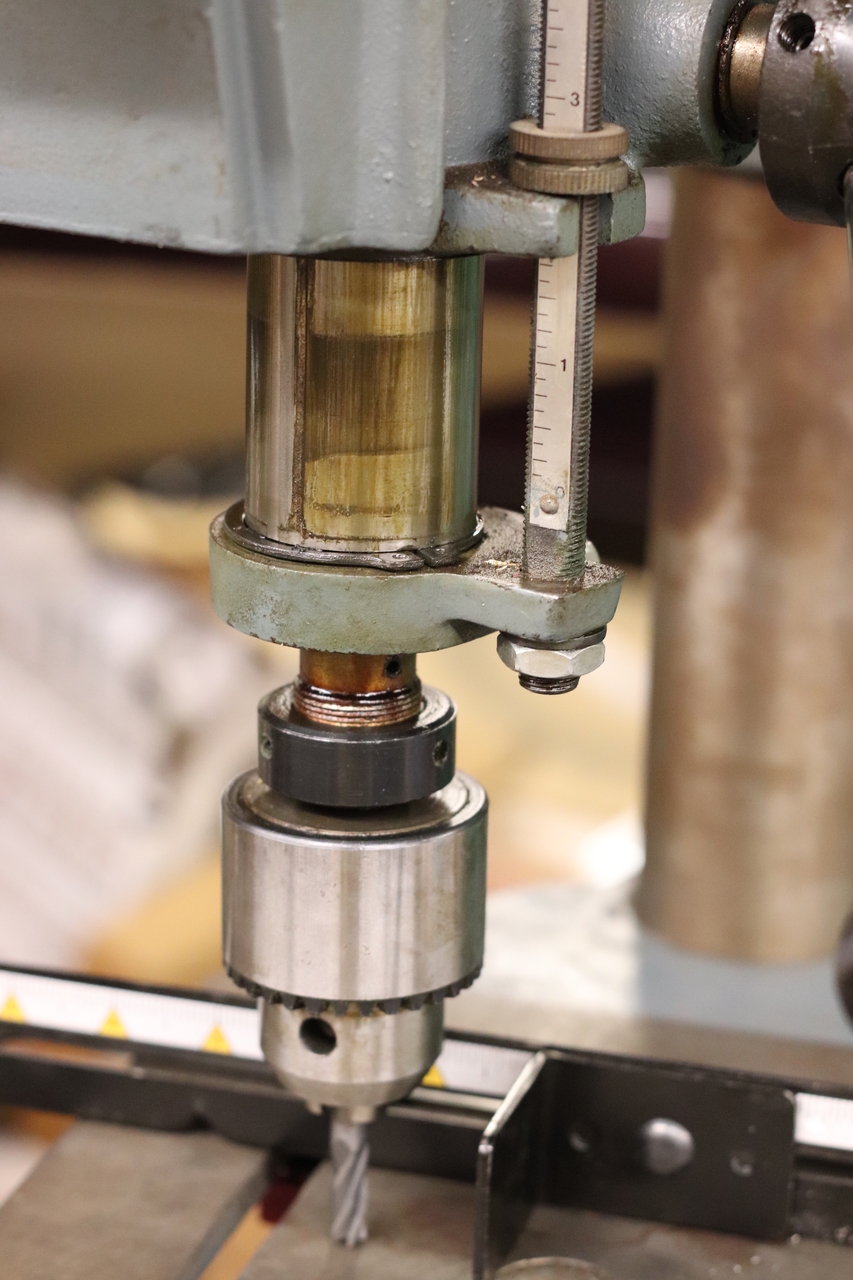
Step 10, confirm the depth visually
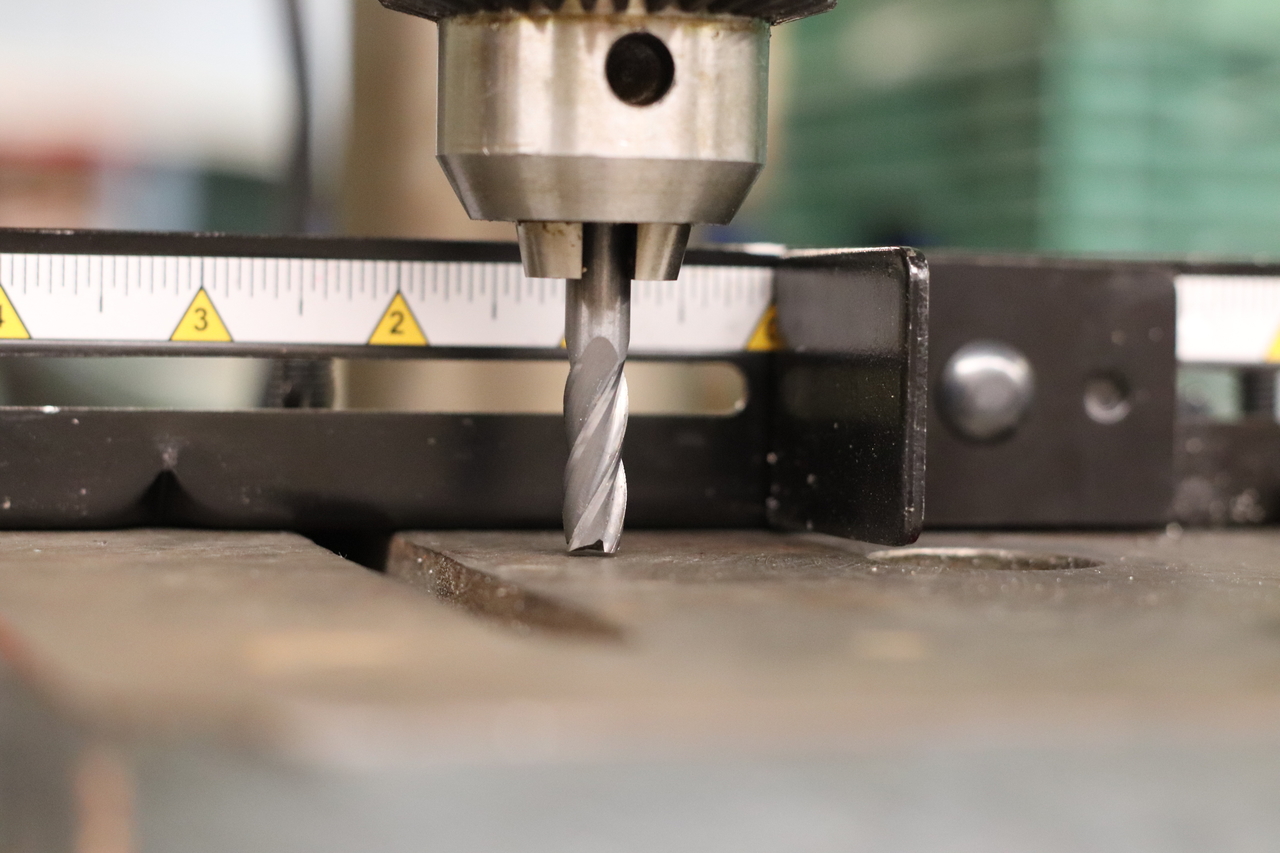
Step 11, mill into the body cap
Blow air into the workspace while milling. I used my own breath. It was adequate. Note, my hand was holding the cap while doing the machining operation. Needed both hands to hold the drill press down and take the picture.
Step 12, Inspect the milled depression and do any cleanup.
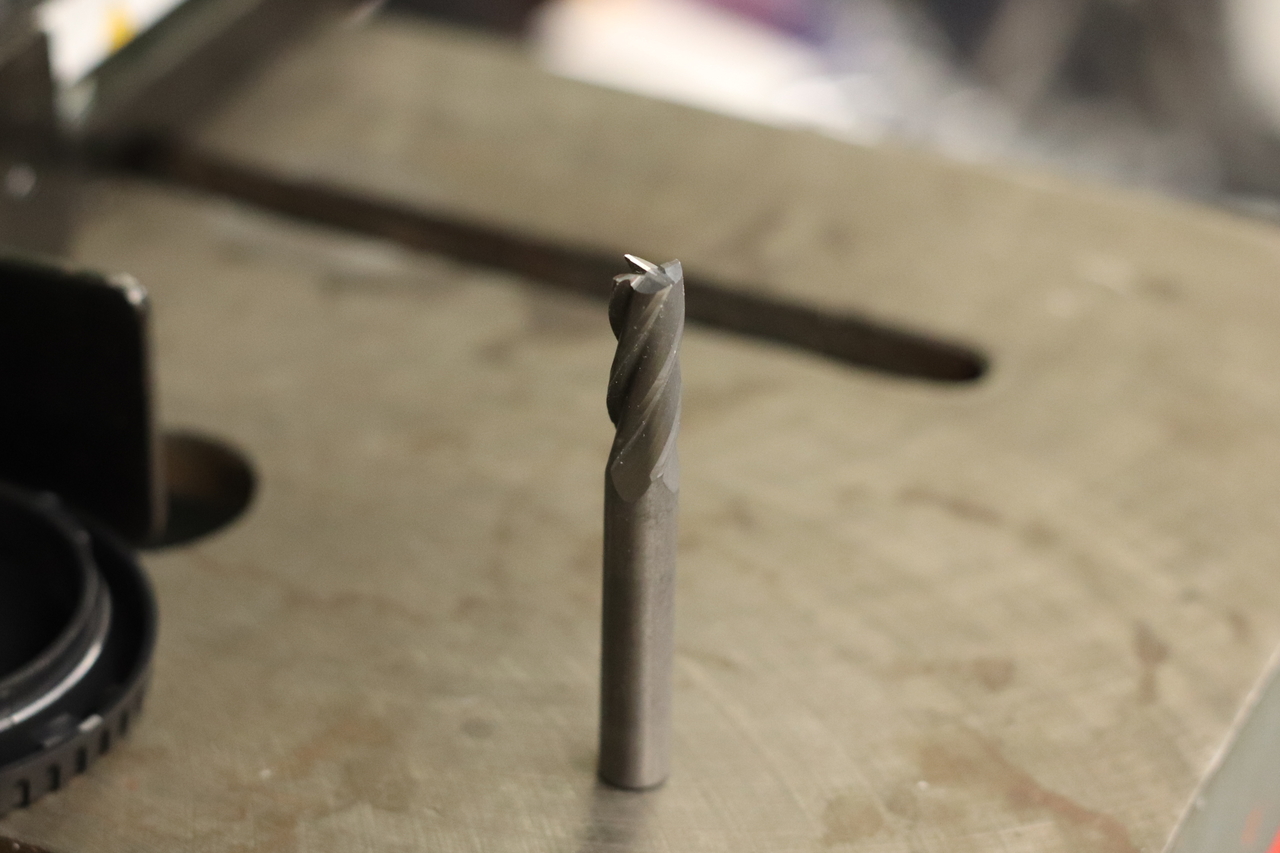
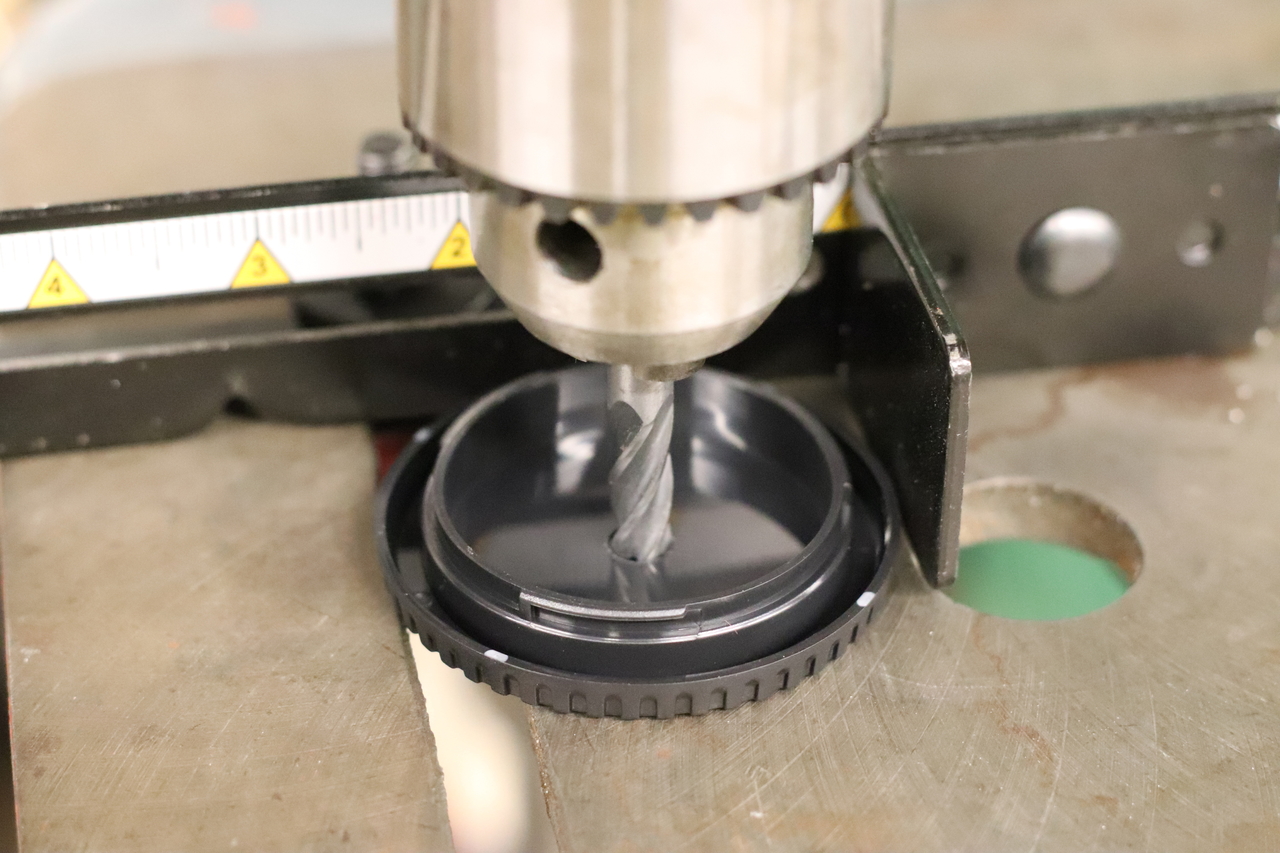
Step 13, select a drillbit for the pinhole.
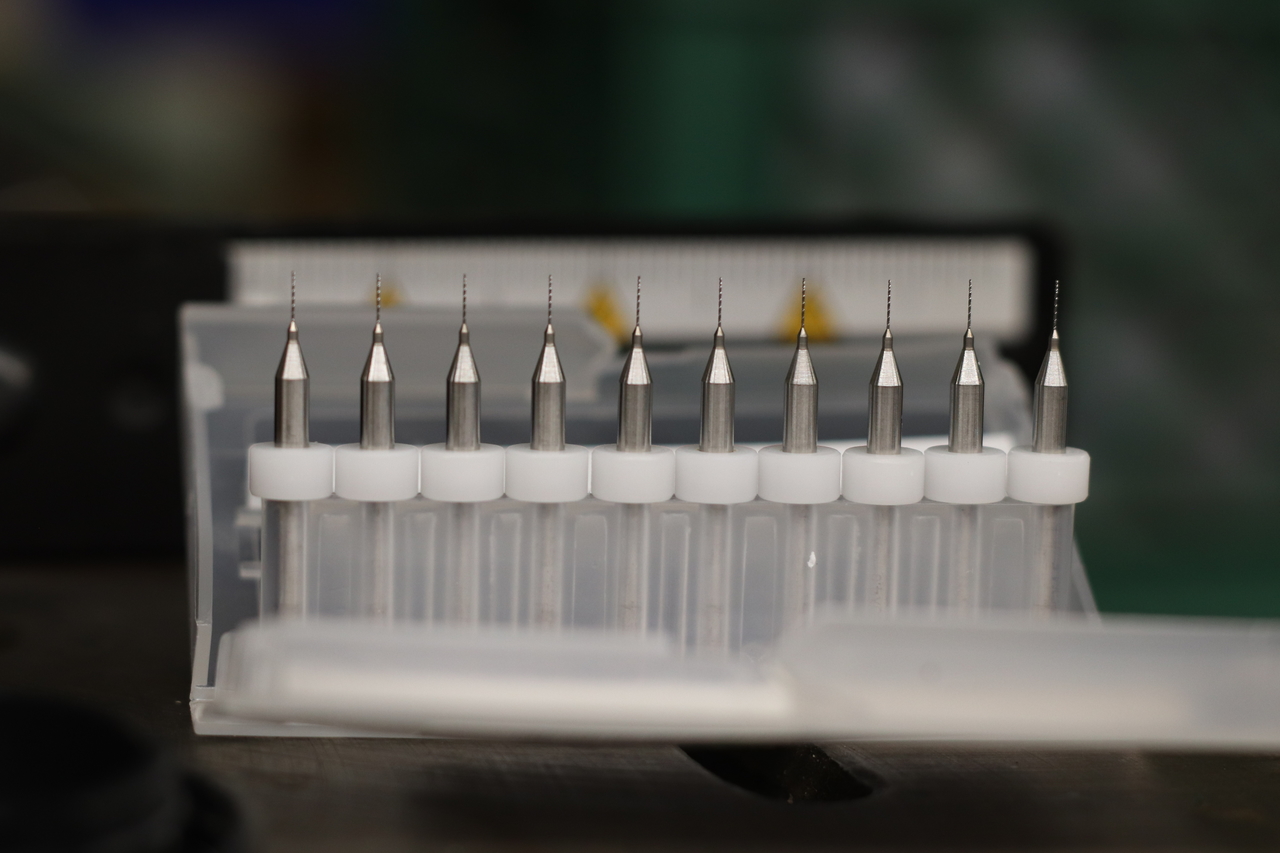
In this case, 0.25mm is a good choice given Canon's flange distance. Bear in mind, the shanks on these bits is only 3mm, these are very tiny.
Step 14, chuck the bit, check for center and runout (visually!) and drill the pinhole.

I used a piece of finished poplar scrap from a previous project to prevent tearout on the exit.
Success!
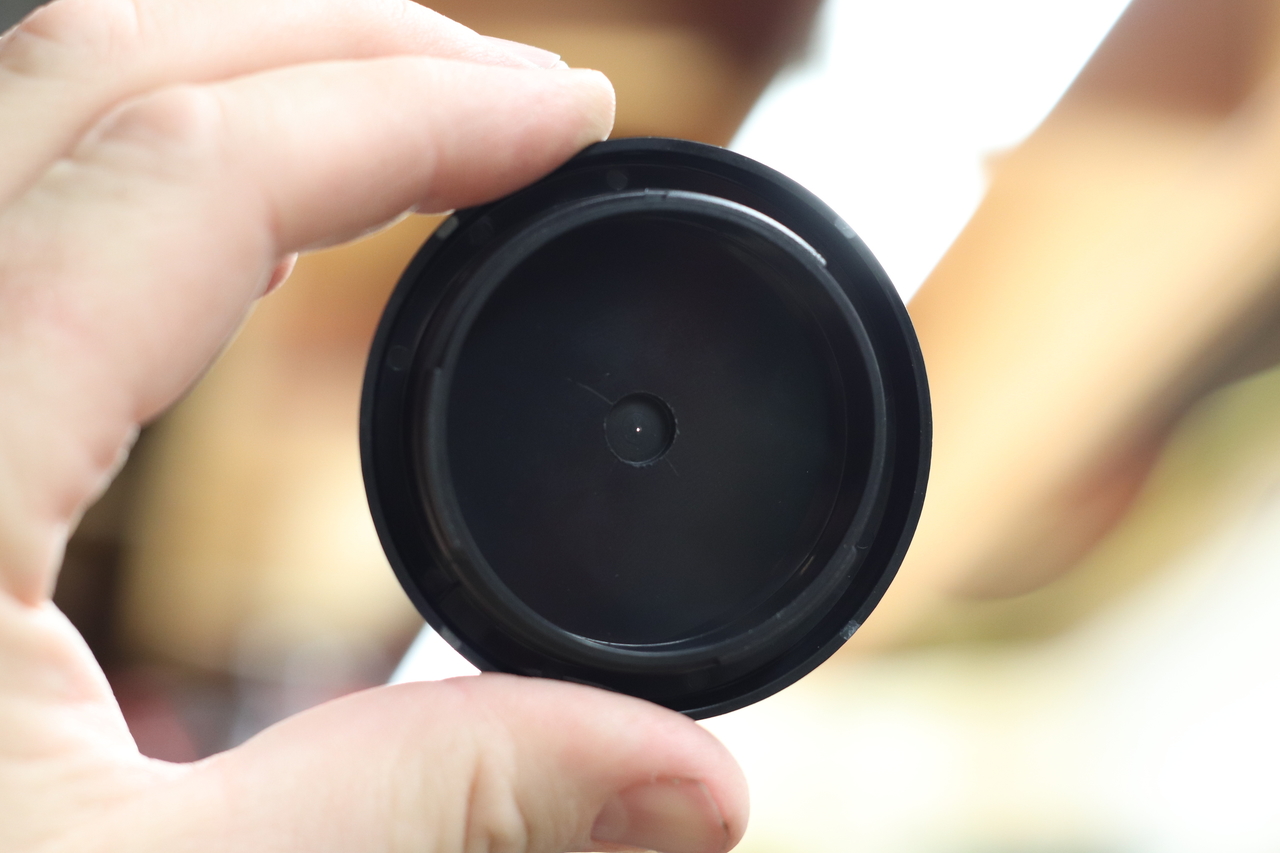
Hole is seemingly clean, though I haven't inspected it with a macro photo.
Some results:
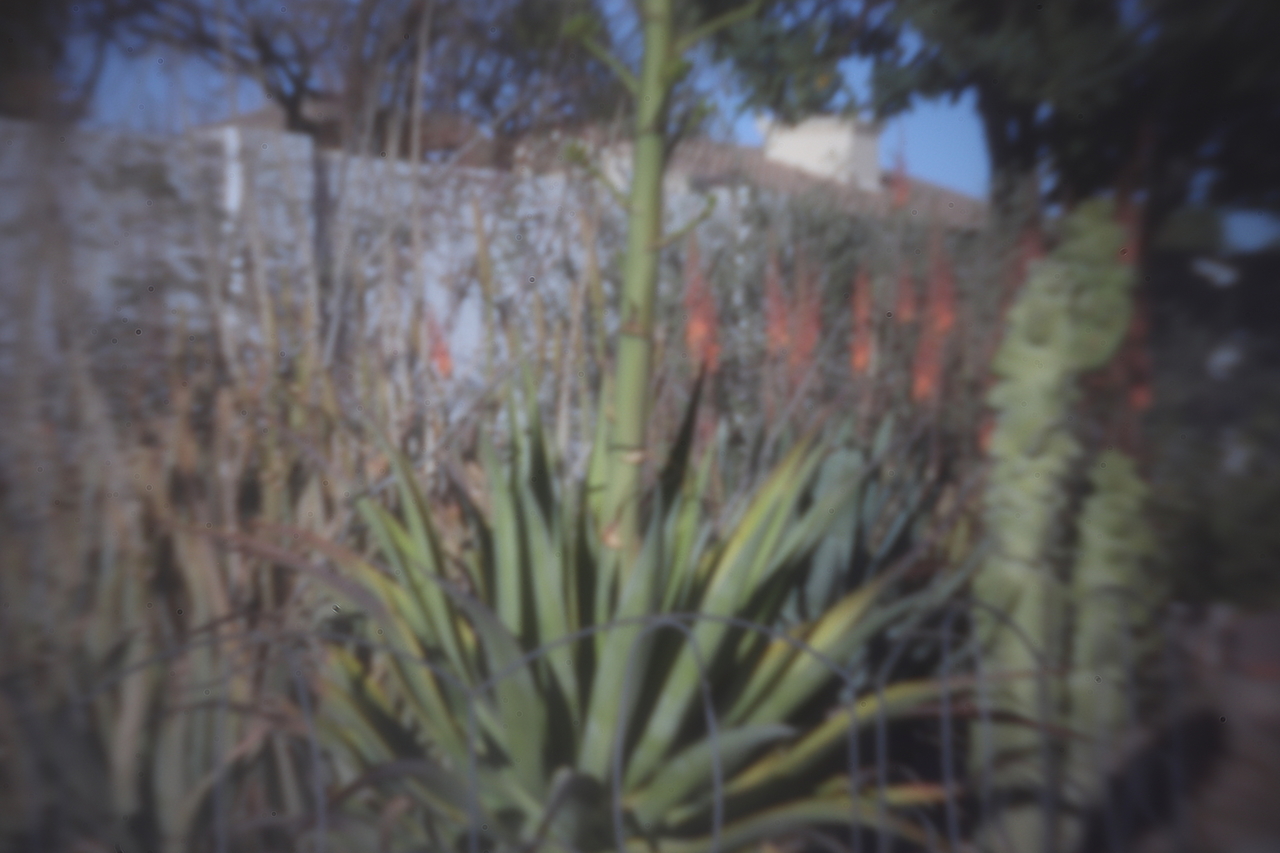
Canon EOS 77D, Pinhole, 2 second shutter, ISO100. Scaled 50% for forum, no other modifications
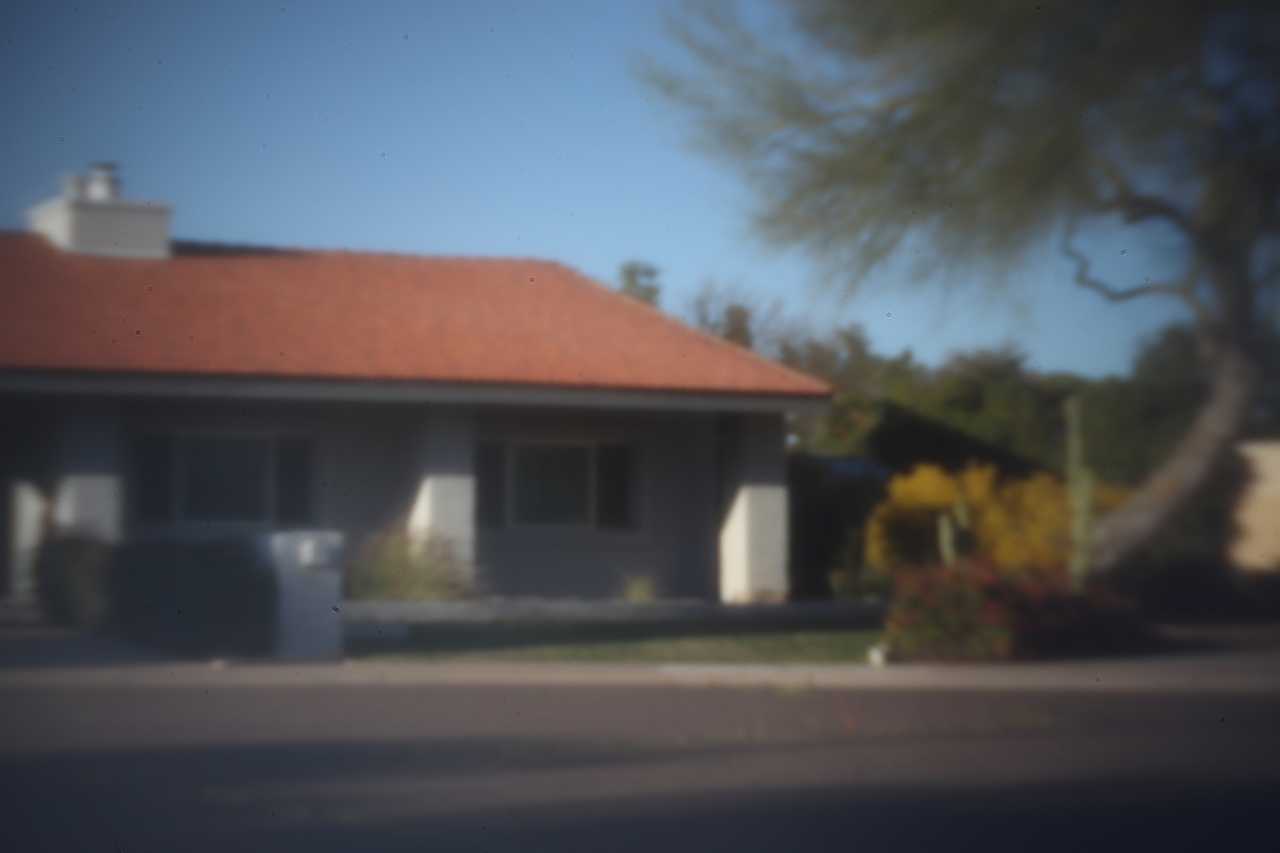
Canon EOS 77D, Pinhole, 3 second shutter, ISO100. Scaled 50% for forum, no other modifications
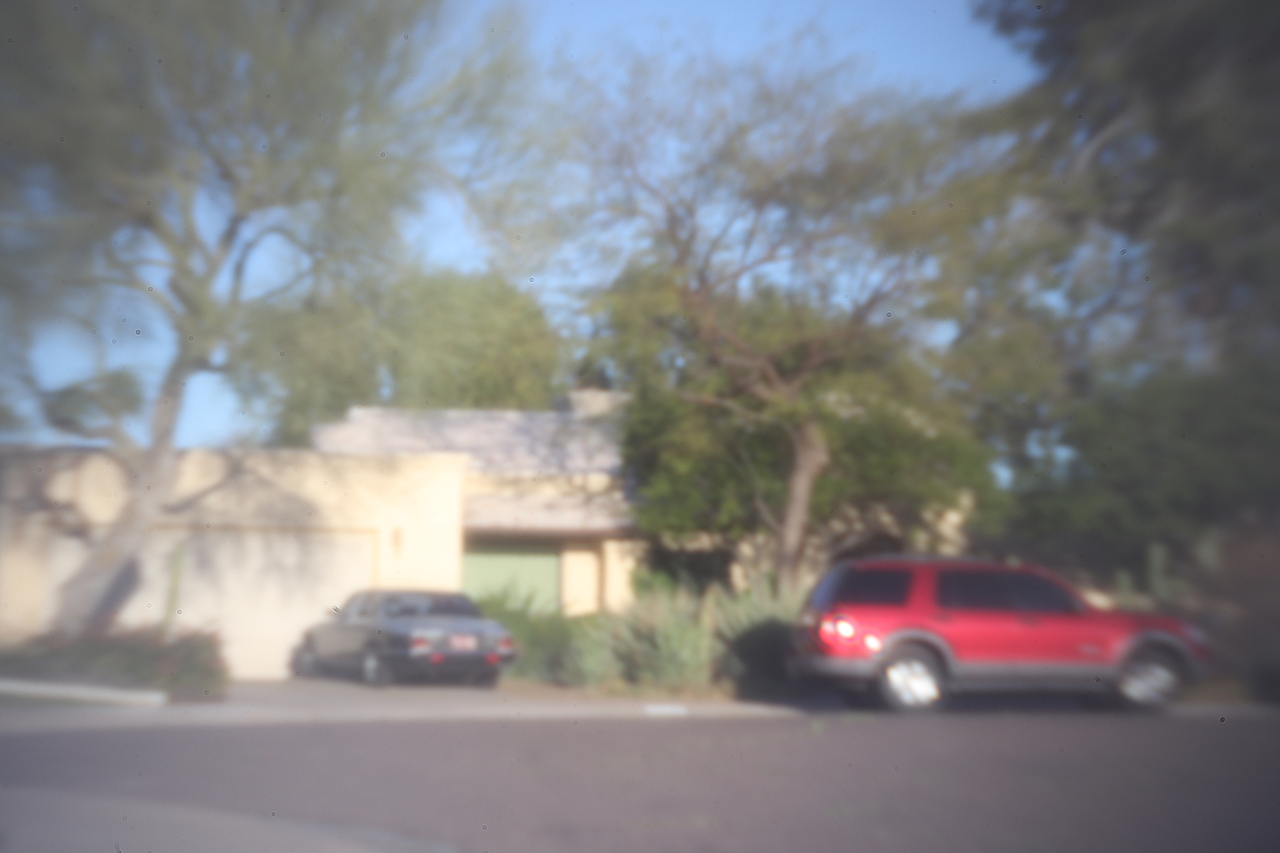
Canon EOS 77D, Pinhole, 5 second shutter, ISO100. Scaled 50% for forum, no other modifications
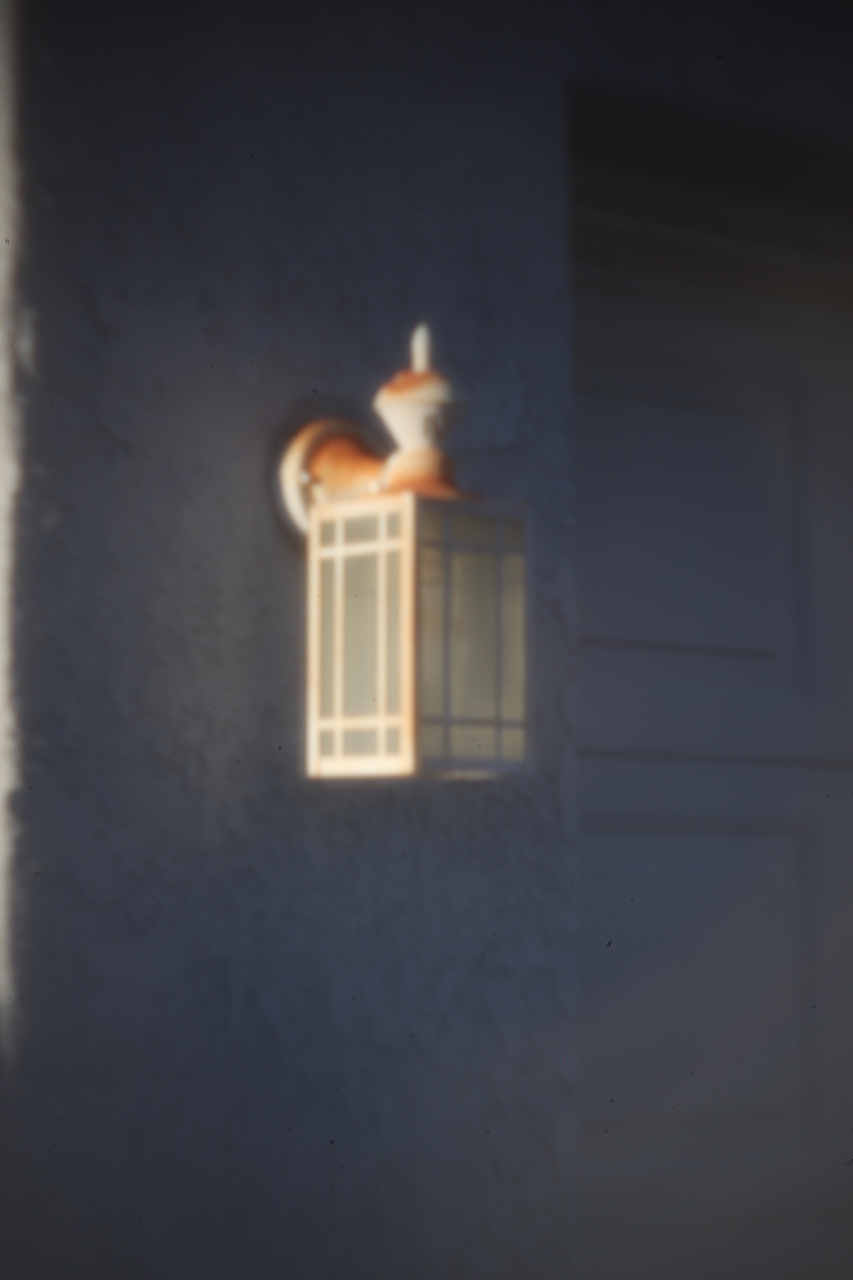
Canon EOS 77D, Pinhole, 3 second shutter, ISO100. Scaled 50% for forum, no other modifications
So, other than seeing some evidence of dust on my sensor, I'm pleased with the result. I'll need to learn how to use this, and I may see if I can make a dished one to locate the pinhole closer to the sensor, but it was fun. Took all of a half-hour.
As far as the images themselves go I took a whole bunch at different shutter speeds, manually controlled with the Canon application on the phone (for mirror-lockup and no touching the camera to avoid shakes) and picked the best of each.
Step 1, first thing, I found opposing edges. This body cap has forty-eight ridges, found perpendicular points, every twelfth ridge.
Step 2, transfer marks to the backside of the cap.
Step 3, measure the width of the body cap with calipers.
On taking this measurement (2.553 inches in this case) divide by two (1.2765 inches) to get the radius, and set the calipers to the radius.
Step 4, pick one of the marked points on the perimeter, and score an arc in the vicnity of the center.
Step 5, pick another mark perpendicular to the first, and score a second arc. Where the arcs intersect is the center.
Step 6, chuck a small drillbit into the drill press, check centering/runout, and use this to hold the center of the body cap in order to hold it relative to the table.
Use this to set the fence and stop to allow the body cap to be positioned in the same place each time.
Step 7, select an endmill.
The endmill should be reasonably small, but wider than the camera-obscura viewing angle based on the flange distance.
Step 8, chuck the endmill into the drill press, check for center and runout.
Step 9, lower the endmill to the table, lower the drillpress depth-stop, then use that depth-stop to raise the lowest point of the endmill to be just above the table.
Step 10, confirm the depth visually
Step 11, mill into the body cap
Blow air into the workspace while milling. I used my own breath. It was adequate. Note, my hand was holding the cap while doing the machining operation. Needed both hands to hold the drill press down and take the picture.
Step 12, Inspect the milled depression and do any cleanup.
Step 13, select a drillbit for the pinhole.
In this case, 0.25mm is a good choice given Canon's flange distance. Bear in mind, the shanks on these bits is only 3mm, these are very tiny.
Step 14, chuck the bit, check for center and runout (visually!) and drill the pinhole.
I used a piece of finished poplar scrap from a previous project to prevent tearout on the exit.
Success!
Hole is seemingly clean, though I haven't inspected it with a macro photo.
Some results:
Canon EOS 77D, Pinhole, 2 second shutter, ISO100. Scaled 50% for forum, no other modifications
Canon EOS 77D, Pinhole, 3 second shutter, ISO100. Scaled 50% for forum, no other modifications
Canon EOS 77D, Pinhole, 5 second shutter, ISO100. Scaled 50% for forum, no other modifications
Canon EOS 77D, Pinhole, 3 second shutter, ISO100. Scaled 50% for forum, no other modifications
So, other than seeing some evidence of dust on my sensor, I'm pleased with the result. I'll need to learn how to use this, and I may see if I can make a dished one to locate the pinhole closer to the sensor, but it was fun. Took all of a half-hour.
As far as the images themselves go I took a whole bunch at different shutter speeds, manually controlled with the Canon application on the phone (for mirror-lockup and no touching the camera to avoid shakes) and picked the best of each.


![[No title]](/data/xfmg/thumbnail/33/33354-6ffc81f7f344284105512b442aee229c.jpg?1734163271)


![[No title]](/data/xfmg/thumbnail/33/33357-bd174890e33fb2a7f7338b9278e6dad2.jpg?1734163276)


