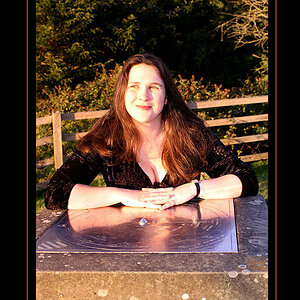
My baby girl in hats

Defog is using the unsharp mask (Filter, Sharpen, Unsharp Mask). Settings vary widely among forums, but start at about 40,60,0, or half those numbers for certain images if its too strong. Many people don't realize that they have sort of hazy images, until they use this method, then you use it on what you THOUGHT was a great photo and it gives a WOW factor to it and there is more clarity in them.

Just zoom way in to check details and don't over do it. Many people do it before any other PP, but I just read one amazing photographer does it very last and not til after the final crop. Good luck. It does make a huge difference.
 
I don't know anything about digital, photoshop is where I buy chemicals, so I can't fix this or anything else on the computer.

Of course, almost nobody will criticize a portrait of a baby, regardless of it's technical deficiencies. I'm one who will, because it's important for us to help each other improve.

Bambino is as cute as a button, but the lighting needs serious work.

I've just finished my university photograpy class end of term project on Yousuf Karsh, the undisputed master of studio portraiture, and I'm feeling kind of clever. More clever than I am, I'm sure.

But if you put ONE of these photo's into the serious critique section, I'm sure there are much more experienced photographers who can help you.
 
Critique away. I would love to know what more I can do with my flash and a window since I have no other lighting right now. I am always open constructive criticism.
 
Okey dokey.

Since in nature, the light almost never comes from below, when lit that way, the human face looks most unnatural.

Lighting from below, was extensively used in the old horror films with Boris Karloff, like the first frankenstein, arsenic and old lace..etc..etc..

It also leaves shadows in the mouth and nose. I'd avoid it whenever possible for normal portraiture.

I'd also make use of reflectance. I shoot black and white, so I'm able to use pretty much any sort of light I come across, without worrying much as to it's colour* cast.

(*Not a typo, In Canada we use the Queen's English, Colour, Flavour..etc)

You too, can use cheap lights, like clamp on worklights, if you make certain to get "daylight" bulbs, and use them mainly for either separation lighting, or to light the background.

Also, try light modifiers. A 4 dollar sheet of the biggest foamcore that the office supply store sells, held by a friend or ally, can do wonders. especially if taking outdoors, (like on a balcony in shadow. It will reflect suprising amounts of light on your subject.

Ideally there is the two light setup, where let's say the subject is facing you, turned slightly toward your left, (because their left side is their better side and thats what you wanted to highlight)

Then, in the classic two light setup, the primary light would be high to your right, 45 degrees up, and the secondary(fill) light would be 15-20 degrees up above the eye level of the subject, and over your left shoulder.

The primary light, should either be stronger than your secondary, or closer. Usually it's either closer, to account for the fact that lights aren't usually much cheaper in the smaller sizes, or the secondary has a light modifier over it to make it dimmer.

A great thing is also a separation light. It's a light with a small degree of cast, from VERY high, usually right up in the corner or edge of the wall and ceiling, behind the subject, that shines directly down on the back of the subjects head, making their hair shine, and separating them from the background. Because a white skinned baby blends into a light background, and a dark haired person blend into a dark background.

You can either use a spot type light for a separator, or a long dark tube on the light to guide it. Be careful using a paper tube, if you are using a very hot light.

I'd also first test any light setup with a subject that doesn't get bored, and doesn't cry, like a teddy bear of about the same size as the baby.

Small changes to lighting have big effects.

And don't worry about your lack of equipment too much, my avatar was taken with a 20 dollar webcam, and using window light from one side, and a flashlight stuck into a book shelf from the other. Other than the obvious pixelation, it looks ok at higher resolution. I just used the the basic law of "primary-fill". If I had to do it over, I'd block off the light coming from the bottom of the window, to effectively bring up my primary lighting closer to a 45 degree angle.

Also, have a look at other portrait artists. Yousuf Karsh's portrait of Sir Winson Churchill is the most widely reproduced photograph ever made. I'm sure that had alot to do with the nature of the second world war, but he even managed to make good pictures of Pablo Picasso, who looks much like a garden gnome, and THE inspiring portrait of Martin Luther King, who is a pretty average looking guy.

Karsh's photographs were pretty miserly in their use of fill and separation lights, but remember, before him, nobody used studio lighting, all portraiture at that time was done with daylight, so his techniques were pretty radical at the time, and he didn't want to overdo it. His idea to use studio lights came when he attended a play in the early 30's.

***note*** The following images are copyright of the National Archives of Canada, and are used for illustrational purposes only and are thus fair use under Canadian Law, reproduction however, in whole or in part for commercial/personal purposes would violate Canadian, and International copyright law and is thus forbidden.

Churchill1.jpg

Here is his use of a separation light in the background, albeit placed below his subject on the floor, it wasn't like he could go drilling holes and mounting lights in the wood paneling of the antechamber of the House of Commms eh? He had two minutes, literally 120 seconds to setup his lighting and all manual calumet view camera, and make a few exposures. Notice also how he lights the hand by itself.
MartinLutherking.jpg

Here the fill light is almost unnoticable, except on King's Collar and ear.
PabloPicasso.jpg

Here the fill is necessary, but low key, it gives itself away on Picasso's shirt sleeve, and although it may look like a single light, if it was, you couldn't see the fringe of hair on the right side of his head or the pupil in his right eye. Still, his use of shadow is very much deeper than what is considered normal today, 6-plus decades later.
 
Bobby,
I am so glad you took the time to share that. Your post was most informative! I love the examples and fully intend to play with all your suggestions :)
 
I don't think Karsh's style fits to well with Baby portraiture. His lighting was very dramatic and brought out the character in each of his subjects.
I think with the styles that go with contempery baby portraits are very close to what you have achieved, the very shadowless cheeks and forehead.
I liked your shots.

No doubting Karshs ability and the amount that people can learn from his work, I know I did while I was studying. And I know it wasn't him specifically you were saying her photos should be like, but more talking about how he used lighting to achieve certain effects.

When I've taken baby portraits in the past I've always used a single flash with an umberella from high up (rembrandt style), with a reflector on either side from low down to bounce some light back up to fill the shadows.
 
into my backdrop(sheet lol...cheep backdrop)

How do you get your backdrop to stay up? I don't have any expensive backdrop equipment either.
 
I turned my couch around and draped it over that ;) In other cases I just tack it to the wall. I want to get seamles paper and a portable stand next year though. So I can take it with me when I photograph babies.
 

Most reactions

New Topics

Back
Top