My first try at a panoramic

AnthonyB

TPF Noob!
Joined
Jul 20, 2010
Messages
134
Reaction score
1
Location
Newfoundland
Can others edit my Photos
Photos OK to edit
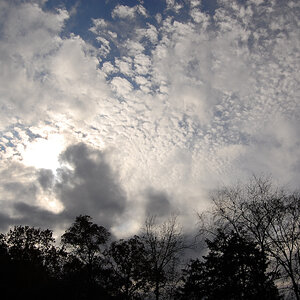
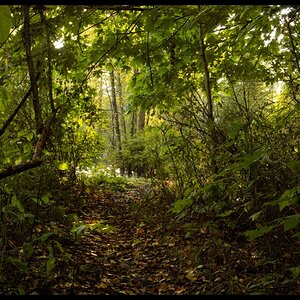
So I tried my hand at a panoramic shot, I thought it came out fairly good, before you say it the right side of the pond was cut off from my viewpoint lol
It is 5 images stitched together ,how do I get rid of the white highlights in the sky ?

Untitled_Panorama1.jpg
 
I really want to try this someday!

I will say that there is some noticeable highlights at the stitch points. I couldn't even begin to tell you how to fix it but they are noticeable.

I do like the concept though.
 
What program are you stitching them with? I've done quite a few and don't get that effect. I use Hugin. Typically about 8 to 12 frames, sometimes more.
 
yea I found it almost impossible to get rid of them completely, hopefully some of the photoshop guru's will be able to give me some tips ... hint hint
 
Photoshop CS5, Its the first time ive tried it so there may have been something I should have or should not have done that I did or did not do lol , I think that makes sense lol
 
Yea I can see those highlights as well, I did my panoramic in photoshop cs4 and didn't get those so hopefully someone can tell you how to get rid of them.
 
I see these were shot in Program mode; do you know if all of the exposure values were the same for each image? If not, that likely accounts for it. Panoramas should always be shot in full manual.
 
these where shot with the pano function in the camera, and woulden't different exposures make the full stitched picture a little off not just the joining point ?

I took a 3 shot pano in manual with the same issue
 
these where shot with the pano function in the camera, and woulden't different exposures make the full stitched picture a little off not just the joining point ?

I took a 3 shot pano in manual with the same issue
Did you meter for each shot, or take all three at the exact same setting.
You have to treat a pano image as one, so meter and get an average. Set the camera and shoot all the images at that setting.

That said, you still have issues if the light changes while taking the shots, such as the sun going behind a cloud.

It could be your joining software?
 
I see these were shot in Program mode; do you know if all of the exposure values were the same for each image? If not, that likely accounts for it. Panoramas should always be shot in full manual.

I have visited your site and this is awesome. I believe if you provide an option to put visitors comments there, that would make the site more interactive. Great job !

Thank-you :er:
 
I'll blow the dust off this for old time's sake...

John's basic 'How-to' guide to Panoramas...
1. In order to get a good pano, your camera has to be level, and has to rotate around the nodal point. This the point at which the image inverts. For practical purposes, with most lenses, using the sensor plane will work fine. What this means is that you have to shoot from a tripod for best results.
Therefore, put your camera on your tripod and level it. Even though my tripod legs and head both have levels built-in, I carry a small dollar-store spirit level in my camera bag to make sure everything is as close to level as I can get it.

2. Once I'm satisfied that everything is level and square and my tripod is locked (except for the rotating axis) where I want it, it's time to work on the exposure. Another important factor is to NEVER SHOOT PANOS IN AUTO! Set your camera to manual.
Determine the range of your pano (eg the left and right limits) and then go through and meter the different areas. Find out what the camera is recommending as maximum and minimum exposure, and when you've done this for the full range of the image, then average the settings. Don't change these settings; yes some will likely be slightly under exposed, and some slightly over, but deal with it in post.

3. Now you're ready to start shooting. I always start at the left-hand end of the intended pano and work right, simply so that the images are in the correct order when they're on my computer, but that's up to you. Expose the first image, and choose a landmark about 2/3 of the way to the right-hand side of the frame. Now, being careful to ensure that you don't upset your level, move your camera so that the left-hand edge of the frame lines up on the land mark you just chose. Ideally you want about a 30-35% (or 1/3) overlap between each image. Continue shooting in this manner until you have the whole sequence captured.

4. Download and stitch using your favorite software.
A few tips: With respect to the issue of exposure: If there is an extreme dynamic range within the pano, (say bright sun to deep shade) I will often bracket each image 1/3 stop on each side, so that for every image used in the pano, you actually expose three. This gives you a bit of latitude in terms of trying to produce an image with a pleasing and realistic dynamic range, but be warned, it often looks hokey.
One of the most important tools you can have for taking panos (aside from a good tripod) are filters. There are two types, one is the circular polarizer (CPOL)for enhancing colours and deepening the blue in sky and the other is graduated neutral density(G-ND); these help to prevent blown skies and preserve detail on the ground. When using a CPOL, it's important to remember not to change it's setting through the course of the pano either. Find the optimum setting and use it at that setting for the whole image. Likewise with your G-ND; don't change their position or intensity.

Hope that's helpful
 
these where shot with the pano function in the camera, and woulden't different exposures make the full stitched picture a little off not just the joining point ?

I took a 3 shot pano in manual with the same issue
Did you meter for each shot, or take all three at the exact same setting.
You have to treat a pano image as one, so meter and get an average. Set the camera and shoot all the images at that setting.

That said, you still have issues if the light changes while taking the shots, such as the sun going behind a cloud.

It could be your joining software?


I used PP CS5, they where all on the same settings shot from a tripod, without a cloud in the sky lol
its kinda pissing me off, I think it could be a nice picture if that crap wasn't there lol
 
Hmmm. There is definitely banding issues, not just in the sky. They are even throughout.

Just to be clear was this an auto stitch, or did you do it by hand?
 
Did you use a filter? Do the individual shots show this gradient effect, or just the stitched-together pano?

I don't have any experience with this, just throwing of ideas :)
 
It was auto stitched, and I was using a GND filter
 

Most reactions

New Topics

Back
Top