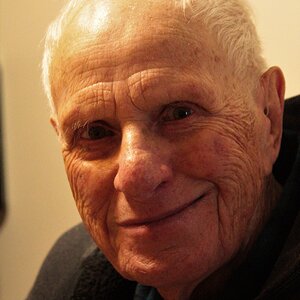
People photos on a gray cloudy day

SquarePeg

hear me roar
Staff member
Supporting Member
Joined
Mar 18, 2013
Messages
15,329
Reaction score
15,028
Location
Boston
Can others edit my Photos
Photos OK to edit
Looking for some insight/suggestions/tutorials on how to get some decent people shots on a gray cloudy day. I'm supposed to be shooting some head shots/portraits tomorrow for a friend of mine and her colleagues. They are realtors and want updated photos for their website and social media. Our original plan was to use the open shade down at one of the parks and then move across to the school and use the exterior of the building (which is covered by an overhang so more open shade). Was going to use reflectors for fill light. I've shot there before on sunny days and it's perfect. However, weather tomorrow is going to be cloudy and cool with maybe some showers floating around right at our appointed time (3pm). Not the nice overcast giant softbox sky or bright open shade I was hoping for.

We'd like to get this in tomorrow as it was a chore to coordinate everyone's busy schedules. They don't want glamour shots but it is all women so will want the photos to have flattering light. Mostly single portraits but will need at one or two group shots (up to 4 people in the group).

Should I still try to use the natural light and reflectors to add fill? Will a reflector do any good if there is no directional light to reflect? Brighten them up in post if needed? Or do I trash that plan and use flash for fill?

For fill light, I have - 2 ocf flash units with stands and decent modifiers, a trigger, a couple of largish reflectors and some foam boards.

Appreciate any advice or suggestions. Thanks.
 
If you're using off-camera flashes, you'll run into white balance issues unless you gel them.
 
Our original plan was to use the open shade down at one of the parks and then move across to the school and use the exterior of the building (which is covered by an overhang so more open shade).
now you can shoot everywhere, as it'll all be "scrimed", even light...
 
Cloudy or flat lighting is like a giant soft box, little contrast. The omni-directional nature minimizes the shadow which which will hide imperfections such as wrinkles, blemishes and bumps. This lack of contrast can make the skin more flattering, but can also cause your subject to blend into the background. Since you're doing head an shoulders it won't be as much of a problem, but still wouldn't hurt to be aware of surroundings.

Though the light might be diffused you can still use a reflector to move light into the face. Even on a cludy day sun position will give some direction, you might have to move around a bit to get it right. You can also use a flash to supplement though without an incident/reflected light meter it might be difficult to match output to surrounding so that it doesn't over power the ambient light.

I know nothing about Fuji, but I believe it's like my Pentax in its ability to change color mode to things like vivid color, adjust contrast, saturation, etc. To give you a better image.

Lastly I'd set the WB to auto, shoot my target cards, and save as a raw file, so that I could make adjustments post where needed.
 
If I were in your shoes I would use ambient light as fill and an off-camera strobe as main. The cloudy day is perfect to provide a low contrast light that can fill the shadows and provide pleasant skin, as the light will be quite diffused and non-directional. The downside is that you don't have "punch" and there is not value difference between subject and background. By adding a flash (hopefully powerful and close enough) to add 0.5+ f-stops to your ambient fill light, you'll produce a bit of directionality and control the brightness of the background using your shutter speed. Often I use a second off-camera flash behind my subjects (single person or couples, not groups) to produce simulated sunlight on the hair or shoulders. Here is an example - the portrait of the model surrounded by wildflowers needed to have a sunny feel - but it was taken on a cloudy day with a flash producing the hair highlights for a sunny effect.

110417_Salma_004_soft_web.jpg


On the image of the woman with the hat, flash is used on the model and the back wall to create a sunny effect when the day was pretty gray. Note that I use the flash as main and ambient as fill.

004.jpg
 
Last edited:
Our original plan was to use the open shade down at one of the parks and then move across to the school and use the exterior of the building (which is covered by an overhang so more open shade).
now you can shoot everywhere, as it'll all be "scrimed", even light...

I hope so. It's going to be a very cloudy dark day - not the nice overcast soft box/scrim light that would be great.
 
If I were in your shoes I would use ambient light as fill and an off-camera strobe as main. The cloudy day is perfect to provide a low contrast light that can fill the shadows and provide pleasant skin, as the light will be quite diffused and non-directional. The downside is that you don't have "punch" and there is not value difference between subject and background. By adding a flash (hopefully powerful and close enough) to add 0.5+ f-stops to your ambient fill light, you'll produce a bit of directionality and control the brightness of the background using your shutter speed. Often I use a second off-camera flash behind my subjects (single person or couples, not groups) to produce simulated sunlight on the hair or shoulders. Here is an example - the portrait of the model surrounded by wildflowers need to have a sunny feel - but it was taken on a cloudy day with a flash producing the hair highlights for a sunny effect.

On the image of the woman with the hat, flash is used on the model and the back wall to create a sunny effect when the day was pretty gray. Note that I use the flash as main and ambient as fill.

Thanks for the tips. I'm not sure if I'm experienced enough to simulate sunlight but if that second photo was taken on a gloomy day then kudos on the effect.
 
Our original plan was to use the open shade down at one of the parks and then move across to the school and use the exterior of the building (which is covered by an overhang so more open shade).
now you can shoot everywhere, as it'll all be "scrimed", even light...

I hope so. It's going to be a very cloudy dark day - not the nice overcast soft box/scrim light that would be great.

Then you can just treat it as an indoor shoot with no fill at all -- setup the camera so there's little to no ambient in the non-lighted exposure -- then do a standard key/fill.
 
You have been given some great advice by all the posters above. The light's going to be flat and low(Low meaning not really bright) and aldo low-contrast, so they should be no problem bumping up the contrast in post. Make sure the background looks decent behind each face, and then in post you're going to be able to tweak the shots easily. No worries.

If you want more eye sparkle, use a squirt of fill flash, or a whiteboard reflector. Another option is to shoot in between two buildings, so that there's a darker area behind the person and bring them out to the edge of like, say the end of an alleyway, between the two buildings.
 
Last edited:
Thanks for the tips. I'm not sure if I'm experienced enough to simulate sunlight but if that second photo was taken on a gloomy day then kudos on the effect.

Thank you!

Both pictures were taken with gray skies. In each case the models were concerned that the light looked pretty flat and they would not get that crispy, intense feeling of sunlight. All I had to do was to point the flash to the hair/arm in the first case, and make sure the exposure for the flash was higher than ambient/fill, even higher than main (key flash in front of the model) - exactly the same as I would do in a studio with a hair light. I have learned a lot about the basics of lighting through Dean Collins dvds... YouTube has some material from his amazing teachings... He was not only a fantastic photographer, but also a great teacher. The setup he described in the video below is so creative!

 
If you want more I sparkle, use a squirt of fill flash,

Could you elaborate more on the technical term "squirt of"? not sure I've used that measurement before:biggrin-93:
 
You might try placing them just under the edge of the overhang and that will give you directional light and eliminate racoon eye shadows. Have their heads about 45 degrees to the opening that is now a giant soft box to get the lighting pattern you want. Moving subject further from the edge lowers the ratio as the light becomes more even although less bright. If the shadow ratio isn't high enough, subtract light from the shadow side with a piece of black foam core or reflector or piece of black cloth moving it closer or further for the desired ratio. You will have beautiful, gradual shadow edge transitions from the overcast light. You should be able to shoot near wide open for shallow dof to blur out any busy background or make turn the bg into a wash of color. Might consider a silver reflector from 3/4 rear on shadow side to add some rim light for separation and dimension. Watch your white balance and might take a shot with a wb card in first shot to help in post or just set custom wb.
 
You have been given some great advice by all the posters above. The light's going to be flat and low(Low meaning not really bright) and aldo low-contrast, so they should be no problem bumping up the contrast in post. Make sure the background looks decent behind each face, and then in post you're going to be able to tweak the shots easily. No worries.

If you want more I sparkle, use a squirt of fill flash, or a whiteboard reflector. Another option is to shoot in between two buildings, so that there's a darker area behind the person and bring them out to the edge of like say the end of an alleyway between the two buildingS.

Thank you for the suggestions.

Thanks for the tips. I'm not sure if I'm experienced enough to simulate sunlight but if that second photo was taken on a gloomy day then kudos on the effect.

Thank you!

Both pictures were taken with gray skies. In each case the models were concerned that the light looked pretty flat and they would not get that crispy, intense feeling of sunlight. All I had to do was to point the flash to the hair/arm in the first case, and make sure the exposure for the flash was higher than ambient/fill, even higher than main (key flash in front of the model) - exactly the same as I would do in a studio with a hair light. I have learned a lot about the basics of lighting through Dean Collins dvds... YouTube has some material from his amazing teachings... He was not only a fantastic photographer, but also a great teacher. The setup he described in the video below is so creative!


Thanks will look into his instructional stuff.

You might try placing them just under the edge of the overhang and that will give you directional light and eliminate racoon eye shadows. Have their heads about 45 degrees to the opening that is now a giant soft box to get the lighting pattern you want. Moving subject further from the edge lowers the ratio as the light becomes more even although less bright. If the shadow ratio isn't high enough, subtract light from the shadow side with a piece of black foam core or reflector or piece of black cloth moving it closer or further for the desired ratio. You will have beautiful, gradual shadow edge transitions from the overcast light. You should be able to shoot near wide open for shallow dof to blur out any busy background or make turn the bg into a wash of color. Might consider a silver reflector from 3/4 rear on shadow side to add some rim light for separation and dimension. Watch your white balance and might take a shot with a wb card in first shot to help in post or just set custom wb.

Thanks for your suggestions.
 
good luck today.
 
good luck today.

Thanks! Heading out shortly. It’s a little brighter than I thought it would be which is good and hasn’t started raining yet knock knock!
 

Most reactions

Back
Top