Advice for product photography

Tidiman

TPF Noob!
Joined
Apr 4, 2016
Messages
2
Reaction score
0
Hi All,

I dont have much experience in photography but I am currently developing a new ecommerce store for ceramics and pottery . My mission was to picture all of the items in the website. I am using Panasonic GX7 with the stock lens. I am taking the pictures in light tent. I will be very happy if someone can provide feedback what I can do to change the image quality. I am not very good in manual shoot and so much factors like - exposure, light, ISO, F and many more. I am pretty sure that the camera is much more capable to make a better pictures. It is just that I am not a photographer and dont have much experience with the cameras. Hiring a photographer is not an option becase we should take a thousands of pictures and our finance budged is very limited.

Thank you in advance!
 
In order to give advice on image quality we need to see the existing image quality. It would help if you posted a couple of photos.

Sent from my VF695 using Tapatalk
 
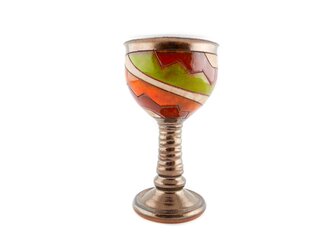
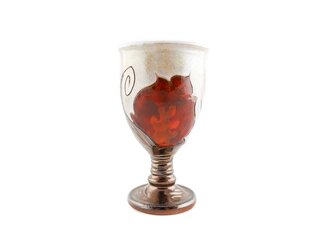
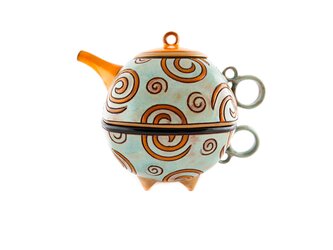
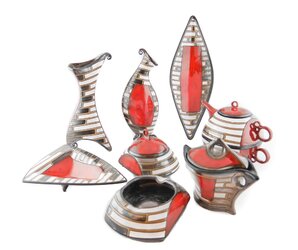
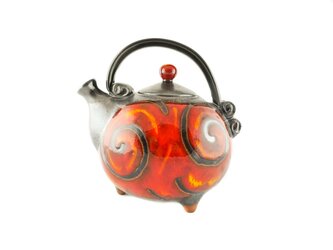
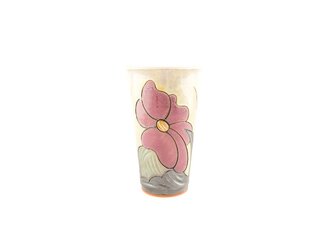
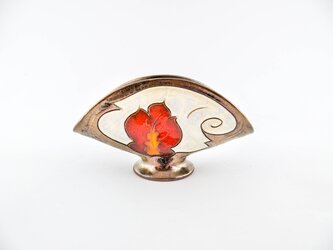
My Idea was to check the website mentioned above( Dont want to sound like a advertising...) because There are lot of different colors and photos and I just want some kind of overall review or advice. I am really struggling to make a good photo of the white objects. Also I cannot get the white background and because of that I am manually editing all photos and deleting the background. P1050344.jpg P1050345.jpg P1050364.jpg P1020899.jpg P1020699.jpg P1020512.jpg P1000857.jpg P1010553.jpg
P1050344.jpg P1050345.jpg P1050344.jpg P1050345.jpg
 
This is ALL about the lighting; you will need to buy a few lights; inexpensive speedlights will work just fine, some diffusers (softboxes, umbrellas, etc) triggers, lightstands and a roll of seamless white paper. The whole package is easily put-togetherable for $3-400. What you need first and foremost however is the lighting bible.
 
As an Amazon Associate we earn from qualifying purchases.
For throwing stuff into a light tent and leaving the camera on auto these haven't turned out too bad. Product photography is not the easiest to shoot so first off without extra light on the background you will not be able to get white backgrounds in camera so editing them white will be a must and quit a few product photography will require editing to have a white backgrounds.

Second white on white is very hard to shoot and will require some manual settings, unfortunately there is not a magic formula I/we can give you except meter for the white object (which will make the background gray) then Photoshop the white background back in.

Next for the black spots in the middle of the gobbles this is your camera/room reflecting back into the product. To fix this you will need to get some white foam core to reflect the light back into the dark areas.

Good luck, keep trying and keep sending questions.
 
Product photography is all about the lighting - get this right and you image should be super crisp and irresistible!

Hard shadows are created when the size of the light source is small compared to the size of the subject. Conversely, soft shadows are created when the size of the light source is larger than the subject.

For your needs you want to aim for soft shadows so go for big windows or the outdoors. To avoid a hard shadow, use a flash diffuser. A flash diffuser can be created by taking a white tape or a white plastic bag and attaching it to the flash of the camera. In turn, the light will be distributed in a softer, more even way in all parts of the object, rather than be centred in one spot. Always experiment with different angles, be brave.
 
In some of these images, the shiny reflective surfaces of the products is reflecting the white sides of the tent.

When doing product photography such as this, it's a good idea to pick up some simple white foam-core board and ALSO... some black foam-core board (extremely inexpensive and available at any craft store.) Reflective surface will reflect whatever they can see... so if you put large black foam-core boards out-of-frame on the left and right sides of the shiny objects then what they reflect is blackness and it won't wash-out the detail on the edges of your round products. This is mostly a problem for objects that are shiny reflective. Objects that aren't shiny probably won't need the black foam-core boards.

Use the white boards to boost light in reflections that are too dark.
Use the black boards to subtract light from reflections that are too bright.

Since the product is set against a white background, darkening the edges will help define the shape and provide better contrast -- color won't wash out on the edges. In a few of your examples, I'd take the product out of the light tent, and place it on a white "sweep" (think of a roll of white paper hanging on the wall (sort of like a butcher-shop would have to wrap up products). Pull down a clean section of paper and let it hang down from the wall and sweep onto the table surface. The curved background hides any corners so you get the same effect as a light tent... but without the constraints of having to work in the tent. Now you can place the black foam-core boards on the left and right sides of any shiny products (make sure the boards are out of frame so they don't appear in the images.)
 
Light Science and Magic - 4th edition.

That is the go to book for introducing you to lighting control over various surface and material types. It's a book you should get and is well worth having on your shelf for reference. It will teach you a lot about lighting which will help you tremendously in your product photography
 
Fewer sources of light and the use of over bright cards will help. And a light table.
 

Most reactions

Back
Top