mcleish
TPF Noob!
- Joined
- Dec 12, 2011
- Messages
- 99
- Reaction score
- 43
- Location
- Sheffield, UK
- Can others edit my Photos
- Photos OK to edit
Hey everyone. Happy New Year!!
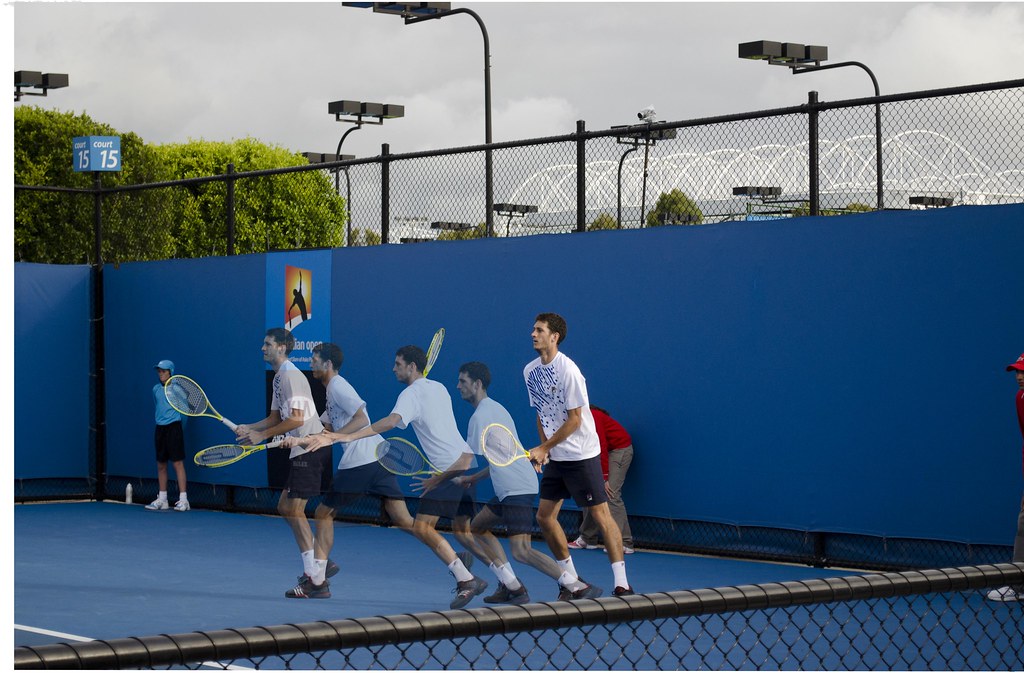
Ive been racking my brains all day and i can't figure out how to create this effect. Basically, what I'm trying to do is, create a panoramic scene with x amount of photos but with deliberate ghosting. I took 6 photographs of a tennis player returning a tennis serve (as an experiment) and then merged them together using CS 5.1. I then turned down the opacity on each layer to try and create the effect. Now on the right hand side i wanted to mask out 5 of the 6 lines person and leave 1 so that there wouldn't be any ghosting there (If you understand what i mean). Now as you can see it hasn't gone too well. Im not much of a PS wizard so any help would deeply appreciated.
What I'm looking for at the end of this 'little project', is to go to the main tennis arena...Create a panoramic photo of the whole stadium (and mask all the layers of the crowd apart from one so that there isn't any blurring/ghosting) and then get a ghosting/motion blur of the tennis players playing a point. In my head it looks awesome...I just hope you guys can visualise what I'm going for.

Untitled_Panorama1 by mcleishlad, on Flickr
Thanks for looking guys and i hope you can solve my problem.
Ive been racking my brains all day and i can't figure out how to create this effect. Basically, what I'm trying to do is, create a panoramic scene with x amount of photos but with deliberate ghosting. I took 6 photographs of a tennis player returning a tennis serve (as an experiment) and then merged them together using CS 5.1. I then turned down the opacity on each layer to try and create the effect. Now on the right hand side i wanted to mask out 5 of the 6 lines person and leave 1 so that there wouldn't be any ghosting there (If you understand what i mean). Now as you can see it hasn't gone too well. Im not much of a PS wizard so any help would deeply appreciated.
What I'm looking for at the end of this 'little project', is to go to the main tennis arena...Create a panoramic photo of the whole stadium (and mask all the layers of the crowd apart from one so that there isn't any blurring/ghosting) and then get a ghosting/motion blur of the tennis players playing a point. In my head it looks awesome...I just hope you guys can visualise what I'm going for.
Untitled_Panorama1 by mcleishlad, on Flickr
Thanks for looking guys and i hope you can solve my problem.

![[No title]](/data/xfmg/thumbnail/39/39187-9ec2507d9e5ef2843f7f00127c7abb4c.jpg?1734173062)


