How to touch up skin on portrats

prodigy2k7

No longer a newbie, moving up!
Joined
Apr 22, 2008
Messages
1,668
Reaction score
22
Location
California, USA
Can others edit my Photos
Photos OK to edit
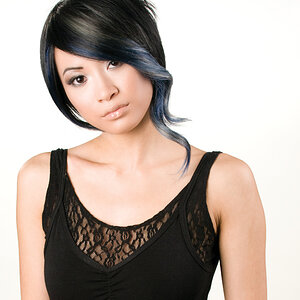
How (without face make up) can you use photoshop to make a face/skin look flawless...like perfect skin? What are some tools to use and play around with and other features of photoshop?
 
I know the clone-stamp tool works pretty well. I believe that is part of the methods used by professional portrait companies like LifeTouch.
 
You can use healing brush or like mentioned clone tool & surface blur. These are few ways. If you want it to be real fine then you'll need several layers.
 
Zoom in real close to the blemishes and clone them, or heal them which ever works best. Run unsharp mask, it helps to sharpen up skin. If your exposure is perfect the skin should be silky smooth after that..
 
Ya im familar with the clone tool, but i mean for overall skin look. Not just specific pieces of the skin. Ill look into the heal tool, havent played with it much yet...
 
A technique I've use before in Photoshop is to make a duplicate layer erase everything on the new layer except for the skin that needs smoothing (it will look like a mask after you've done this). Next use the Median filter to make that layer look as smooth as possible without completely blurring it. Next bring down the opacity of that layer to where it looks natural.
 
Hardly enough time or energy for me to break it all down, but I'll offer one piece of advice: Do not use blur. It has a few specialized applications and is rarely used in the professional world by people who know what they're doing.
 
Hardly enough time or energy for me to break it all down, but I'll offer one piece of advice: Do not use blur. It has a few specialized applications and is rarely used in the professional world by people who know what they're doing.

It can work if it's used in the right way. The retoucher in the link I posted uses surface blur and then puts some of the texture of the skin back on with a high pass filter. And if you know a great way to do it why not invest some time and energy and post a small tutorial.
 
It can work if it's used in the right way. The retoucher in the link I posted uses surface blur and then puts some of the texture of the skin back on with a high pass filter. And if you know a great way to do it why not invest some time and energy and post a small tutorial.

I would like that as well. I agree, I've used surface blur a lot of time but just not directly on the default image, which i don't think should be done. But using surface blur as a top layer should be fine as long is done correctly. Of course any tip from a pro would be awesome.
 
"When I tell any truth it is not for the sake of convincing those who do not know it, but for the sake of defending those who do."

As far as I'm concerned, the cardinal rule of skin retouching is that you work as non-destructively as possible. By that, I mean much more than the usual adjustment layers and all. Why blur and then add texture back in when there are perfectly good ways to touch-up while simultaneously preserving texture in the first place? Blur is for the most part an amateur technique, and is used sparingly in the pro world for glamour and fashion, and rarely if ever for beauty. You've heard it a thousand times before: great shots start with great makeup. And great makeup largely obviates the need for such heavy and destructive retouching. Furthermore, blur is a thoroughly imprecise technique unless you want to go through the hassle of very fine and complicated masking. All in all it's a bit like doing plastic surgery with a cleaver.

The tutorial you posted is full of poor advice. As already noted, it's off to a bad start with the blur. High pass is another cleaver technique that should also be used carefully. In principle, adding a high pass layer on top of another is a type of unsharp mask. Again, unless you intend to go masking off specific portions of your subject, this is going to sharpen the entire image. What if, for example, you wanted to retouch a subject's face but do the neck differently or perhaps not at all? With techniques like these you're out of luck.

Here are a couple tips:

1) The healing brush is a much more precise way to edit out any glaring imperfections. It not only preserves texture but allows you to select a specific texture from somewhere in the frame. By contrast, if you were to use the above high-pass technique, your skin detail layer that you've made from the original is holding onto the detail of those imperfections you want to get rid of...why would you want to reapply them? Alternatively, if you healed them out first, you're already half-way done so why bother with the high-pass anyway?

2) Learn how to use Lab mode. It's a trade secret and you won't find many, if any good tutorials on it. This mode is composed of three channels: L, a, and b. L is a luminance channel, called "lightness" and the other two are chrominance channels. Lab mode is amazing for a number of reasons. First, you can losslessly interconvert between rgb and lab. Second, because the "lightness" of the image is independent of the color channels, you can make color adjustments without brightening or darkening the image. This also works the other way around to some extent. Furthermore, you can do whatever the hell you like with the hue and saturation of the colors completely free of color blocking and artifacting. It's gorgeously non-destructive.

3) Paintbrush modes are your friend. Learn what they are and what they do. Color dodge and burn are invaluable for both skin and hair.

4) Pay attention to your damned photo. These catch-all techniques that you all think are gospel because there are lots of tutorials written by a thousand different but similarly misinformed people are totally flattening your photos and stripping your subjects' faces of their dimensional qualities. The very first thing you should do is identify and map out the geometry of your subject's skin. Pay attention to the size and shape and orientation of shadows and highlights that give faces dimension. Play with them and accent them. Extend the highlight on the cheekbone to give the appearance of greater bone structure, etc etc. You should be accentuating, not detracting. You can even go so far as to add highlight and shadows where there were none.

That should get you started.
 
Well, since I "invest[ed] some time and energy into writing a small tutorial" which nobody bothered responding to, thank you very much you ungratefuls, I might as well bump the thread.
 
I'm grateful! I'm grateful!

Haha, it's quite alot of info to absorb, much more in depth than the other tutorials. And since there are no pics, you have to try it out for yourself... Something I don't have time for quite yet...But I will! I also need a decent photo to try it on. So I'll get back to you...
 

Most reactions

New Topics

Back
Top