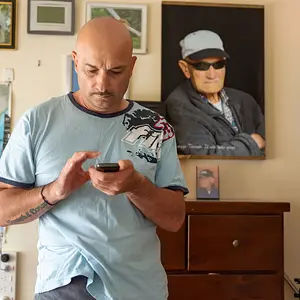
So this may be a non-elements Photoshop option, but I can't push the exposure on anything but a RAW file. I was trying to take your advice and select the subject and push the exposure but the only option I have is to .
You have a lot more options than just "lighten shadows or darken highlights".
Do you have any documentation about how to use Elements?
[ame="http://www.amazon.com/Photoshop-Elements-Digital-Photographers-Voices/dp/0321660331/ref=sr_1_11?ie=UTF8&s=books&qid=1272929965&sr=8-11"]Amazon.com: The Photoshop Elements 8 Book for Digital Photographers (Voices That Matter) (9780321660336): Scott Kelby, Matt Kloskowski: Books[/ame]
You can use the Quick Selection tool to select the boy/guitar/shadow.
Open your original image then click on File>Duplicate.
Most basic Photoshop rule #1 -
Aways work on a dupicate of the original.
Then hold down the Ctrl key and then the J key together (Copy Layer). You just made a copy of the background layer and Elements named the layer "Layer 1". (If you double click on the layer name you can change it to whatever works for you.)
Now use the Quick Selection tool to select the boy,guitar,shadow. You can use the [ to make the tool smaller and the ] key to make the tool larger. If you need to make the selection smaller in a spot or 2 go outside the selection and hold down the Alt key as you click or drag to make it shrink.
Once you have the selection the way you want it, at the top of the work space click on Select>Save Selection and give it an easy for you to remember name when the box pops-up. Now if something happens you don't have to re-do the entire selection again and/or can easily recall it to refine it. (or re-use it)
Now there are 2 ways to do what comes next:
- Click on Layer>New Adjustment Layer
- or just click on the half brown/half white ball above the top layer thumbnail image there on the right in the layers pallet. Both do the same thing, access the New Adjustment Layer drop-down menu.
With the new Adjustment Layer drop-down box open click on Brightness/Contrast.
If you did everything right the only part of the image effected by moving the sliders in the drop down box will be what was inside your selection, the boy/guitar/shadow.
If you want, you can use the same selection to include everything EXCEPT whats inside the selection. Just go up, click on Select>Inverse. Now any changes you make happen in the rest of the photo.



![[No title]](/data/xfmg/thumbnail/32/32173-af05ea40d00ae9cd79a01007df914b5f.jpg?1734161047)
![[No title]](/data/xfmg/thumbnail/32/32696-92b490fbf42036986e97d5e60ff2b35e.jpg?1734162244)
![[No title]](/data/xfmg/thumbnail/35/35668-5ed46d3abc5acbedc69d68e0c3a2173a.jpg?1734167299)