OK I'm getting brave C&C please...

With your little background, I think you did well for a Nikon.

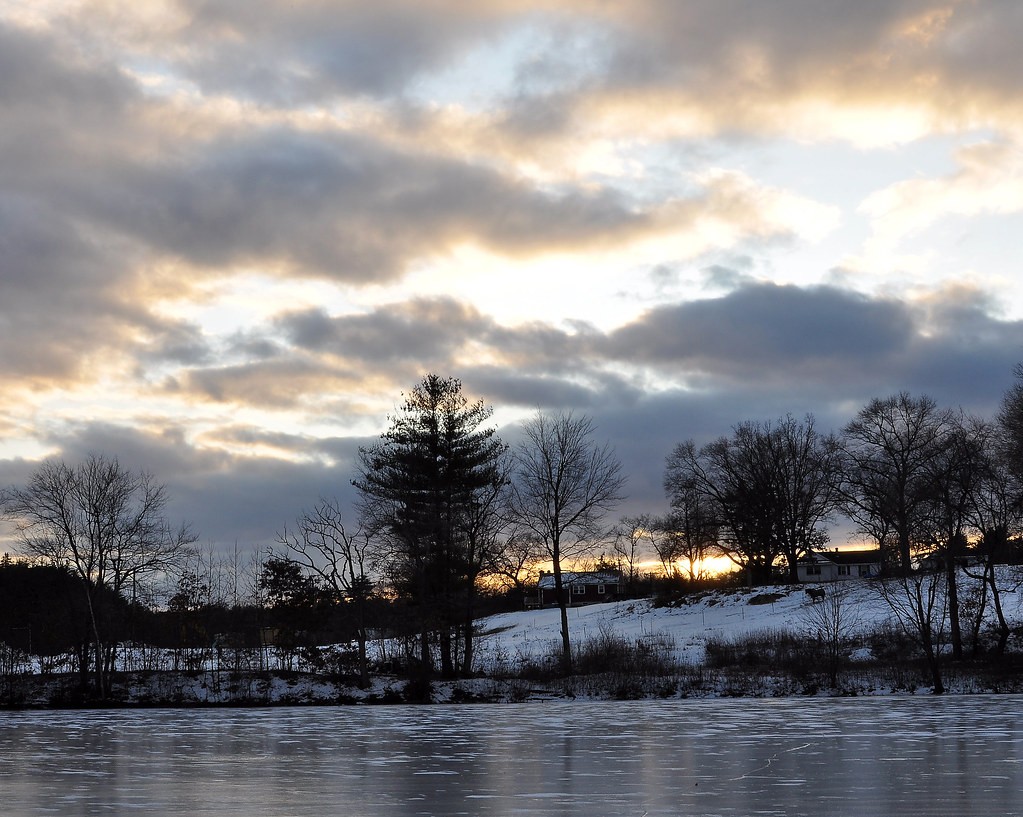
#1. I like the concept, but I think the timing was off. A better capture would have occurred around 20 minutes earlier. It’s hard to get a good photo of the water, the sun, clouds, and trees all in one photo (reflecting), which is well exposed across the scene.

#2.
I think its awesome! Great focus, could be a little sharper though. DOF works well for me. I also perceive four separate subjects, all four mesh excellent, with enough focus for each.
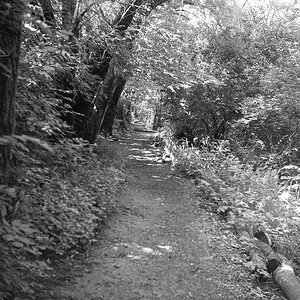
#3.
Agree with others on #3, don’t cut off heads or hands in photos. I do like the expression captured. His face, along with PJs and country style sofa makes me think he’s about to reap havoc early on a Saturday morning.

#3.
Blan

Now time to repeat using your manual setting
 
Thanks for the feedback! I used manual settings on all of these photos except for the one of my nephew. In all honesty that was really just a snap shot anyway, but I thought I captured the moment pretty well. As you can tell there was no prep as positioning or anything.

That picture of the sunset... it was ISO 200 F/22 at 1/80th of a second. I tried F/18 and that killed the sky...even a longer exposure seemed to do that. Any advice on how you guys may have shot it?

-tim
 
...That picture of the sunset... it was ISO 200 F/22 at 1/80th of a second. I tried F/18 and that killed the sky...even a longer exposure seemed to do that. Any advice on how you guys may have shot it?
-tim

I would try a strong ND filter (neutral density) - you can darken the whole scene or just the upper area with the sky to extend exposure times. I'm not sure if it will actually do a great job but it would be worth a try.

I actually tried a few shots with a Polarizing filter, but got similar results.

-tim
 
Another question... for those commenting on noise in picture #2, where are you seeing it? There is texture on that stone, which is enhanced by the B&W effect, is that what you're seeing as "noise" or is it something else I'm missing?

-tim
 
I actually tried a few shots with a Polarizing filter, but got similar results.
-tim

That's not the same. A polarizer will reduce reflection as it only allows directional light to enter the lens. It also increases contrast and a side effect is a little loss of light but that's not the main reason why you would use a polarizer.

A neutral density filter (depending on it's density) just allows less light to enter the lens which enables the photographer to use longer exposure times in bright situations.

Another question... for those commenting on noise in picture #2, where are you seeing it? There is texture on that stone, which is enhanced by the B&W effect, is that what you're seeing as "noise" or is it something else I'm missing?
-tim

Simply post a 100% crop so we can look at it closely.
 
Id prefer a faster shutter speed for the 1st picture so you see less of the house, more of the lake and the sky :/
 
Haha goes to show how subjective this stuff is. Some want faster shutter speed others want slower. I'll probably try that shot again at a different time of day and mess around a bit

what does post 100% crop mean?

-Tim
 
I actually tried a few shots with a Polarizing filter, but got similar results.
-tim

That's not the same. A polarizer will reduce reflection as it only allows directional light to enter the lens. It also increases contrast and a side effect is a little loss of light but that's not the main reason why you would use a polarizer.

A neutral density filter (depending on it's density) just allows less light to enter the lens which enables the photographer to use longer exposure times in bright situations.

Another question... for those commenting on noise in picture #2, where are you seeing it? There is texture on that stone, which is enhanced by the B&W effect, is that what you're seeing as "noise" or is it something else I'm missing?
-tim

Simply post a 100% crop so we can look at it closely.


In that case, you should try using ND Grad filter...

or using HDR technique..
 
#1 - add a bit of fill light in PP
#2 - like selective colors, though image seems a bit noisy
#3 - too soft for my flavor. Don't cut heads (or any body parts for that matter)
#4 - cute.

not sure what lens you're using, couldn't pull the exif, but boost the sharpness in camera. On D90 and D300, I'm on Standard w/ sharpness+5, Saturation+1.

Thanks for the advice. The 1st and 2nd image were shot with the 18-105 kit lens. The 3rd and 4th were shot with an older nikkor 28-105 macro lens.

For the first shot, it was a bit brighter out than the way the photo came out. I tried shooting it a bunch of times and it seemed like I either go the highlights in the landscape and lost the detail in the sky, or vice versa. In retrospect I wasn't paying too much attention to ISO (I think i was at 320) would it have helped if I were shooting at a higher ISO? Or are these the type of adjustments that are always made in PP? I don't have PS yet so taking your PP advice isn't something I'll be able to do.

The second pic might seem noisy, because the selective color editing was done in paint, lol. It's all I have. I usually think that selective coloring is cheesy, but I really wanted the flowers to stand out, and the trees in the background had no interesting color.

I thought the third one was cute with such a tight crop, but I appreciate your advice and think that maybe I should have made a wider shot that I could have edited if I wanted. It is a little soft, and I don't know why?


you had done a good job..
you may try harder for the next photo shoot..
 
I went back for a re-shoot on one of these locations. I used some of the advice you guys gave and got a hold of a tripod this time. I also thought it would be interesting to take a look at it with snow and ice now just a few weeks after the first shot. C&C please

4191601172_b35e17dd2c_b.jpg
 
Going back to that first landscape shot - some people have touched on why its a tricky exposure and on some solutions and I would expand and add this:

Firstly you have a tricky scene to expose for since you have a bright sky and water reflection with a dark band of shadowed land between the two. This means that (as you found) any exposure where the sky is well exposed, the land is not (underexposed) and any where the land is correct the sky is not (overexposed). In such a scene using a polarizing filter (its main intented use is to cut down light reflections of non metalic surfaces, but it also cuts out 2 stops worth of light just like a 2 stop Neutral Density (ND) filter would) or an ND filter will just darken the whole shot. You will thus be able to do something then, like use a longer shutter speed, but the overall differences in brightnes between the sky and the land remain the same - so you still cannot expose both correctly.

Using an ND Graduated (NDGrad) filter is also not a good idea for this scene; firstly these sorts of filter essentially block light from one half of the shot and allow light from the other - with hte middle areas graded so that its not a harsh line. However in the original scene you have 2 problems. Firstly you dont have a single line between bright and dark, you have two - water and land; land and sky. So whilst you might get the sky and land or water and land to work one of the other area would still be having problems. Secondly the line on the filter is a straight line and you have trees pushing up into the sky areas - that means with an NDGrad you would have a change in exposure as you looked up the tree - this might work creativly and it might just look really really odd in a shot.
As an aside the best sort of NDgrad filters to get are not screw in filters but those that use a filter holder to be positioned - this allows you to set where in the shot the line of graduation is - and thus you can have scenes where the skyline is say in the lower or upper areas of the shot. The screwin filter types will only allow you to have the line of graduation in the direct middle of the frame - which limits your creativity and compositional options.

Ok so Polarizers and ND and NDGrad filters are not going to work - so what will. Well you have a few choices:

a) Pick one element to be exposed "correctly" and allow the other to "error". Note that these are very general terms, a correct exposure does not mean that every part of a shot has to be prefectly exposed, but that its it exposed to display the scene as you wish to present it. In this shots example you have gone for a correctly exposed sky, whilst allowing your land areas to darken. I don't (personally) feel its worked that well in this shot, but as an example imaging a sillouet shot - the foreground land areas are not "correcly" exposed because they are black (underexposed) but for a sillouet shot they are correct exposures

b) Come back another time when the lighting is different - not always an option one has, but its one to consider. It might be that you wait for the sky to darken far more, thuss lowing the difference in brightness of the land and sky - or it might be that at a different time of the day (dawn/evening) the land areas are getting more natural lighting onto them and thus can allow you to expose for both sky and land together

c) Tonemapping/HDR - I won't go into massive depth here; but essentially you take two shots - one exposed for sky and one exposed for the land - and then combine the two results into a single shot. There are manual ways to do this and there is software which can do it for you. This is really a whole topic unto itself, but is well worth looking into when you have more complexe scenes which demend a different approach than the use of filters.

Edit - secondly:
A 100% crop is when you set the image to display at fullsize in your editing software and then crop (cut) out a section of that fullsized display. You can then save this cutout section and post it online - the result is that we can see what the image quality is like for the fullsized shot, but without you having to host the whole image online. Remember to choose the location you crop from well to display what you want it to
 

Most reactions

New Topics

Back
Top