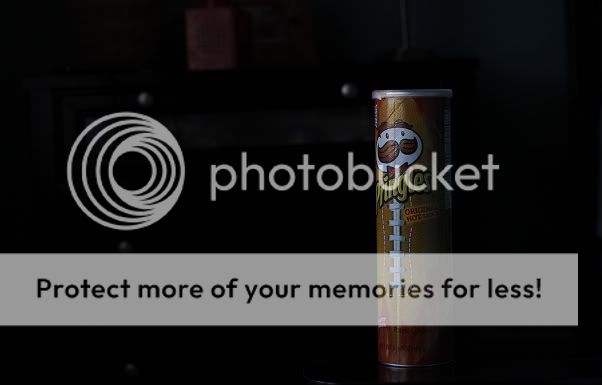
One from today's session, trying to learn new lens

You talk about not "liking" studio work... that you prefer the "outdoors"!

You do realize that 'LIGHT" works the same way in both places, right? you don't need to master studio or outdoors shooting! You need to master using the "LIGHT" to achieve what you want.. no matter where or when!
 
This is why I keep coming back, I love the advice such as this. Oh, I have a white backdrop as well....but I really do not like studio work. I like outdoors not just because of "natural light," but because there are more interesting locations than a boring backdrop....no matter what color it is. Preference....

Using AMBIENT light is wonderful..... go for it! But do it right! I would estimate that on the average day.. the AMBIENT light is perfect for photography maybe for an hour or two! So that gives you a two or four hour window every day to shoot in! ;) (better know how to work that WB though.. as the hours are typically just after sunrise and before sunset)

If you add some reflectors.. that might increase the window an hour or two! If you learn how to use them!

Shooting in the shade is a good idea on really sunny days.. but that can also kill color and WB and even clarity. Again reflectors (got an assistant handy?)...or if you get good at using fill flash.. the colors will pop better, there will be more clarity.. and you won't need an assistant.. just a light stand or two. Notice I said FILL FLASH.. we are just adding to the AMBIENT light.. not overpowering it. (and yes.. reflectors and fill flash work well together!)

Guess what? You have just increased your shooting time to anytime there is any sunlight at all ! WOW.. no longer limited to just a few hours! And since you can apply what you learned about flash.. to shooting at night or in a dark house... you can now shoot ANYTIME! No limitations! :)

Which sounds better to you? :)

So I should youtube some tutorials on properly using reflectors, or "assistants" as you call them;)

I noticed that you avoided the word "FLASH" in your reply.... even though my intent was to point out the added ability FLASH gives you! lol!
 
Your photos do have issues with lighting. But when you don't have the money to spend of flashes, you have to improvise. One technique that works uses a north-facing large window as the primary light source, with an appropriate backdrop and a reflector that fills in the side of the face opposite the window. While working next to the window is not always ideal, it gets around the issue of having enough light, and the size of the window usually works well to create a rather soft enveloping light. To set the exposure, use either a spot meter on a "typical" subject, or a grey card. Once you have your exposure settings, set the exposure manually (if the light doesn't change, neither will your exposure). At this point, it's also a good idea to shoot a picture of the grey card at the exposure settings you will be using. Later, you can use the grey card to adjust the white balance point.

The other issue is the shallow DOF and your focus placement. Figure out how much DOF you need, then use the DOF utility (such as here: Online Depth of Field Calculator), to determine what aperture and what distance. Put some inanimate, 3-dimensional object that approximates the size of your subject, put your camera on a tripod, and practice getting the focus so that the entire object (or the portion you care about) is within the desired DOF. I suggest, shoot, upload to computer, check it carefully, then go back (camera on tripod in same position) and make your adjustments. Do this until you can get your focus pretty much each time.

Then, put the two together.

Once these basic technical issues are taken care of, you can switch your attention to the pose and framing of the image.

Here's an example of a picture by the window. Taken a few years back, when I just started doing portraiture and there was a lot that I didn't know...

Chloeportraitbythewindow2.jpg
 
Last edited:
You talk about not "liking" studio work... that you prefer the "outdoors"!

You do realize that 'LIGHT" works the same way in both places, right? you don't need to master studio or outdoors shooting! You need to master using the "LIGHT" to achieve what you want.. no matter where or when!

Yeah, now I am not that dumb. I just have better luck outdoors than in a dark basement at night. Oops, sorry I left out the word flash. As far as getting defensive like Mot said, I am not and I appreciate all the help. I don't think you all would be saying these things if you didn't see a slight bit of potential in me. Also, once again, the reason I post work that i have the most trouble with is it helps me with the work I have done well with. This got overlooked, but this is why I do not like to post work I have done that I personally like. Is this my best, no, but I did like it. http://www.thephotoforum.com/forum/...orum/274292-our-wedding-bands-c-c-please.html
 
Your photos do have issues with lighting. But when you don't have the money to spend of flashes, you have to improvise. One technique that works uses a north-facing large window as the primary light source, with an appropriate backdrop and a reflector that fills in the side of the face opposite the window. While working next to the window is not always ideal, it gets around the issue of having enough light, and the size of the window usually works well to create a rather soft enveloping light. To set the exposure, use either a spot meter on a "typical" subject, or a grey card. Once you have your exposure settings, set the exposure manually (if the light doesn't change, neither will your exposure). At this point, it's also a good idea to shoot a picture of the grey card at the exposure settings you will be using. Later, you can use the grey card to adjust the white balance point.

The other issue is the shallow DOF and your focus placement. Figure out how much DOF you need, then use the DOF utility (such as here: Online Depth of Field Calculator), to determine what aperture and what distance. Put some inanimate, 3-dimensional object that approximates the size of your subject, put your camera on a tripod, and practice getting the focus so that the entire object (or the portion you care about) is within the desired DOF. I suggest, shoot, upload to computer, check it carefully, then go back (camera on tripod in same position) and make your adjustments. Do this until you can get your focus pretty much each time.

Then, put the two together.

Once these basic technical issues are taken care of, you can switch your attention to the pose and framing of the image.

Thank you. One thing though, it was pitch black outside, so a window wouldn't have helped in this case. I'm logging how to practice and read more about DOF. Megan suggested practicing with a perfume bottle.
 
Your photos do have issues with lighting. But when you don't have the money to spend of flashes, you have to improvise. One technique that works uses a north-facing large window as the primary light source, with an appropriate backdrop and a reflector that fills in the side of the face opposite the window. While working next to the window is not always ideal, it gets around the issue of having enough light, and the size of the window usually works well to create a rather soft enveloping light. To set the exposure, use either a spot meter on a "typical" subject, or a grey card. Once you have your exposure settings, set the exposure manually (if the light doesn't change, neither will your exposure). At this point, it's also a good idea to shoot a picture of the grey card at the exposure settings you will be using. Later, you can use the grey card to adjust the white balance point.The other issue is the shallow DOF and your focus placement. Figure out how much DOF you need, then use the DOF utility (such as here: Online Depth of Field Calculator), to determine what aperture and what distance. Put some inanimate, 3-dimensional object that approximates the size of your subject, put your camera on a tripod, and practice getting the focus so that the entire object (or the portion you care about) is within the desired DOF. I suggest, shoot, upload to computer, check it carefully, then go back (camera on tripod in same position) and make your adjustments. Do this until you can get your focus pretty much each time.Then, put the two together.Once these basic technical issues are taken care of, you can switch your attention to the pose and framing of the image.
External flashes work best obviously, but there are plenty of tutorials on YouTube for homemade pop up camera flash diffusers. That mixed with manually setting your pop up flash compensation, you will be utilize your flash to some degree for now until you decide if/when you want to invest in something off camera. That's what I'm working with now.
 
You talk about not "liking" studio work... that you prefer the "outdoors"!

You do realize that 'LIGHT" works the same way in both places, right? you don't need to master studio or outdoors shooting! You need to master using the "LIGHT" to achieve what you want.. no matter where or when!

Well, you know, the idea that "LIGHT" works the same way in both places is, uh, really NOT 100 percent accurate...like in the shot of her son, on the black background, wearing the fedora-type hat...his FACE is "hot" with flash or studio incandescent light, but his FEET are seriously under-exposed, in relation to the FACE. Now, outdoors, the light would NOT DO THAT SAME THING!!!! That's right, outdoors, with the kid laying down on the grass in a park or field on a bright, cloudy day, the amount of light on his FACE and his FEET would be IDENTICAL. And I mean the light would be IDENTICAL in its intensity. SO, right there, we can see that LIGHT does NOT, I repeat, does NOT, behave "the same way" outdoors as it does indoors.

I've seen the same allegation from other posters, that light is light and that outdoor light is the same as indoor light, and that light behaves the "same way". Uh...in terms of photography, that is simply not an accurate statement. At normal, indoor distances, light from artificial sources, like lamps, and flash units, falls off extremely rapidly in its intensity when the light is placed CLOSE TO a subject and the subject moves away from the flash or other artificial light source. Outdoors in open areas, with the sun as the light source, natural light has basically almost NO FALL-OFF in its intensity!!!!! The exposure for a man standing 10 feet from the camera is the same as the exposure for his face 4 feet from the camera. And the exposure that is correct for the man standing 40 feet from the camera is the SAME EXPOSURE as it is when he is 4 feet from the camera.

With a flash or lamp, the exposure settings required at 4,10,and 40 feet are are all, each, INCREDIBLY DIFFERENT!!!!!!! There is a HUGE variance in the intensity of the light produced by many artificial sources, like studio flash, on-camera flash, and off-camera speedlight flash, or off-camera electrical lighting, s the distance from the light source changes. Part of the reason natural light and artificial light have been separated and differentiated between for over 100 years by experienced,sensible,sane photographers is that natural, outdoor lighting, and indoor-distance artificial lighting often behave very,very,very differently.

The portrait of the boy on the black background, with the BRIGHT, well-exposed face and the DARK, dark feet up in the air...gsgary mentioned that the shot desperately needed a second light, to provide separation from the background...well, it would also provide more light on his legs and body....light that WOULD HAVE BEEN THERE, if the shot had been made outdoors, in an open field. So, again...a shot that would have looked perfectly EVENLY LIGHTED if it had been lighted by the sun, looks very bright up close, and very DIM, just 30-36 inches behind the boy's face. So,again, in a practical sense, a photograhic exposure sense, natural light does not behave the same way as indoor, studio lighting does...

In natural lighting situations, lighted by the sun, or the sky, the light tends to be of almost the same,exact,identical,equal INTENSITY, across distances of thousands and thousands of feet. Why? Because the source of the light is so,so far away that the inverse square law is basically non-existant for all practical intents. When the light comes from an artificial source, at indoor distances, such as in a portrait studio situation, the amount of light fall-off can vary TREMENDOUSLY from 36 inches to 50 inches. That does NOT OCCUR when shooting outdoors, in natural lighting conditions in parks, or on laws, etc. This difference is one of the reasons new shooters have such difficulty transitioning from a single, HUGE, exceptionally distant light source (either the sky, or the sun itself) to very CLOSE light sources.
 
External flashes work best obviously, but there are plenty of tutorials on YouTube for homemade pop up camera flash diffusers. That mixed with manually setting your pop up flash compensation, you will be utilize your flash to some degree for now until you decide if/when you want to invest in something off camera. That's what I'm working with now.

There are a few things to consider though, even with using a diffuser on the popup flash:

1) Direction of the lighting. Generally most portraits are not trying to light the subject fully, but instead are trying to mimic sunlight upon the subject, whilst keeping softer shadows (not harsh ones). This means lighting has to be weighted to one side of the photo, rather than the full in the face shot from the camera. This is why directional lighting (as suggested the window) is popular because it gives that direction to the lighting, which helps mimic that natural light we are used to seeing and also helps cast a contrast difference over the face - giving definition to features and helps with textures.

2) Even with a diffuser the popup flash light source is still pretty small, this limits it greatly since small light sources cast a harsher shadowing effect on the subject. Consider how much bigger a window, softbox or bounced light is onto a subject in comparison to the size of a popup flash with a diffuser (even a small reflector manages to be at least twice or more times the size).


I'm not saying popup never has a place, nor that directional lighting from on-camera isn't a valid method, but one has to round such advice against the wider picture. If the photographer wants to go for that professional look they've got to move that main, primary, lighting away from the same plane of angle as the camera is facing (this also helps greatly with avoiding red-eye and other problems).
 
External flashes work best obviously, but there are plenty of tutorials on YouTube for homemade pop up camera flash diffusers. That mixed with manually setting your pop up flash compensation, you will be utilize your flash to some degree for now until you decide if/when you want to invest in something off camera. That's what I'm working with now.
There are a few things to consider though, even with using a diffuser on the popup flash:1) Direction of the lighting. Generally most portraits are not trying to light the subject fully, but instead are trying to mimic sunlight upon the subject, whilst keeping softer shadows (not harsh ones). This means lighting has to be weighted to one side of the photo, rather than the full in the face shot from the camera. This is why directional lighting (as suggested the window) is popular because it gives that direction to the lighting, which helps mimic that natural light we are used to seeing and also helps cast a contrast difference over the face - giving definition to features and helps with textures.2) Even with a diffuser the popup flash light source is still pretty small, this limits it greatly since small light sources cast a harsher shadowing effect on the subject. Consider how much bigger a window, softbox or bounced light is onto a subject in comparison to the size of a popup flash with a diffuser (even a small reflector manages to be at least twice or more times the size). I'm not saying popup never has a place, nor that directional lighting from on-camera isn't a valid method, but one has to round such advice against the wider picture. If the photographer wants to go for that professional look they've got to move that main, primary, lighting away from the same plane of angle as the camera is facing (this also helps greatly with avoiding red-eye and other problems).
Oh yeah I know it's not ideal. Just some advice when you're desperate lol.
 
Your photos do have issues with lighting. But when you don't have the money to spend of flashes, you have to improvise. One technique that works uses a north-facing large window as the primary light source, with an appropriate backdrop and a reflector that fills in the side of the face opposite the window. While working next to the window is not always ideal, it gets around the issue of having enough light, and the size of the window usually works well to create a rather soft enveloping light. To set the exposure, use either a spot meter on a "typical" subject, or a grey card. Once you have your exposure settings, set the exposure manually (if the light doesn't change, neither will your exposure). At this point, it's also a good idea to shoot a picture of the grey card at the exposure settings you will be using. Later, you can use the grey card to adjust the white balance point.

The other issue is the shallow DOF and your focus placement. Figure out how much DOF you need, then use the DOF utility (such as here: Online Depth of Field Calculator), to determine what aperture and what distance. Put some inanimate, 3-dimensional object that approximates the size of your subject, put your camera on a tripod, and practice getting the focus so that the entire object (or the portion you care about) is within the desired DOF. I suggest, shoot, upload to computer, check it carefully, then go back (camera on tripod in same position) and make your adjustments. Do this until you can get your focus pretty much each time.

Then, put the two together.

Once these basic technical issues are taken care of, you can switch your attention to the pose and framing of the image.

Here's an example of a picture by the window. Taken a few years back, when I just started doing portraiture and there was a lot that I didn't know...

Chloeportraitbythewindow2.jpg

This photo demonstrates the Inverse Square Law almost perfectly!!! This is shot indoors. The light source is not "that big", really. SHe is positioned indoors, fairly close to the source of the light. How do I know she's fairly close to the source of the light??? Well, look at how fast the light drops in its intensity,across the width of her face--a distance of around six inches I guess.

ON the window side, the skin on her face and cheek is BRIGHT, almost blown-out and yellow...her hair looks well-lighted on the "light side". But, around four inches farther from the light source, the intensity of the light has dropped tremendously...her skin on the cheekbone on the right hand side of the frame looks nice. But look at the BLACK shadow on her neck, and the total loss of all color in hr hair on the right hand side.

Her chin is totally blown-out and over-exposed. But one inch to the right, it's got good skin tone. But some four inches to the right, where her ear is....totally black...

Why is this lighting of such high contrast? well, the first reason is that the subject is so,so CLOSE TO the source of the light...had she been positioned farther away from the window, more in the center of the room, the lighting would have been dimmer, yes, but also more "even" in its intensity across the width of her face. The second reason is that the light source is "small", in relation to the size of the subject. But the main reason the light has such a high degree of contrast is the subject's distance from the source of the light, and to a lesser degree, the size of the light source in relation to her.

As one can see, in this type of photo, with the light source being very close to the model, the Inverse Square Law affects the light to a very easily-seen degree. One side of the face the exposure used creates blown-out and almost detail-less skin in the highlight areas, and the other side of the face is seen as being in near total darkness. That is what is called "steep fall-off". That degree of fall-off would NOT occur outdoors with the sky as the source; there would be some fall-off, but not anywhere near as much as when using a window as the source. That same degree of fall-off would not have occurred if she had been placed farther from the window, and the exposure adjusted to compensate for the light lost by the increased distance away from the source of the light.
 
Yep, that's one of the things I've been learning - to take into account the light fall-off. The eye doesn't see that fall-off very well due to the eye's dynamic range, but the camera does.
 
....

I've seen the same allegation from other posters, that light is light and that outdoor light is the same as indoor light, and that light behaves the "same way". Uh...in terms of photography, that is simply not an accurate statement. At normal, indoor distances, light from artificial sources, like lamps, and flash units, falls off extremely rapidly in its intensity when the light is placed CLOSE TO a subject and the subject moves away from the flash or other artificial light source. Outdoors in open areas, with the sun as the light source, natural light has basically almost NO FALL-OFF in its intensity!!!!! The exposure for a man standing 10 feet from the camera is the same as the exposure for his face 4 feet from the camera. And the exposure that is correct for the man standing 40 feet from the camera is the SAME EXPOSURE as it is when he is 4 feet from the camera.

.....

Practical demonstration of the Inverse Square Law.

 
Last edited by a moderator:
Wonderful, I came back to see if Bossy returned to the scene of the incident after the hit and run and what do I find?
Gipson all over the place.
 
luvmyfamily said:
This is a nicely done studio photo but did she have something wrong with her eye....it's red. Also, if she did, why didn't you fix it?

Lol thats her birth mark and no she doesn't want to fix it. That picture was taken using off camera flashes. You should see the picture I did with my iPhone and a led flash light.
 
You talk about not "liking" studio work... that you prefer the "outdoors"!

You do realize that 'LIGHT" works the same way in both places, right? you don't need to master studio or outdoors shooting! You need to master using the "LIGHT" to achieve what you want.. no matter where or when!

Well, you know, the idea that "LIGHT" works the same way in both places is, uh, really NOT 100 percent accurate...like in the shot of her son, on the black background, wearing the fedora-type hat...his FACE is "hot" with flash or studio incandescent light, but his FEET are seriously under-exposed, in relation to the FACE. Now, outdoors, the light would NOT DO THAT SAME THING!!!! That's right, outdoors, with the kid laying down on the grass in a park or field on a bright, cloudy day, the amount of light on his FACE and his FEET would be IDENTICAL. And I mean the light would be IDENTICAL in its intensity. SO, right there, we can see that LIGHT does NOT, I repeat, does NOT, behave "the same way" outdoors as it does indoors.

I've seen the same allegation from other posters, that light is light and that outdoor light is the same as indoor light, and that light behaves the "same way". Uh...in terms of photography, that is simply not an accurate statement. At normal, indoor distances, light from artificial sources, like lamps, and flash units, falls off extremely rapidly in its intensity when the light is placed CLOSE TO a subject and the subject moves away from the flash or other artificial light source. Outdoors in open areas, with the sun as the light source, natural light has basically almost NO FALL-OFF in its intensity!!!!! The exposure for a man standing 10 feet from the camera is the same as the exposure for his face 4 feet from the camera. And the exposure that is correct for the man standing 40 feet from the camera is the SAME EXPOSURE as it is when he is 4 feet from the camera.

With a flash or lamp, the exposure settings required at 4,10,and 40 feet are are all, each, INCREDIBLY DIFFERENT!!!!!!! There is a HUGE variance in the intensity of the light produced by many artificial sources, like studio flash, on-camera flash, and off-camera speedlight flash, or off-camera electrical lighting, s the distance from the light source changes. Part of the reason natural light and artificial light have been separated and differentiated between for over 100 years by experienced,sensible,sane photographers is that natural, outdoor lighting, and indoor-distance artificial lighting often behave very,very,very differently.

The portrait of the boy on the black background, with the BRIGHT, well-exposed face and the DARK, dark feet up in the air...gsgary mentioned that the shot desperately needed a second light, to provide separation from the background...well, it would also provide more light on his legs and body....light that WOULD HAVE BEEN THERE, if the shot had been made outdoors, in an open field. So, again...a shot that would have looked perfectly EVENLY LIGHTED if it had been lighted by the sun, looks very bright up close, and very DIM, just 30-36 inches behind the boy's face. So,again, in a practical sense, a photograhic exposure sense, natural light does not behave the same way as indoor, studio lighting does...

In natural lighting situations, lighted by the sun, or the sky, the light tends to be of almost the same,exact,identical,equal INTENSITY, across distances of thousands and thousands of feet. Why? Because the source of the light is so,so far away that the inverse square law is basically non-existant for all practical intents. When the light comes from an artificial source, at indoor distances, such as in a portrait studio situation, the amount of light fall-off can vary TREMENDOUSLY from 36 inches to 50 inches. That does NOT OCCUR when shooting outdoors, in natural lighting conditions in parks, or on laws, etc. This difference is one of the reasons new shooters have such difficulty transitioning from a single, HUGE, exceptionally distant light source (either the sky, or the sun itself) to very CLOSE light sources.

I agree with Derryl here about natural light. It's true, had he been outdoors laying in the grass, wouldn't have had that. These are poor UNEDITED EXAMPLES, but just showing the difference in my pringles can experiment. I believe all of the exposure of all of these could be easily edited. However, I DO agree with CGipson that a true photographer knows how to shoot in all types of lighting. I am struggling with indoor night studio. The photos posted of the pringles can are just for EXPERIMENT since we are on the subject of LIGHTING.

#1 taken in the same studio I took last night but with natural light coming through the window. I believe this image could be easily edited to fix the exposure.
pringle2.jpg


#2 taken by a window in my bedroom. Parts of the can are darker than others.
pringle.jpg


#3 Direct sunlight! Sun literally shining on the can, but there are no dark areas of the can.
pringle4.jpg


#4 In the shade, but still natural light. Still, no dark areas of the can.
pringle3.jpg


Most reactions

New Topics

Back
Top