Orton Technique.

RMThompson

the TPF moderators rock my world!
Joined
Nov 12, 2006
Messages
1,888
Reaction score
11
Can others edit my Photos
Photos NOT OK to edit
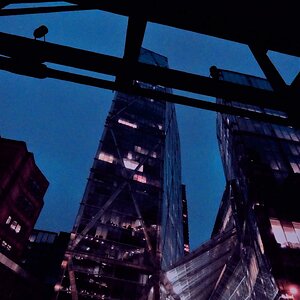
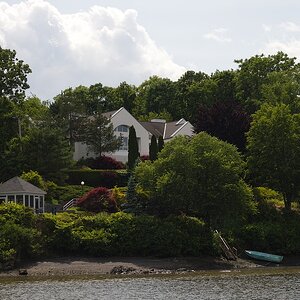
Whatcha think?

2430896781_71d4e68bab.jpg


I used a technique called the Orton Technique, which combines a regular, sharp, photograph and a secondary blurred and overexposed one. This was the result... not sure if I like it!
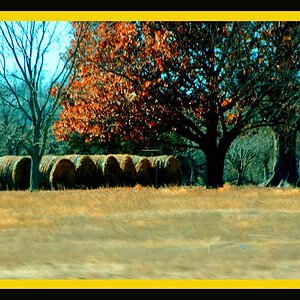
Thoughts?
 
Wow its actually a named technique? I have done that many times. Its useful also when you want to blur and isolate your subject. One layer and erase your subject and blur the background. Then reapply your background opacity. Takes some tweaking but it works great.

Your shot is very nice.
 
I like it. Her nose seems to be a bit red though. Other than that, very cool. Would you share the technique? Maybe a tutorial somewhere on the web?


I found the technique on this website:

http://www.naturephotographers.net/articles0106/dw0106-1.html

It gives a film version and this digital way:

Here is the step-by-step recipe for making Orton images in Photoshop:
  1. Open any image you wish to try the technique on. Make a duplicate of the image (Image>Duplicate). Close the original image.
  2. Lighten the image as follows: Image>Apply Image… then in the dialog box that comes up change the bending mode to “Screen” and the Opacity to 100%. This will give you an appropriately overexposed image.
  3. Duplicate this overexposed image (Image>Duplicate).
  4. Blur this second image (Filter>Blur>Gaussian Blur… and in the dialog box use a Radius setting of 15 to 50 pixels – the higher the pixel setting the blurrier the photo and the more ‘painterly’ the image… but you can go too far!). Experiment with different settings, for my tastes and for the size of my digital files (50-100 megabytes) a radius of about 25 pixels works perfect.
  5. Now select the move tool from the Photoshop tool bar (or just press “v” on your keyboard for quicker access to the move tool). Hold down the “shift” key and use your mouse to drag and drop the blurry image onto the sharp one (don’t let go of the shift key until after you release the mouse button or the images won’t be in perfect alignment).
  6. Bring up the layers palette in Photoshop (F7 is the keyboard shortcut). Under the word “Layers” in the layers palette will be a menu box of blending modes. Change the blending mode from “normal” to “multiply”.
  7. Now “flatten’ the two layers by pressing “CTRL+E” or by clicking on the sideways triangle in the layers palette to select ‘flatten image’.
There, you now have an Orton image - if you like your new masterpiece save the file!
 

Most reactions

New Topics

Back
Top