Please help to analyze below sample image and method to achieve

prashant4u

TPF Noob!
Joined
May 12, 2018
Messages
1
Reaction score
0
Can others edit my Photos
Photos NOT OK to edit
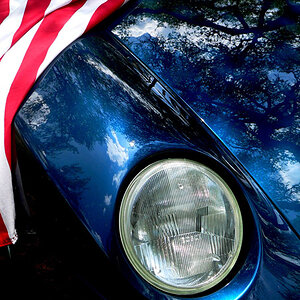
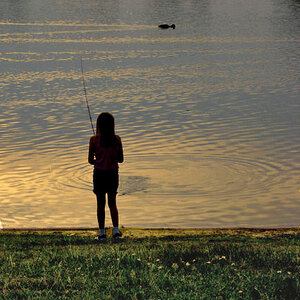
Hi, Technology has improved and now expectation is to get ultra high resolution image with effects. Can experts point out how this is achieved with a photoshop or any other adobe tool. I have been struggling to understand whether its a real clicked photo or achieved through tools.

Your help will be very much appreciated and beneficially to the community to raise the bar of our work. Thanks in advance.

Image Link 1
Image Link 2
 
I've sure the first has quite a bit of post processing, probably exposure adjustments, maybe some colour tweeks, noise reduction, doge and burn layer.

The second looks to me like it was shot with good lighting placement - strong backlight and some fill from the opposite direction. Sky colour looks to me like it might have been shot in tungsten WB with the flashes gelled to balance it out. This probably also has some post processing though I'd expect you could get 90% there with good lighting alone.
 
I would say that both are 90% good lighting. The first is using at least a 5 light set-up, and definitely has a bit of processing intended to produce a 'gritty' feel. The second is using 2 lights with a much 'cleaner' look. Both images are primarily the result of good planning and technique, and NOT an over-reliance on post-processing.
 
Yep. It's mostly about light quality, direction, and photographer skill and knowledge used to produce most of what the photographer wanted when the shutter was released. No doubt there was some post process image editing , but becuase of good planning and set up before shutter release it wouldn't take much editing.

In particular note the likely use of a tungsten WB camera setting/gells on the lights Weepete mentioned regards the second image.
 
There’s something odd about the first image that I’m trying to identify.

I’m noticing how his arms and wides of his torso are lit ... but less on the centerline of his chest and everything below the waist goes quite dark. It suggests lights were placed on the sides and about even with his body so that only when he “leans back” does he get the light.

But the wierd bit is the “water” (which may not be water). Zoom in around the sides of the frame near the top and you’ll see what appears to be streaks ... as if some milky substance is hitting glass and running down.

It is “as if” the subject is positioned behind a giant glass window. If it were a small glass nearer to the lens, I don’t think the streaks of liquid would be focused well enough to perceive them.

It may be a photoshop composition where the “water” was photographed separately. Another reason I suspect this is the case is because his clothes don’t act like wet clothes. (Wet fabric wants to stick to the skin and his shirt and pants hang more like dry clothes).


The 2nd shot looks easier... two lights (look at the shadows). This shot doesn’t have a level horizon.
 
100% he was not shot in the rain. that mud isn't even real...


second shot is easy:

1 main light above and in front of the subject, a 2nd firing bare from behind -- light stand was photoshopped out.
 
Look closely behind her arm on the second image, looks like they didn't even photoshop out the light stand.
 
oh yeah i see it now. lol.
 
There’s something odd about the first image that I’m trying to identify.

I’m noticing how his arms and wides of his torso are lit ... but less on the centerline of his chest and everything below the waist goes quite dark. It suggests lights were placed on the sides and about even with his body so that only when he “leans back” does he get the light.

But the wierd bit is the “water” (which may not be water). Zoom in around the sides of the frame near the top and you’ll see what appears to be streaks ... as if some milky substance is hitting glass and running down.
. . . .

The 2nd shot looks easier... two lights (look at the shadows). This shot doesn’t have a level horizon.

I found out how to take the first shot by accident last year. Notice it is a very wide angle lens (probably a frame filling fisheye)? Assuming this is in a studio, you just need a fine misting spray bottle of water, maybe about 1' in front of the lens, and have some lighting in the area. Get the depth of field right and the fine droplets look big like that. Notice how they look at the near edge of the depth of field? The only trick is to set it up in advance with a dummy and get your lighting and everything right with test shots. And then do enough live shots with the "model" to get a good one. But there is no special post processing necessary for it.

[2018-05-23]
Actually, having thought about it a bit more, it was probably taken with an "action camera". A GoPro Hero 4 Silver, Hero 5 or later, would all be capable of getting this picture out of the box. The standard focus distance is something like 4' and the "model" would have been within the depth of field. These later version GoPro's have a lot of manual control which also helps. Another good camera "out of the box" would be a GitUp "Git2" which has a higher 16MB resolution sensor and an equally good set of manual controls. I have a modified SJCAM M20 (re-focussed) that could have taken this picture.

The small sensor size (1/2.3") used in these "action cameras" is part of the depth of field equation that allows a picture like this to be taken easily.
 
Last edited:
First image is Studio Shot with heavy photoshop work...second shot is not, with just some edits.

As about first shot lots of layers and masking done....Subject is shot in studio, rain effect is different layer, backgorund is different layer, and lots of other skills like use of brush, dodging and burning and more.
 
I found out how to take the first shot by accident last year. Notice it is a very wide angle lens (probably a frame filling fisheye)? Assuming this is in a studio, you just need a fine misting spray bottle of water, maybe about 1' in front of the lens, and have some lighting in the area. Get the depth of field right and the fine droplets look big like that. Notice how they look at the near edge of the depth of field? The only trick is to set it up in advance with a dummy and get your lighting and everything right with test shots. And then do enough live shots with the "model" to get a good one. But there is no special post processing necessary for it.

[2018-05-23]
Actually, having thought about it a bit more, it was probably taken with an "action camera". A GoPro Hero 4 Silver, Hero 5 or later, would all be capable of getting this picture out of the box. The standard focus distance is something like 4' and the "model" would have been within the depth of field. These later version GoPro's have a lot of manual control which also helps. Another good camera "out of the box" would be a GitUp "Git2" which has a higher 16MB resolution sensor and an equally good set of manual controls. I have a modified SJCAM M20 (re-focussed) that could have taken this picture.

The small sensor size (1/2.3") used in these "action cameras" is part of the depth of field equation that allows a picture like this to be taken easily.

this shot is 80% photoshop. the camera mattered very little here -- but he was shot under studio lights, it appears to be two rims from the side/behind, and two at 45° to camera.

the background is probably 100% digital, the ground doesn't even look like grass, the lights as just lens flare filters.

looks like 2 or 3 different layers of rain:
1. glass drizzle look
2. rain bokeh balls.
4. rain white specs.
3. layer of fine-rain close to his body above his head/shoulders/arm.

there's a few color overlays, his right hand is glowing green.

I'm pretty certain the mud on his shirt is an overlay.

the photographer did NOT spray water in front of the lens to get the effect, he googled "rain" and dropped it into his artboard.


I've done something very similar:
Before and After thread!
 
[2018-05-23]

The small sensor size (1/2.3") used in these "action cameras" is part of the depth of field equation that allows a picture like this to be taken easily.

this shot is 80% photoshop. the camera mattered very little here -- but he was shot under studio lights, it appears to be two rims from the side/behind, and two at 45° to camera.


I've done something very similar:
Before and After thread!

Hah! So there are two ways to do this! I guess we gravitate to our experiences. I would find my way easier and you would no doubt find your way easier.
 
. . . .

The small sensor size (1/2.3") used in these "action cameras" is part of the depth of field equation that allows a picture like this to be taken easily.

. . . .

I've done something very similar:
Before and After thread!

After reading your process and looking at the picture again it's clear that it was done your way. If it had been done my way, the water droplets would have been a fairly even pattern in front of the guy, but the pattern sort of thins out suddenly just where the guy is. Also the pattern changes between the left side and the right side.

By the way, nice work on the BMW shot. I have no real preference for wet or dry. :)
 
I was going through files to delete or offload and I found the files from the "accident" that I mentioned before.

On Jan 21, 2017 we had an unusual weather condition. It is rarely foggy in the evening in my area (away from the lakefront and fairly high elevation). But on this particular occasion we had evening fog. I had my Olympus TG-850 with me and I took a few pictures. The first I took without flash, and they turned out as I expected. But the advice I got years ago from much better photographers than me, was that when you finish the pictures you "planned" then change something and take a couple more. When I was younger, I actually did not do this much because real film and developing costs money, but with digital, I can afford to do this. In this case, I decided to turn on the flash. The results were not what I was expecting. I had no idea that the small water droplets of the fog would be big enough to show up, even in this "out of focus" way. But this is something I remembered, and will remember in the future.

These droplets do not look like in the sample photo, but depending on how they are lighted, I think I could come closer. Focal length has an interesting affect. I took a few pictures where the water droplets show up well. Most of my pictures were around 4mm and one was at 8mm. The 8mm image shows the droplets much larger and sharper. I picked this picture because the droplets show up closer to the size in the sample picture. But I made some adjustments, including sharpening.

"P1210009b-SmartFix-C1.jpg"
[2018-05-31 This is an unreduced detail crop.]

Partial EXIF
Original date and time January 21, 2017 17:38:33
Pixel height 3456
Pixel width 4608
Component configuration YCbCr
Color space sRGB
Exposure program Normal program
Scene capture Standard
Exposure mode Auto exposure
Exposure bias 0.00 ev
Exposure time 1/30 sec.
F number f/4.1
Max aperture f/3.5
Focal length 4.5mm
Focal length 25mm
Flash used Yes
ISO speed 1000
Metering mode Pattern
Custom rendered Normal processing
Gain control High gain up

Post processing Corel PaintShop Pro X9 on Gateway dx4375, Windows 8.1
Crop start 950,2650
1240 x 930

SmartFix
Brightness:
Ovaerall 28
Shadows -50
Highlights 20

Saturation 8
Focus 63
White balance [yes]
Black 20
White 2
 

Attachments

  • P1210009b-SmartFix-C1.jpg
    P1210009b-SmartFix-C1.jpg
    345.4 KB · Views: 153
Last edited:

Most reactions

Back
Top