Sw1tchFX
TPF Noob!
- Joined
- May 3, 2006
- Messages
- 7,499
- Reaction score
- 478
- Can others edit my Photos
- Photos NOT OK to edit
So there are alot of threads that pop up about how to shoot pictures at night, so instead of writing (essentially) the same thing every time, I figured it could benefit us all if there was a sticky about it? I'll write this up for doing single exposures, if someone experienced wants to write up one about stacking and contribute, be my guest. I don't know a whole lot about stacking because I much prefer the results from single exposures.
Anyway.... Night shooting is a ton of fun, the results can be awesome! There are so many things the camera will see that we can't. Night shooting takes alot of time, a little practice, and more than anything, patience. Night shooting isn't something that you're done with quickly. Your first attempt will be awful, everyone screws it up the first time. Don't get bummed about it. My first attempt was so bad, I deleted the pictures, and I never delete pictures. But, over the years I’ve formulated a pretty good method of shooting at night. In an effort to save you the trial and error I experienced, i bestow onto thee enlightenment to mastering night photography!
Before you decide to go take pictures tonight, you'll need at least 3 things, most likely 6 though:
1. Freshly charged batteries. Nothing will kill your battery faster than long exposures and cold weather. On digital, your camera is constantly running, gathering light, using up energy. It sucks when you have to cut your night short by leaving with one partially charged battery, or forgetting spares.
2. A cable release or remote. They're (generally) cheap, there's no reason you can't go and spend $25-$100 on one. If you don't have one, long exposures can be tricky to do without stacking. Holding down the shutter when your camera is set to Bulb won't fly, your hands will shake the camera too much. There are exceptions to this, some cameras will let you do exposures longer than 30 seconds without a cable release via mechanical shutters that turn off electronics for bulb exposures or firmware hacks like Magic Lantern. nudge nudge Canon shooters..
3. A real tripod. Not the crappy 25-60 dollar Sunpak/Quantaray sticks. When it's breezy out, those lousy plastic heads don't do jack. Invest at least $200 in at least a Gitzo or Bogen/Manfrotto system. Trust me when I say it could easily be the last tripod you'll ever buy. I went through 3 of the lousy Quantaray's to figure that one out. I've had the same Manfrotto sticks (3021BPro/488RC4) for 6 years (at the time of this writing), and they may not look like new, but they sure act like it.
(Possibly #4) A friend. If you don't have a good way to pass the time, you'll get impatient and thus, lazy, shooting yourself in the foot (so to speak) because you "just couldn't wait to see it". Also, if you're away from civilization it's good to have someone else there to talk to, compare exposures, or in case something goes wrong and you get hurt and need help.
(Possibly #5) Hot packs, food, a flashlight, and a first aid kit. If you're out at 2 in the morning in the middle of a isolated area such as the mountains in below freezing temperatures, your camera battery will die quick. Hot packs in your jacket pockets will keep you warmer and will also keep your batteries warm so the cold temperatures don't drain them. Food is good because it will help keep you awake, pass the time, and hey, you might actually get hungry. I always forget a flashlight, but LED's on cell phones work just as well. I don't think I need to explain why a first aid kit is a good idea, if you're out in the middle of nowhere and something happens, it helps to be at least somewhat prepared.
(Possibly #6) If you want pictures of stars and live in a Metro area, get the heck out of town. I live in Portland Oregon, and even driving 60 miles out to Mt. Hood, I still get light pollution. If you want lots of stars in your images, expect to go for a little bit of a drive.
Now that we have all our gear in order and we're at our location, how the heck are we going to pull this off?!?!
Night photography pushes the limits of your tools. This is part of the reason I shoot Full Frame and use just about only f/1.4 (or brighter) prime lenses when doing this. They suck in tons of light and are generally awesome by f/2-2.8, which sometimes can negate the need to stop down further and will allow you to freeze the Earth's rotation that f/2.8 lenses and cameras (at the time of this writing) can sometimes have a little bit of trouble with. There are exceptions though, and as the years go on this will be less and less of an issue as cameras improve at the upper ISO's.
To start with,
1. Set up the camera on the tripod, hook up the cable release, compose as best as possible and focus the lens at infinity, not past it. If your camera has a level built in, use it to help composition.
2. Set the WB pretty cool to keep things looking like night. If it's too warm (or "correct"), it can look wierd. Think of when TV illustrates night time. When someone turns off the lights, they fill it in with blue colored light so you can still see what's happening but your mind makes the switch to "nighttime".. I start off at about 3000K and work my way up or down from there (I prefer adjusting the color temperature by Kelvin vs. presets). Adding magenta can also help in getting that cool night time color too.
Now what about exposure, the important part right? This is where mileage varies and equipment differences become apparent.
3. Max out the ISO and open up your aperture all the way. We can always close it down later, we just need to get a base exposure. I start off my very first exposures at around 1-5 seconds ISO 25,600, and f/1.4. If that doesn't give me an accurate exposure, then I adjust my shutter speed shorter or longer until my histograms and exposure looks good and bright. Keep the ISO up! You would rather do 30 seconds at 25600 then 2 minutes at 6400, especially if you're just trying to figure out your brightness. If you can't get a bright enough exposure at max ISO, 30 seconds, and max aperture, THAN adjust the shutter speed. This just a test shot, it's going to be tossed aside anyway, so why should you care if its noisy or not?
4. Count down. Once the base exposure is determined, count down and crunch the numbers to whatever the equivalent exposure is at a more reasonable ISO and aperture. Reasonable apertures i'd say are within the realm of f/2.8 and f/11. This is completely dependent on the ambient light. If the moon is out or you're in the city, you'll be closer to f/11. If you're in the desert with no moon in sight, closer to f/2.8.
Why? Because lenses are at their weakest wide open (generally), and I never recommend final exposures going longer than an hour. After that, the possibility of damaging your camera rises exponentially. I met a gentleman who told me he fried his Rebel XT doing a 3 hour exposure in Death Valley.
So, let's recap a little on the exposure. If my test shot is 6 seconds, f/1.4, ISO 25,600, what is my final exposure going to be?
Lets err on the side of overexposure to keep numbers even, start with ISO, and count down..
6 sec / ISO25600
15 sec / ISO12800
30 sec / ISO6400
1 min / ISO3200
2 min / ISO1600
4 min / ISO800
8 min / ISO400
16 min / ISO200
32 min / ISO100
Alright, so we have: 32 minutes, ISO100, and f/1.4. Wow! that's long, but the aperture is still a little wide, Let's count down the aperture to something reasonable, like f/2.8.
32 min / ISO100 / f1.4
1 hour / ISO100 / f2
2 hours / ISO100 / f2.8
4 hours / ISO100 / f4
OY VEY! 4 HOURS! That's a bit long, lets let the amplifier shave some time off that and bump the ISO back up to 400, giving us:
1 hour / ISO 400 / f4
This is where super wide aperture lenses are key. We could either keep the ISO lower, or shorten our exposure time.
Now, you might have to do something called "Long Exposure Noise Reduction" If you shoot Nikon and are using a D3(s), or D700, I'd go so far as to say you can skip this if your exposure is within an hour. Those bodies are flat-out incredible when it comes to amp noise. My old D70 was awful past 60 seconds without LENR. I haven't got a clue how good Canon's or other Nikons are. Without LENR, your images may be riddled with noise or worse you'll get amp noise which looks like purple/magenta clouds in the sides and corners of the frame. Your mileage may vary.
The way Long Exposure Noise Reduction works is that it takes two exposures. your normal exposure, than another exposure for the same length of time so it can subtract the noise pattern from the exposed image. So, if you have a 20 minute exposure, you've got 20 minutes of LENR, meaning you need to wait 40 minutes to see if you got the picture right (or wrong). Bummer. Also, ambient temperature affects noise in long exposures, so when your camera is doing LENR, you need to make sure that you leave your camera alone so it can be in the same temperature as your exposure was, that way the subtraction will be as accurate as possible.
As long as you're on a stable tripod, focused, composed correctly, using a cable release and are patient enough, you'll get awesome results from your digital camera. One great thing about digital is that reciprocity failure doesn't exist on it!
So let's put things in perspective with images.
Lets say we hike up to this awesome view and want to take a picture. Let's assume you've got your sticks down and are composed.
We take our initial picture:
6 seconds, f/2, ISO 25,600

Ugly, right? Well let's count it down to the equivalent exposure at ISO 200 and f/2.8:
32 minutes, f/2.8, ISO 200

MUCH BETTER! Now we just have to open up the RAW file, do some post-processing, and BAM!

AWESOME NIGHT TIME SINGLE EXPOSURES!
And you can apply this towards any of your long exposures too!
20 minutes, ISO 400, 24mm, f/5.6

Or, keep the ISO up to freeze the stars!
30 seconds, ISO 1600, 24mm, f/2

15 seconds, ISO 6400, 24mm, f/1.4:

10 seconds, ISO 6400, 24mm, f/1.7

In the city too!
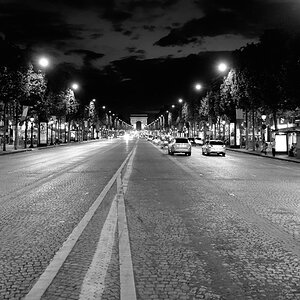
3 seconds, ISO 200, 24mm, f/8

1/2 second, ISO 100, 24mm, f/8

After two or three nights out, you should have a pretty good handle on things and shouldn't have any excuse for having dark or poorly-exposed night time pictures if you're shooting digitally!
Hope this helps, and happy shooting!!!!
Anyway.... Night shooting is a ton of fun, the results can be awesome! There are so many things the camera will see that we can't. Night shooting takes alot of time, a little practice, and more than anything, patience. Night shooting isn't something that you're done with quickly. Your first attempt will be awful, everyone screws it up the first time. Don't get bummed about it. My first attempt was so bad, I deleted the pictures, and I never delete pictures. But, over the years I’ve formulated a pretty good method of shooting at night. In an effort to save you the trial and error I experienced, i bestow onto thee enlightenment to mastering night photography!
Before you decide to go take pictures tonight, you'll need at least 3 things, most likely 6 though:
1. Freshly charged batteries. Nothing will kill your battery faster than long exposures and cold weather. On digital, your camera is constantly running, gathering light, using up energy. It sucks when you have to cut your night short by leaving with one partially charged battery, or forgetting spares.
2. A cable release or remote. They're (generally) cheap, there's no reason you can't go and spend $25-$100 on one. If you don't have one, long exposures can be tricky to do without stacking. Holding down the shutter when your camera is set to Bulb won't fly, your hands will shake the camera too much. There are exceptions to this, some cameras will let you do exposures longer than 30 seconds without a cable release via mechanical shutters that turn off electronics for bulb exposures or firmware hacks like Magic Lantern. nudge nudge Canon shooters..
3. A real tripod. Not the crappy 25-60 dollar Sunpak/Quantaray sticks. When it's breezy out, those lousy plastic heads don't do jack. Invest at least $200 in at least a Gitzo or Bogen/Manfrotto system. Trust me when I say it could easily be the last tripod you'll ever buy. I went through 3 of the lousy Quantaray's to figure that one out. I've had the same Manfrotto sticks (3021BPro/488RC4) for 6 years (at the time of this writing), and they may not look like new, but they sure act like it.
(Possibly #4) A friend. If you don't have a good way to pass the time, you'll get impatient and thus, lazy, shooting yourself in the foot (so to speak) because you "just couldn't wait to see it". Also, if you're away from civilization it's good to have someone else there to talk to, compare exposures, or in case something goes wrong and you get hurt and need help.
(Possibly #5) Hot packs, food, a flashlight, and a first aid kit. If you're out at 2 in the morning in the middle of a isolated area such as the mountains in below freezing temperatures, your camera battery will die quick. Hot packs in your jacket pockets will keep you warmer and will also keep your batteries warm so the cold temperatures don't drain them. Food is good because it will help keep you awake, pass the time, and hey, you might actually get hungry. I always forget a flashlight, but LED's on cell phones work just as well. I don't think I need to explain why a first aid kit is a good idea, if you're out in the middle of nowhere and something happens, it helps to be at least somewhat prepared.
(Possibly #6) If you want pictures of stars and live in a Metro area, get the heck out of town. I live in Portland Oregon, and even driving 60 miles out to Mt. Hood, I still get light pollution. If you want lots of stars in your images, expect to go for a little bit of a drive.
Now that we have all our gear in order and we're at our location, how the heck are we going to pull this off?!?!
Night photography pushes the limits of your tools. This is part of the reason I shoot Full Frame and use just about only f/1.4 (or brighter) prime lenses when doing this. They suck in tons of light and are generally awesome by f/2-2.8, which sometimes can negate the need to stop down further and will allow you to freeze the Earth's rotation that f/2.8 lenses and cameras (at the time of this writing) can sometimes have a little bit of trouble with. There are exceptions though, and as the years go on this will be less and less of an issue as cameras improve at the upper ISO's.
To start with,
1. Set up the camera on the tripod, hook up the cable release, compose as best as possible and focus the lens at infinity, not past it. If your camera has a level built in, use it to help composition.
2. Set the WB pretty cool to keep things looking like night. If it's too warm (or "correct"), it can look wierd. Think of when TV illustrates night time. When someone turns off the lights, they fill it in with blue colored light so you can still see what's happening but your mind makes the switch to "nighttime".. I start off at about 3000K and work my way up or down from there (I prefer adjusting the color temperature by Kelvin vs. presets). Adding magenta can also help in getting that cool night time color too.
Now what about exposure, the important part right? This is where mileage varies and equipment differences become apparent.
3. Max out the ISO and open up your aperture all the way. We can always close it down later, we just need to get a base exposure. I start off my very first exposures at around 1-5 seconds ISO 25,600, and f/1.4. If that doesn't give me an accurate exposure, then I adjust my shutter speed shorter or longer until my histograms and exposure looks good and bright. Keep the ISO up! You would rather do 30 seconds at 25600 then 2 minutes at 6400, especially if you're just trying to figure out your brightness. If you can't get a bright enough exposure at max ISO, 30 seconds, and max aperture, THAN adjust the shutter speed. This just a test shot, it's going to be tossed aside anyway, so why should you care if its noisy or not?
4. Count down. Once the base exposure is determined, count down and crunch the numbers to whatever the equivalent exposure is at a more reasonable ISO and aperture. Reasonable apertures i'd say are within the realm of f/2.8 and f/11. This is completely dependent on the ambient light. If the moon is out or you're in the city, you'll be closer to f/11. If you're in the desert with no moon in sight, closer to f/2.8.
Why? Because lenses are at their weakest wide open (generally), and I never recommend final exposures going longer than an hour. After that, the possibility of damaging your camera rises exponentially. I met a gentleman who told me he fried his Rebel XT doing a 3 hour exposure in Death Valley.
So, let's recap a little on the exposure. If my test shot is 6 seconds, f/1.4, ISO 25,600, what is my final exposure going to be?
Lets err on the side of overexposure to keep numbers even, start with ISO, and count down..
6 sec / ISO25600
15 sec / ISO12800
30 sec / ISO6400
1 min / ISO3200
2 min / ISO1600
4 min / ISO800
8 min / ISO400
16 min / ISO200
32 min / ISO100
Alright, so we have: 32 minutes, ISO100, and f/1.4. Wow! that's long, but the aperture is still a little wide, Let's count down the aperture to something reasonable, like f/2.8.
32 min / ISO100 / f1.4
1 hour / ISO100 / f2
2 hours / ISO100 / f2.8
4 hours / ISO100 / f4
OY VEY! 4 HOURS! That's a bit long, lets let the amplifier shave some time off that and bump the ISO back up to 400, giving us:
1 hour / ISO 400 / f4
This is where super wide aperture lenses are key. We could either keep the ISO lower, or shorten our exposure time.
Now, you might have to do something called "Long Exposure Noise Reduction" If you shoot Nikon and are using a D3(s), or D700, I'd go so far as to say you can skip this if your exposure is within an hour. Those bodies are flat-out incredible when it comes to amp noise. My old D70 was awful past 60 seconds without LENR. I haven't got a clue how good Canon's or other Nikons are. Without LENR, your images may be riddled with noise or worse you'll get amp noise which looks like purple/magenta clouds in the sides and corners of the frame. Your mileage may vary.
The way Long Exposure Noise Reduction works is that it takes two exposures. your normal exposure, than another exposure for the same length of time so it can subtract the noise pattern from the exposed image. So, if you have a 20 minute exposure, you've got 20 minutes of LENR, meaning you need to wait 40 minutes to see if you got the picture right (or wrong). Bummer. Also, ambient temperature affects noise in long exposures, so when your camera is doing LENR, you need to make sure that you leave your camera alone so it can be in the same temperature as your exposure was, that way the subtraction will be as accurate as possible.
As long as you're on a stable tripod, focused, composed correctly, using a cable release and are patient enough, you'll get awesome results from your digital camera. One great thing about digital is that reciprocity failure doesn't exist on it!
So let's put things in perspective with images.
Lets say we hike up to this awesome view and want to take a picture. Let's assume you've got your sticks down and are composed.
We take our initial picture:
6 seconds, f/2, ISO 25,600

Ugly, right? Well let's count it down to the equivalent exposure at ISO 200 and f/2.8:
32 minutes, f/2.8, ISO 200

MUCH BETTER! Now we just have to open up the RAW file, do some post-processing, and BAM!

AWESOME NIGHT TIME SINGLE EXPOSURES!
And you can apply this towards any of your long exposures too!
20 minutes, ISO 400, 24mm, f/5.6

Or, keep the ISO up to freeze the stars!
30 seconds, ISO 1600, 24mm, f/2

15 seconds, ISO 6400, 24mm, f/1.4:

10 seconds, ISO 6400, 24mm, f/1.7

In the city too!
3 seconds, ISO 200, 24mm, f/8

1/2 second, ISO 100, 24mm, f/8

After two or three nights out, you should have a pretty good handle on things and shouldn't have any excuse for having dark or poorly-exposed night time pictures if you're shooting digitally!
Hope this helps, and happy shooting!!!!
Last edited:


![[No title]](/data/xfmg/thumbnail/32/32150-7445fc014b4b484b24ba067189aa45b6.jpg?1619735233)

![[No title]](/data/xfmg/thumbnail/32/32156-d6cfe2865ceed861a0633752a006ea20.jpg?1619735234)
