What's new

To sharpen or not to sharpen

So you guys who always sharpen, you're sharpening with appropriate parameters for the final output, right?

I mean, just sliding the lever over to 5 or whatever, or even until it looks good in your editor is irrelevant. If you're resizing to whatever for the web, you need to sharpen for that size. If you're printing 8x10, you should sharpen differently, and so on.
 
There's always some applied by default when i import into LR, but I'll bump it arbitrarily until I'm happy with it in screen. I'm a fan a sharp/crisp images.
 
So you guys who always sharpen, you're sharpening with appropriate parameters for the final output, right?

I mean, just sliding the lever over to 5 or whatever, or even until it looks good in your editor is irrelevant. If you're resizing to whatever for the web, you need to sharpen for that size. If you're printing 8x10, you should sharpen differently, and so on.

Size makes a difference, yes. But so does the type of detail in the image. There is no cookie cutter solution, and knowing which type of sharpening to use is important. In any case sharpening should be done "by inspection", and that should be while viewing a 100% crop. Anything else is your "irrelevant"!

Edit: And every image taken with a Bayer Color Array camera can benefit from appropriate sharpening.
 
So you guys who always sharpen, you're sharpening with appropriate parameters for the final output, right?

I mean, just sliding the lever over to 5 or whatever, or even until it looks good in your editor is irrelevant. If you're resizing to whatever for the web, you need to sharpen for that size. If you're printing 8x10, you should sharpen differently, and so on.

Size makes a difference, yes. But so does the type of detail in the image. There is no cookie cutter solution, and knowing which type of sharpening to use is important. In any case sharpening should be done "by inspection", and that should be while viewing a 100% crop. Anything else is your "irrelevant"!

Edit: And every image taken with a Bayer Color Array camera can benefit from appropriate sharpening.

^that
 
So you guys who always sharpen, you're sharpening with appropriate parameters for the final output, right?

I mean, just sliding the lever over to 5 or whatever, or even until it looks good in your editor is irrelevant. If you're resizing to whatever for the web, you need to sharpen for that size. If you're printing 8x10, you should sharpen differently, and so on.

Yes, I sharpen individually to each photo by eye, and using the 100% view. But the order rarely if ever matters with resizing.

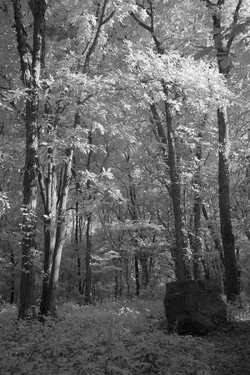
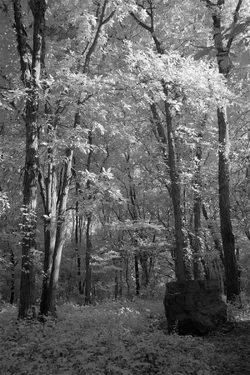
One of these was sharpened and then resized. One was resized and then sharpened. I picked numbers in unsharp mask that maintained roughly the same ratio of resize:sharp ratio, so that they should be equivalent, except for the order of those two steps (It's not EXACTLY mathematically precise, because photoshop only lets you go in increments of 1/10th of a pixel, so the exact ratio wasn't possible, but pretty darn close). Can you tell me which one is which? Both have had a pretty decent amount of sharpening done to them. More than I would probably normally do, to help highlight any differences.

$A.webp$B.webp

If you click on them, load each, then use "next" and "previous" you can view them overlaying each other back and forth.
 
Order shouldn't matter much, but the parameters used do depend on the output size and device.

Essentially, unsharp mask boosts the higher spatial frequencies, at the expense of lower spatial frequencies. If you then resize to smaller, you are throwing away higher spatial frequency information. The result, if you are careless, if that the entire picture loses contrast. Ooops.

By varying the parameters to match the output size, you boost the highest spatial frequencies in the final output, and thus produce a sharper-looking picture in the final output.
 
I'm still not understanding what you mean here. If it "[considering output size] produces a sharper-looking picture in the final output," then you should be able to tell me which of those two images looks sharper.

To me, they look completely identical, to the point where I wasn't even sure if the "next" and "prev" buttons were functioning correctly. And yet one of them was sharpened without any consideration whatsoever to the final output size.


I.e., if "order doesn't matter much" then that's just another way of saying "you don't need to worry about the output size when you do the sharpening"
 
Last edited:
I do smart sharpen and drag all the sliders to the extreme right.

It looks wicked pissah.
 
Yes, I sharpen individually to each photo by eye, and using the 100% view. But the order rarely if ever matters with resizing.

One of these was sharpened and then resized. One was resized and then sharpened. I picked numbers in unsharp mask that maintained roughly the same ratio of resize:sharp ratio, so that they should be equivalent, except for the order of those two steps (It's not EXACTLY mathematically precise, because photoshop only lets you go in increments of 1/10th of a pixel, so the exact ratio wasn't possible, but pretty darn close). Can you tell me which one is which? Both have had a pretty decent amount of sharpening done to them. More than I would probably normally do, to help highlight any differences.

They are distinctly different! The B image has higher contrast (it is probably over sharpened). The problem though is not what either one actually looks like, but getting exactly what you prefer. I can make the A image look exactly like the B image. The B image is going to lose some of the highlights, so it isn't reversible. But with the original it would be extremely easy to downsize and then duplicate either of those, while it would be much more time consuming to sharpen first and downsize second trying to get exact duplicates.

The second one probably should have been slightly reduced in brightness before sharpening was applied. The increase in contrast towards to black end of the scale appears to be a good thing, but at the lighter end too many pixels are just a hair too bright. That of course is an opinion, and someone else might like it a lot more if the contrast were increased even further!

The point is that they aren't actually the same at all, and moving one in the direction or the other would be much easier after the image is resized. It would also be a lot easier if any form of a high pass filtered Sharpen tool were used, simply because USM is not reversible. Hence the oversharpening of the B image, using USM, can't really be corrected exactly, while adding a little more to the A image to make it like B is probably not hard.

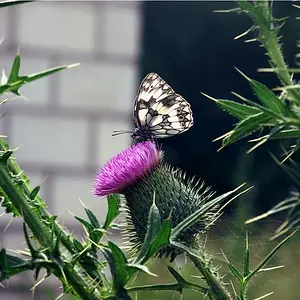
You have a fairly interesting example too! It has perhaps more single edge transitions, which USM works on, than not. So USM will certainly show an effect. It also, in all of those leaves, has a great deal of repetative fine detail that a Sharpen tool will be more effective. To try something fairly subtle, reduce the brightness by about one fstop, and then apply a small amount of Sharpen. The trick is to use just enough Sharpen to get the desired increase in sharpness of the leaves, but the brightness has to be reduced enough that when that amount of sharpen is applied the highlights don't clip. I tried just 5 points less brightness, then 10, and finally about 20 before the effect was exactly what I wanted.

 
I picked numbers in unsharp mask that maintained roughly the same ratio of resize:sharp ratio, so that they should be equivalent, except for the order of those two steps

Assuming I understand what you mean here, you have performed this correctly. While you may not have thought through what the "correct amount" is, you arranged to arrive at the same place, by adjusting parameters.

If, on the other hand, you blindly applied unsharp mask with radius X, percentage Y, and threshold 0 to both the original and to a shrunk copy, the results should look different.

The point is that if you're sharpening to accomplish a particular goal, rather than simply as a Cargo Cult "I must always sharpen" ritual, then there is a proper amount to be sharpening for any particular output size/device. Your goal, whatever it is, cannot really be accomplished without reference to the final output size and device.

ETA: The thumbnails of your two pictures, interestingly, DO look different to my eye (although it's possible that it's some bizarro thing like part of my display being slightly dimmer), but I cannot see any difference in the full sized ones. I speculate that there's some non-visible differences that result in different results after resizing and recompressing or something.
 
Order shouldn't matter much, but the parameters used do depend on the output size and device.

Essentially, unsharp mask boosts the higher spatial frequencies, at the expense of lower spatial frequencies. If you then resize to smaller, you are throwing away higher spatial frequency information. The result, if you are careless, if that the entire picture loses contrast. Ooops.

By varying the parameters to match the output size, you boost the highest spatial frequencies in the final output, and thus produce a sharper-looking picture in the final output.

That is true for a Sharpen tool, but not for an Unsharp Mask tool. USM will do different things to an image with more pixels.

Also when an image is downsampled to make it smaller that is a very sharp cornered low pass filter... and it simply removes all high frequency spatial detail above the cutoff frequency. And of course that is exactly the detail that Sharpen and USM amplified to make the image look sharper! Hence downsampling necessarily removes significant amounts of sharpening.

USM doesn't just boost high frequencies. It looks for single edge transitions and amplifies the high frequencies in the transition. At a very short distance from the transition it averages the high frequency spatial values that make the edge sharp.

Hence if we have a solid area next to an area with a great deal of fine detail, Sharpen will increase the contrast between light and dark areas of the fine detail and will have little effect of the transition from the solid area to the detail. USM will affect the solid to detailed transition, making it more accute, but at the same time it will slightly blur the fine detail close to that single transition. Two very different things, though in practice the parameters can and often are adjusted to get almost the exact same effects.
 
USM will do different things to an image with more pixels.

That is pretty much exactly my point. I can't actually tell if you you amplifying my point, or disagreeing with it. But we appear to be, in broad strokes, on the same page either way.
 

Create an account or login to comment

You must be a member in order to leave a comment

Create account

Create an account on our community. It's easy!

Log in

Already have an account? Log in here.

Back
Top Bottom