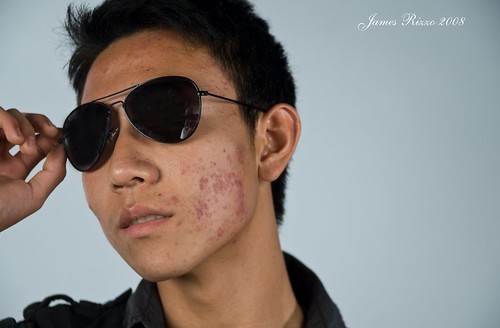
Thanks. I had a senior shoot back late summer and his acne was WAY worse than this. I had to piece his entire face back together, so I had A LOT of practice from his session.
Nice job, Lyncca. Some tonal issues in the face, but def very good on clearing the skin out. After looking at mine, I think something's wrong with my monitor at home, it wasn't nearly that patchy. erg.
And Jerry... holy cow man, ixnay with the oothsmay. He wanted to fix the acne, not make a terminator
In 2 minutes time that was the best I could do, I was not going to invest more time during work... so what you don't like my version of gumby? All I did was take out the green... lol
I thought I would give this as a try, as I am just starting portait photography and this will no doubt come up! So here is my quick effort!
I definitely think lyncca has the best results, as when I compare this with the others, it looks fairly plastic...but it is my first attempt! I shoot sports, and they usually don't care too much what their faces look like (in some of the shots, it's a good thing)!!! :mrgreen:
Thanks Jerry! What exactly did you do? Was that a brush?
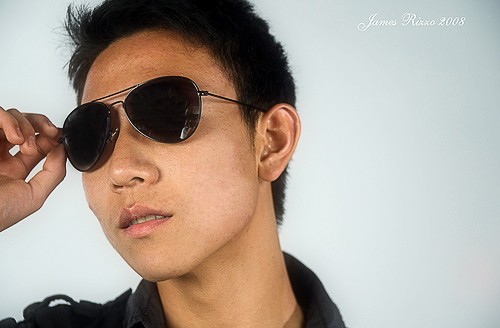
I actually don't plan on using this picture. I don't like the lighting, it looks kind of cheap. I only wanted to learn how to remove serious acne such as this, because this is something I definitely need to learn if I'm going to start shooting people.
I am presently at work and, as such, do not have Photoshop on location. However, if I were to do this... I'd say either clone stamp or healing brush the affected areas from a more clear part of the skin, then in a new layer a "Median" filter with like an 8px radius, then adjust the opacity?
It was a lot more than that. A lot of layers blending, playing with levels, clone stamp, playing with the colours, healing brush, and believe it or not, a healthy dose of noise remover from Imagenomic is in there. Finish off with some amateur dodging and burning. I wish I was an artist... with the last 2, I could have made it look much better. The trick is not to do too much at once... do it in sections and portions, it took about an hour in all.
It was a fun exercise to learn too. As you saw, my first try was turning your friend into Mr. Plastic... lol
Yea, I did a lot of what Jerry did including the noise reduction. I could have made it better, but I didn't see much point in spending TOO much time on a small image, but it is always good practice
")


![[No title]](/data/xfmg/thumbnail/36/36651-948fc64542c147745d3f3c48bce31dce.jpg?1734169165)


