Long Exposure....please help!

CourtneyCollins

TPF Noob!
Joined
Feb 18, 2013
Messages
73
Reaction score
11
Location
Oklahoma
Can others edit my Photos
Photos OK to edit
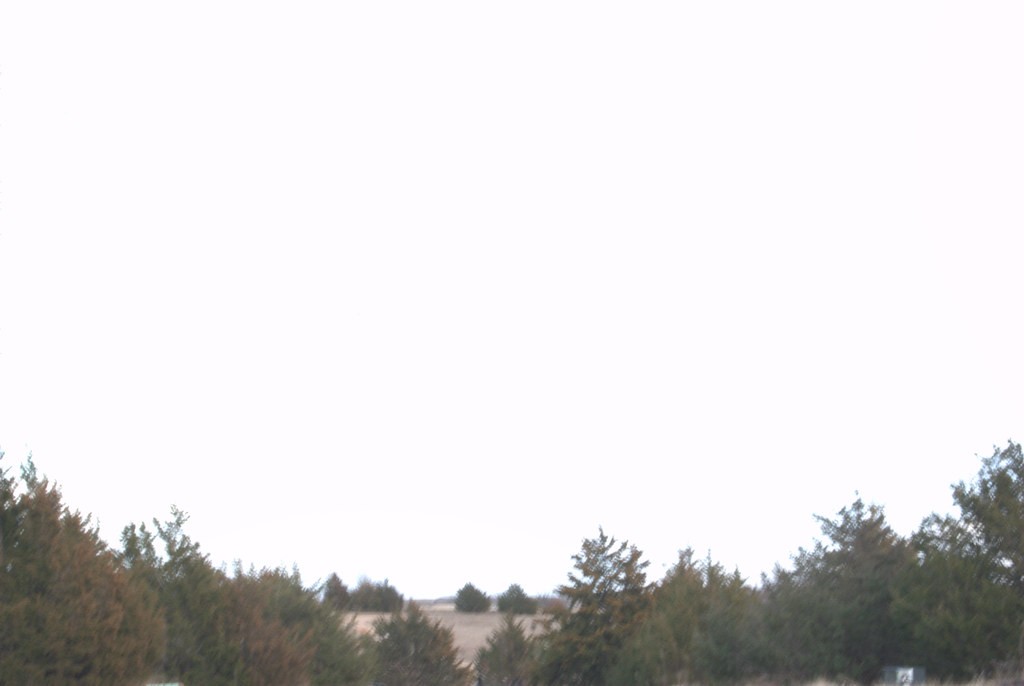
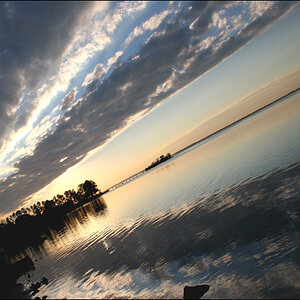
Alright, so I've been trying to do the whole long exposure shot for the first time, but this is all I keep getting, no matter where I point my camera.
I have played with the settings back and forth between how long the shot is set for (between 1" to 30") and the F-stop from anywhere (2.6 or so to 36).
I just can't figure it out, I really want to know so I can do pretty flowing shots! I am shooting with a Nikon D3000 & Nikkor 18mm-55mm lens with this specific picture.


8489821547_83f58bc227_b.jpg
 
What you want to do is set your ISO to the lowest possible number and your f-stop to the highest possible number. Lowering the ISO makes the sensor less sensitive to light, and changing your aperture lets less light through the lens. This means you can keep the shutter open to let the same amount of light onto your exposure. 30 second exposures are really for night photography, less than a second is needed to soften flowing water.
 
I set the ISO to 100 and fiddle with the other settings, but no matter what I set it to its just bright.
 
Go get a copy of Bryan Petersons Understanding Exposure.

Another possibility is your Exposure Compensation has been changed.
 
The more light there is the shorter your maximum exposure can be. If there is too much light you really cannot do an exposure that is seconds long. I know you said you have pointed your camera in every direction but your example is of the sky which is also too bright to get long exposures of. There are filters you can put in-front of your camera to let less light in again but even then you can only leave the shutter open for a little bit longer than normal.

Look at images you are trying to recreate and check what the setting are, or link us to some and we can tell you how they achieved the picture.
 
That looks like a daylight scene to me; why do you want to do a long exposure of that? As mentioned, the more light, the shorter your maximum (longest) exposure can possibly be. If there is a reason that you want a long exposure, then you may need a neutral density filter which will block some of the light (sort of light making an even smaller aperture) and allow for longer shutter speeds.
 
Taking a picture is like filling up a glass with water, but instead you are using light to fill up the CMOS sensor. How long it takes to fill up your glass is the exposure time. Your ISO is how big your glass is (Higher ISO makes for a smaller glass). Your handle on the faucet is the aperture. The water pressure is how brightly lit your subject is.

Learn to control each of these and you can learn when the right conditions are, and what setting to use to achieve a good long expsoure.

Some good tools for long expsoures:
- Steady Tripod: Almost always must for long exposures. Having a Steady tripod will reduce camera shake resulting in a sharper image.
- Remote Shutter: This will keep you from moving the camera when pressing the shutter.
- Neutral Density Filter: This will slow down how fast light comes into your lens, resulting in a longer exposure time.

This photo I took using a 10-stop Neutral Density Filter for 101 seconds on a cloudy day:

 
..........- Neutral Density Filter: This will slow down how fast light comes into your lens,........

Well....... technically..... it really won't slow down the light, at least not enough to make a difference in the field of photography. It will still enter the lens at 299,792,458 meters / 186,282 miles per second. There will just be less of it.

What I should have said was that the filter slows down the amount of light hitting the image sensor. :)
 
..........- Neutral Density Filter: This will slow down how fast light comes into your lens,........

Well....... technically..... it really won't slow down the light, at least not enough to make a difference in the field of photography. It will still enter the lens at 299,792,458 meters / 186,282 miles per second. There will just be less of it.

Ah yes, but technically that's the speed of light in a vacuum. When the light passes through other mediums... such as water or glass, it does actually slow down. Although ... when it gets to the open air on the other side of the thin layer of glass in the filter, it speeds right back up again. But hey... it DID slow down the light for a scientifically measurable amount of time (even if it was very short lived.) :p


To the OP: When you say you "played" with or "fiddled" with the settings, I'm getting the impression that you're not actually confident what each setting does. You want to be confident that you understand what constitutes a correct exposure, what options you have to adjust and control the exposure, and why certain options work better than others depending on the type of shot you're taking.

Bryan Peterson's book "Understanding Exposure" is probably one of the more commonly recommended books for this, but there are others... including the Scott Kelby series (which I think is now up to 4 books.)

You can also use a filter to reduce the total amount of light. This changes your shooting circumstances.

A neutral density filter cuts the volume of light that can pass. In reality, less "photons" make it through the filter and into the sensor body than would otherwise have been delivered without the filter.

Sometimes they're sold in "stops" and sometimes in "density" values. Each "0.1" density represents 1/3rd of a stop. So an ND 0.9 would be a 3-stop filter (only 1/8th of original light passes through the filter.)

An outdoor photo on a sunny day (during mid-day) follows the "Sunny 16" rule. It says that assuming you don't own a light meter nor a camera with a built-in meter, you can assume that in full sun, you can set the camera to f/16 (the "16" in "Sunny 16") and then set the shutter speed to the inverse of the ISO. That means if you were using ISO 100, you could set the shutter speed to 1/100th. You would get a fairly accurate exposure with those settings. You could ALSO use any "equivalent" exposure. For example, you could open the aperture up by 1 full stop which results in double the amount of light getting through, but then use a faster shutter speed (such as 1/200th which is half as long as 1/100th) and you'd get the same total amount of light in the exposure. There are numerous options.
 
..........Ah yes, but technically that's the speed of light in a vacuum. When the light passes through other mediums... such as water or glass, it does actually slow down. Although ... when it gets to the open air on the other side of the thin layer of glass in the filter, it speeds right back up again. But hey... it DID slow down the light for a scientifically measurable amount of time (even if it was very short lived.) :p...........


Hence the qualifier.

........., at least not enough to make a difference in the field of photography...........
 
Wait till later in the day when there is less light...
 
Well... I was trying to take a picture of the sunset, where the sun was barely poking through but that's how the image kept turning out. Oh well lol.
 
Put your camera on manual mode then adjust the settings either aperture or shutter speed until the exposure compensation dial is at zero. Then take "bracketing exposures". Overexpose to get a brighter foreground and underexpose to get the darker, colorful sky. Then use HDR software to combine the exposures. Or lock on your exposure of the sky to either side of the sun, lower the camera to include the darker foreground (the tree line) without changing the exposure you got for the sky. ISO 100 or 200. (If you do bracket photos it is best to leave the f/stop constant)
 
Last edited:

Most reactions

New Topics

Back
Top