What's new

I just don't understand! I'm SO Frustrated =(

AMOMENT

TPF Noob!
Joined
Sep 27, 2011
Messages
701
Reaction score
48
Location
NY
Can others edit my Photos
Photos OK to edit
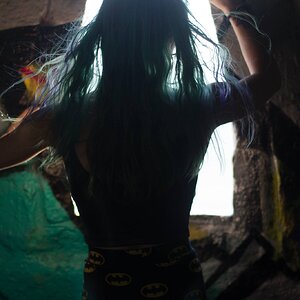
I have still been struggling with some basic issues so I tried out some advice given to me on here long ago. Instead if implemneting more gear into my regimen, such as flash, I simply raised my ISO in the first picture, indoors to 3200 (on my D7000) which I know is high but 1. in order to have my meter read "0" I had to go up that high and 2. supposedly the D7000 can handle ISO that high without too much noise. I still was underxposed by a stop or two but given the amount of noise with the ISO 3200 and my aperture being 1 stop from wide open (also don't like to shoot slower than 1/200 as advised!) These are not photographs in the least but I just snapped them so I could upload them here and get some feedback.

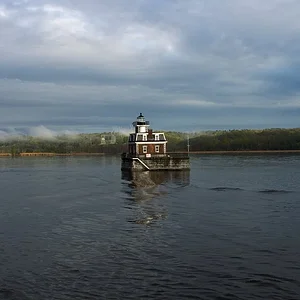
The second one I show I tried reducing the ISO and just slowing the shutter (though I know this is usually disaterous for me.) Nevertheless, I did it to experiment. This shot was taken with a shutter of 1/60.


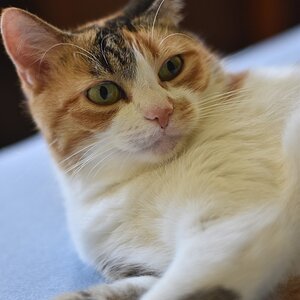
The 3rd shot was taken at around 6:30 at night outside with my 55-300 mm f/4.5 telephoto. I know this is not the best lens for low light but I needed to be able to sit back. Not wanting to shoot any slower than 1/200 (advice given here) I shot as wide open as possible on this lens and raised my ISO to 800. It looks noisy/grainy....I don't get why.

The exposures are all wrong , they are grainy, noisy, and blurry. I know if I composed differently they might be a tad better, but not much. If I raised my ISO up any higher there would have been even more noise and if I slowed my shutter anymoer it would have been even more blurry. I also know the white balance is off but again, this was more to show exposure.

I think in this type of sitution/lighting I would have no choice but to use another light source. Even with an ISO of1250 and shutter of 1/60, it looks noisy. I thought the camera could handle higher ISO's. I'm sure it's me but maybe you can help. I'm extremely frustrated, trying to take advice, and just feeling down. :(

1.
iso003.jpg


2.
Questions078.jpg


3.
21-6.jpg
 
You dont need 1/200s unless:

(a) you're trying to shoot action (and even then 1/100s should often be enough)
(b) you're using at focal lengths 200+ (and then using monopod / VR / right technique will give you more room, and a tripod will remove the condition completely)

Also, I cant see no grain at all in any of these pictures. Please post 100% crops.
 
First of all...who told you to not shoot slower than 1/200s??? and second..what lens, focal length, and aperture are you using to shoot those photos? All of these photos are underexposed, which is the reason why you see more noise than usually. If it's properly exposed, you won't see as much noise. The light meter is just the base you look at, it's not always right. Shot #1 and #2 have the window in the background, and looks like outside is sunny. The light meter do pick up those lights coming in from the window and tell the sensor that there's more light. Don't be afraid to take some shots with the light meter go over to the right side *as in it shows that it's overexposed*

Best way to learn is take the picture..if it's too dark...adjust ISO..Aperture..or Shutter speed to make it brighter. Don't always follow the light meter because it's not always right. As a rule for me...Usually I keep around 1.5-2x the shutter speed as the focal length of my lens...Remember that D7000 has a 1.5x cropped...So let's say you're shooting with the 50mm...time that by 1.5 and it's 75mm....So you want to shoot at least 1/100 of a second if you're hand holding it...if your lens have image stabilizer, then you can shoot it at 1/60 or even less if the subject are not moving. Of course rules can be broken..but if you're new...I would suggest doing that so you won't go home and see some photos blurry. You deal with noise, grain and etc...but not blur. Once you get used to it..you would just know how to push your camera limits, settings, and etc and adjust on the fly. :thumbup:
 
You are shooting indoors with little to no lighting. You need another source of light like a flash. Jeezus--you are shooting directly at these kids with BRIGHTLY LIT windows in the background which the camera is apparently metering for, so no wonder your images are underexposed. Are you spot metering or using matrix metering?

Why do you take advice "given in this forum" and assume it is applicable for all situations? "Don't shoot under 1/200" is applicable when it's applicable, and not when it's NOT applicable.

You seem to be struggling quite a bit and I don't know what to tell you because you don't seem to be getting it.
 
First of all, you think that "0" means "correct". It doesn't. "0" means that the same amount of light will expose the frame as was present at the time the meter was calibrated. This is an arbitrary standard and may not be the same amount of light as the scene requires to accurately be rendered.

What meter mode are you using?
 
A dark skinned man could be wearing black shirt, black pants, and stand in front of a black wall. Put the metering to 0, you are probably going to overexpose it. It is hard to understand. I always have a hard time explaining it to people unless they are sitting next to me with a camera.
 
I keep meaning to write a "how to use the spot meter" post, but I never get around to it. I think Ansel Adams' book The Negative is the best resource.

Once I find out how she's metering, I'll post more.
 
First of all, you think that "0" means "correct". It doesn't. "0" means that the same amount of light will expose the frame as was present at the time the meter was calibrated. This is an arbitrary standard and may not be the same amount of light as the scene requires to accurately be rendered.


Would you suggest that the histogram is the best way to check the exposure then?
 
Uhm. Kind of. But if you use the histogram you still need to make a histogram, and that requires that you know where to start. Some people can just look at a scene and say "oh yeah, 1/125 at f/8 will be pretty close", I'm not one of those people - even if I were, I'd be too anal to trust just eyeballing it.

Understanding exposure compensation, either in manual mode or AE, is essential.

I like to expose for the hilights, choosing the brightest portion of the scene and increasing exposure to just below clipping - similar to how you would expose slide film. With the highlights where they are supposed to be, it's just a matter of pulling the shadows in post. So I find the brightest area, increase exposure by 2-2.75ev and expose. Because the brightest region is within latitude, anything that is clipped on the shadows would require that I blow the hilights to maintain detail. This isn't always bad, and sometimes I might just have to do that. But properly exposing for the hilights ensures that the maximum dynamic range is captured. More often than not, however, it will appear washed out until it's processed.

In some situations, however, this approach isn't appropriate. Bad indoor light is one of them.

I these cases you'd have to let the windows blow out since there is too much dynamic range in the scene. The windows are pretty well exposed, but the subject is way under exposed. I can't fit it all in, so something has to "go". Here I'd meter off a bright area on the kid's face, and compensate according to their skin tone, 1.5-2EV, or less to avoid too much blooming on the window - or better, avoid the windows entirely.
 
Last edited:
The first thing you need to do is understand how your camera's meter "sees" the world. For that, I would recommend starting here, with Cambridge in Colour's excellent tutorials.

Moving on to the images you've posted, the best solution would definitely be more light, HOWEVER, you could have improved the first two. Looking at your EXIF data, I see that you were using 'multi-segment' metering. This means that the camera looks at the whole viewfinder, and makes an exposure recommendation (via the meter) based on an average. If you look at the first two images, what do you see that they have in common? Both have a large, bright white (window?) area in them; this definitely affected your exposure, and had you switched to spot-metering and metered the child's face, your exposure would have been much closer to correct, HOWEVER it would have had even more digital noise (grain) in it. I also see that you had an Exposure Compensation of -1 dialed on; why?

There was nothing wrong with your decision to use the 1/200 second shutter speed with your longer lens. I'm not sure if that lens has VR/EC, but, assuming it doesn't than you should follow the "Shutter-speed = 1/FL" rule. The main issue with this image is a slight under-exposure and a strong blue cast from an improper white-balance.
 
First of all, you think that "0" means "correct". It doesn't. "0" means that the same amount of light will expose the frame as was present at the time the meter was calibrated. This is an arbitrary standard and may not be the same amount of light as the scene requires to accurately be rendered.


Would you suggest that the histogram is the best way to check the exposure then?

You can use the histogram to check exposure as long as you understand that the histogram is derived from the camera processed JPEG and as a result indicates the errors the camera software can be expected to introduce. I frequently check the histogram on my camera and recognize that when it indicates the photo has moderately clipped highlights that's good solid evidence that it doesn't have clipped highlights.

The bottom line: whatever info you're getting from the machine is derived from dumb algorithms designed to hit the center of the bell curve. If you can't intelligently evaluate the scene and interpret that info you will always suffer a high percentage of error.

Joe
 
For exposure purposes, I think the histogram is pretty accurate provided that white balance is remotely set.

I pretty much only use the preview to see what areas have clipped.
 
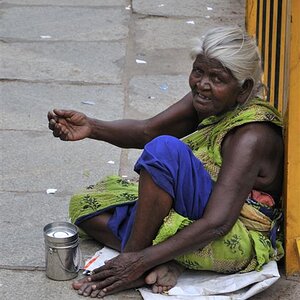
I suggest you learn to love and embrace the grain in your photos. If you are taking indoor low light photos you really need to learn how to find some nice light. In my home I try to position myself in front of a window so that when they turn to look at me they are in the light. Then I usually convert to b/w so that the grain looks nicer. Here are some of my examples (warning snapshots ;) ) I do not like to lower my shutter speed under 1/160 even if my subject is still because I have shakey hands. Sometimes though I will shoot with a wide open aperture to get enough light.

iso 6400; f3.2; ss 1/160
window behind me but it was very late in the day (5:00 ish)
IMG_2771.jpg


iso 3200; ss 1/320 (should have lowered it but this was a quick snapshot); f2.2
window to her right and glass door front/left
IMG_3605.jpg
 
I see that you were using 'multi-segment' metering. This means that the camera looks at the whole viewfinder, and makes an exposure recommendation (via the meter) based on an average. If you look at the first two images, what do you see that they have in common? Both have a large, bright white (window?) area in them

This is precisely why I don't like evaluative/average/weighted modes. They work awesome in scenes where the majority is within the dynamic range capability of the camera: typical scenes.

I maintain that you really only need one accurate reference. The problem is that the meter doesn't know anything about the skin tones of your kids. Fortunately, you do!

For an exercise, in a brightly lit area, take your camera, preset it to any given ISO (400 is fine), and a white sheet of paper. Put it in spot meter mode, dial in "0" and expose. Notice that the sheet is under exposed. Do the same exercise in a dimly lit room, notice that the sheet of paper looks exactly the same.

Now, repeat this exercise, but increase the exposure, taking note how much compensation is required to make the sheet of paper look "correct". Notice that in both the dimly lit room, as well as in the brightly lit room, the same amount more exposure relative to "zero" is required to render the sheet of paper accurately. No matter what the lighting situation, it should be around +2EV.

The same will go for any subject that you know roughly how it should be rendered. I use the brightest part of the scene, but if ETTR isn't your thing, you can use sidewalks (+1), green, lush grass (±0), your kids skin (around +1.5). It doesn't matter what the light situation is, the amount of compensation is the same. Exposure changes, of course, but not compensation.

This is because the meter is calibrated to a specific amount of light. When you dial in 0, the same amount of light is allowed to accumulate at the sensor. Sometimes it might take more time to accumulate, sometimes less aperture, but the result is always going to be same when dialed in to ±0, +1, -2, whatever.

From here, you can look at exposure in terms of "tonal zones". You can say, that is about the same brightness as a sidewalk, so I know it's going to need 1EV more exposure to render accurately. Once you start appreciating this, you can start making judgement calls about exposure, "Even though this subject is about as bright as a sidewalk, I want it to render at Zone IV, or -1EV, that way more detail is visible in the hilights".

This is the great thing about spot metering, you get to decide how the scene should be rendered, what is accurate and what is important and what can be allowed to clip.
 
Last edited:
BTW - it seems really complicated at first, but it will click. I promise, it's really not rocket science, though I don't think anyone didn't feel that way when they first started learning; after all, camera companies want to make you think their meters can do the impossible.

Soon, though, you too will be banging your head on the wall when these questions come up. :)
 

Create an account or login to comment

You must be a member in order to leave a comment

Create account

Create an account on our community. It's easy!

Log in

Already have an account? Log in here.

New Topics

Back
Top Bottom